PBR - Using Standard Blend Shader
The Standard Blend Shader, extends on the Standard Shader and allows the blending between two materials, on Albedo, Metallic, Roughness and Normal inputs on optional blend data. This can be used to set up effects where we wish to take two sets of data to produce output, or just blend two materials together.
You can find the technical reference for this shader here: IBL Standard Blend Shader.
I recommend that you read PBR - Using Standard Shader before proceeding with this article, as I do not cover items again which are covered there.
Blending
The main purpose of this shader over Standard shader is Blending! Switching from one input to another, either everywhere or in areas you choose!
Blending Options
Each of Albedo, Metal, Roughness and Normal now has a function option in Shader Configuration. You can use these to configure the behaviour of blending. Note that only Switch and Overlay are available for Normal Maps.
These options can be used for the following reasons:
- Switch: This requires a Blend Mask to be configured to work correctly. This will simply switch between Input A and B based on the Blend Mask.
- Overlay: Map B is used as an Overlay Map, working broadly the same as a photoshop filter. This can be used to add low frequency detail to an object, where you wish to lighten as well as darken Input A. (For example detail map for a gravel trap).
- Multiply: Map B is simply Multiplied onto Map A. This is useful for if you just wish to darken Map A, whilst respecting the contents of Map A a bit.
- MultiplySquare: This is a special option for Albedo Maps, which offers better colour reproduction in the blending.
- Add: Brighten Map A, by Map B. The output is clamped so that it never goes over the colour bounds. This can be used to make certain areas more metallic or more rough for example.
- Subtract: Darken Map A, by Map B. The output is clamped so that it never goes over the colour bounds. This can be used to make certain areas less metallic or less rough for example.
Input Options
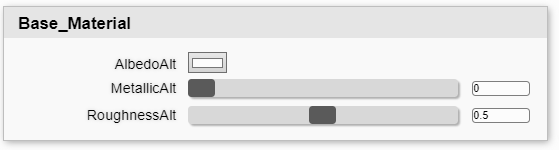
If you have enabled a function on an input, you can still enable or disable map inputs. When you disable the map input, a "Base Material" Parameter section will appear and allow you to set static values for this input instead. Remember only enabled maps will appear under the texture section.
For the maps you do have enabled you can configure which UV they use on a per map basis, the same as explained previously for the Standard Shader.
Blend Masks
By default, the blend options you setup will occur everywhere. But you may not wish for that to happen. You should scroll down to Blend Mask setting in the Shader Configuration and take a moment to look at the options available to you there.
These are self explanatory, there are options to use Vertex Alpha, Vertex Color Red Channel, AlbedoA Alpha Channel, AlbedoB Alpha Channel or a dedicated Blend Map's red channel.
For a practical example of using a blend mask see "Using Standard Blend to Paint Different Parts of an Object" beneath.
Practical Examples
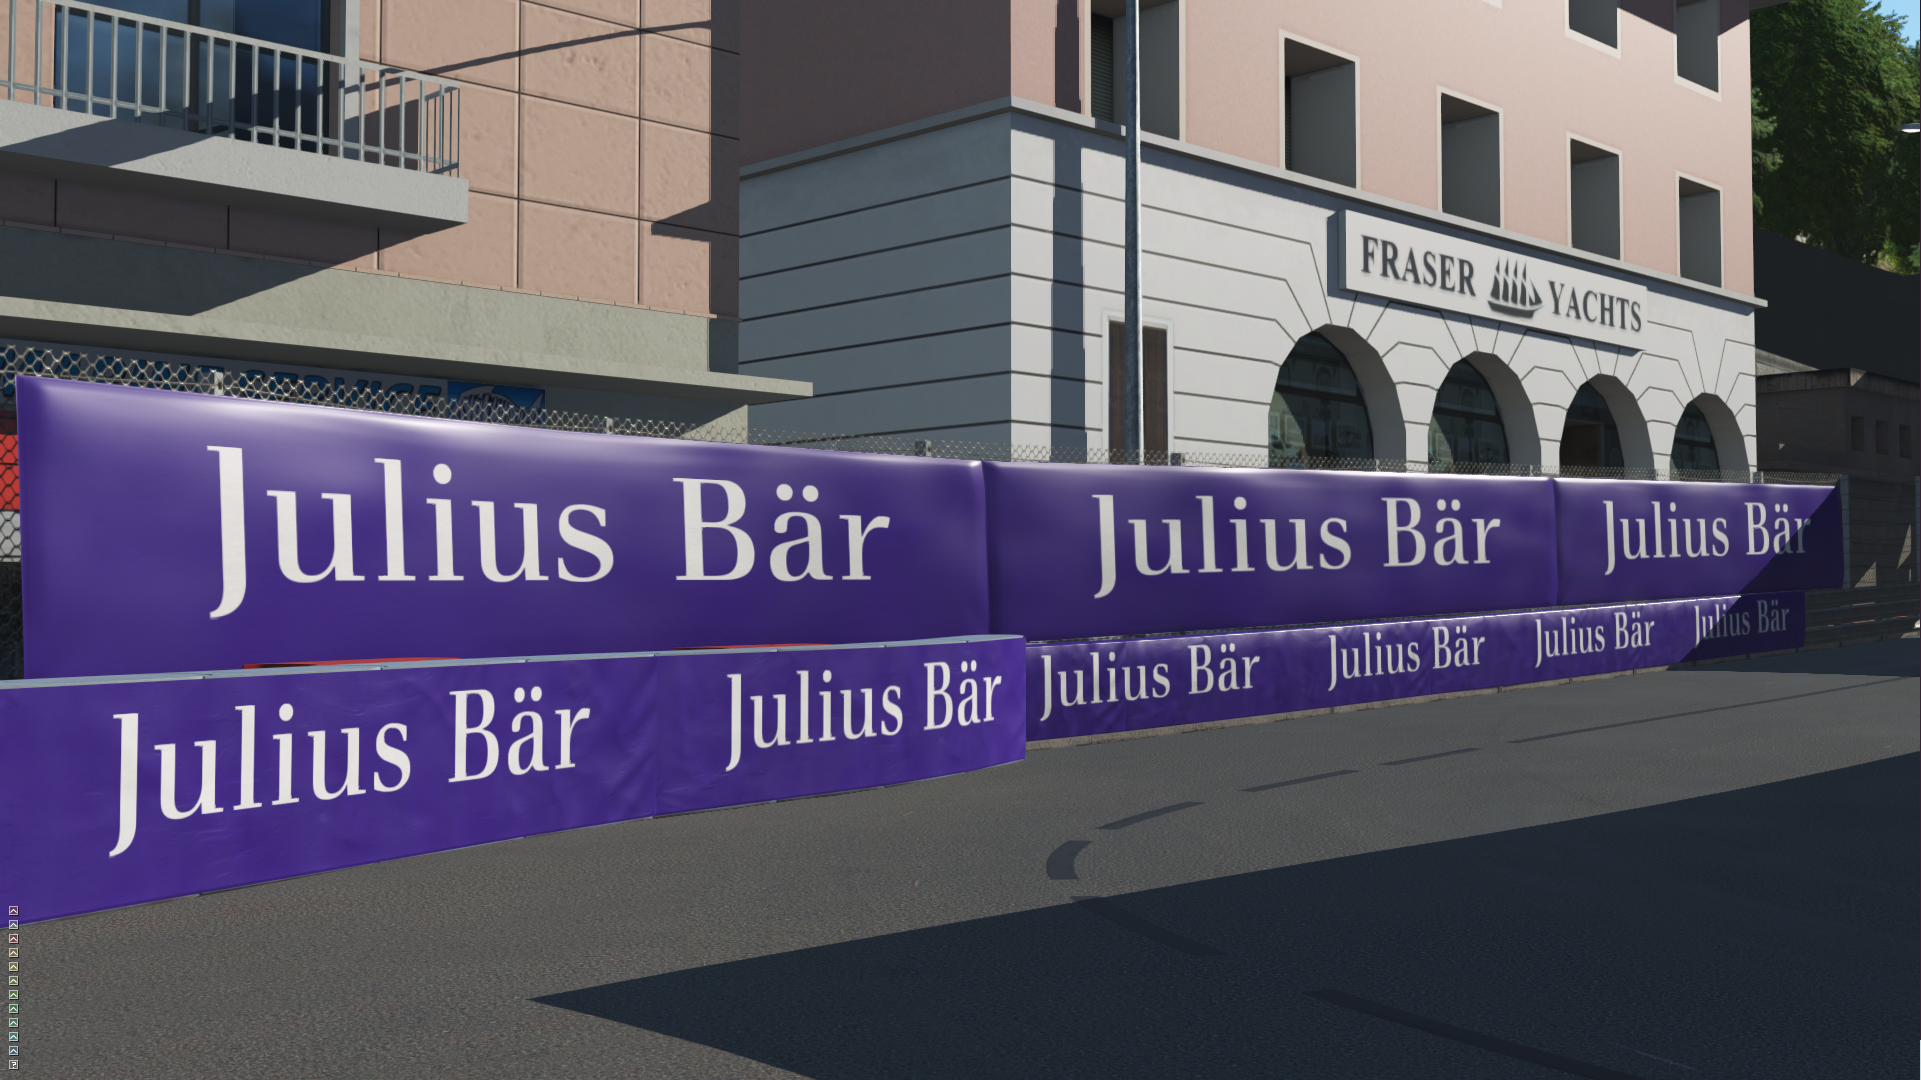
Using Standard Blend for Advertisements
Through the use of two sets of UVW and the Standard Blend shader, we can keep a clean decal texture for advertisements that can be used everywhere, and we can either atlas our "profiles" (a set of multiplication, ao, metal rough and normal maps) or have unique materials for each type. The profile will setup the profile of the ad, i.e. canvas or on a sign etc as well as add grunge and dirt to the decal.
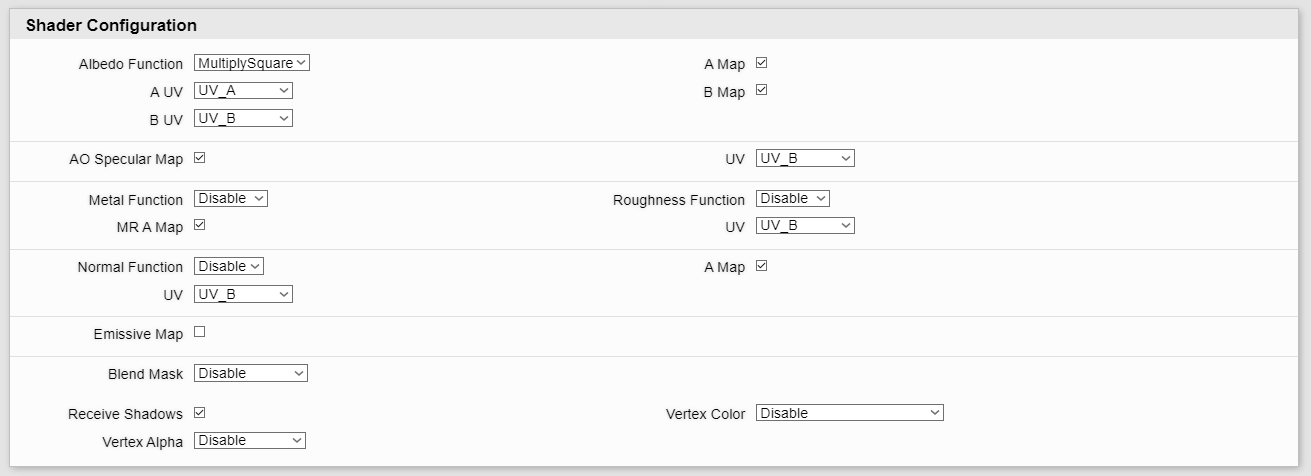
In the Shader Configuration,
- Configure Albedo Function to be Multiply or Multiply Square
- Disable Functions on Metal, Roughness and Normal maps.
- Configured Advertisement Map is configured to use UV A, and all other maps are using UV B.
- This means in your assets you map UV in the first slot for the advertisements, and then have unique mapping for how the profile is applied in the second slot of UV.
When looking at the textures used, we have a multiply map which is used to add fine detail to the albedo map. This contains details such as a canvas style pattern and some general noise, ground dirt etc. This should be predominantly pure white, with shading added as appropriate.
The AOS, Normal and Metal Roughness maps are all setup too and use the same UVW as the multiplication map.
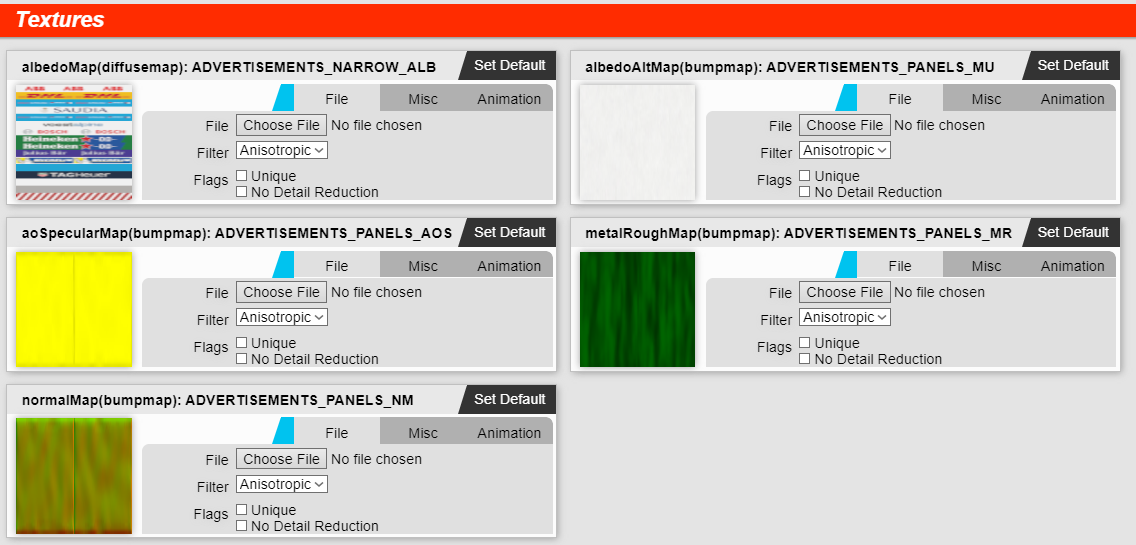
We setup the UV B for this section so that the entire object fits vertically. Horizontally, we can scale at a different rate to the base Advertisement Map if that's appropriate. For these panels it isn't, but for creased canvas draped over the Armco it can be, and that'll break up the tiling by being offset at a different rate.
This example does not allow for areas not to use these details. We are applying this whole set of details on every face used. To be selective about where we apply the advertisement decals either:
- Ensure that there is an unused white section in the advertisement map, and map all sections that are not adverts to this (If you only wish to blend in the albedo map).
- Swap the albedo maps around and use one of the mask options such as an alpha channel in the Albedo map (You will be able to blend different maps in with this approach too, such as normal or metal rough maps).
Using Standard Blend to Paint Different Parts of an Object
We can use the Standard Blend shader to allow us to setup multiple variants of the same object with different colours, and if we wish even adjustments to metal / roughness too, all in the same material. This means we can quickly have many different variations of the same prop, which all use the same material, reducing texture overhead, and allowing the merging of objects into groups with out requiring many more draw calls.
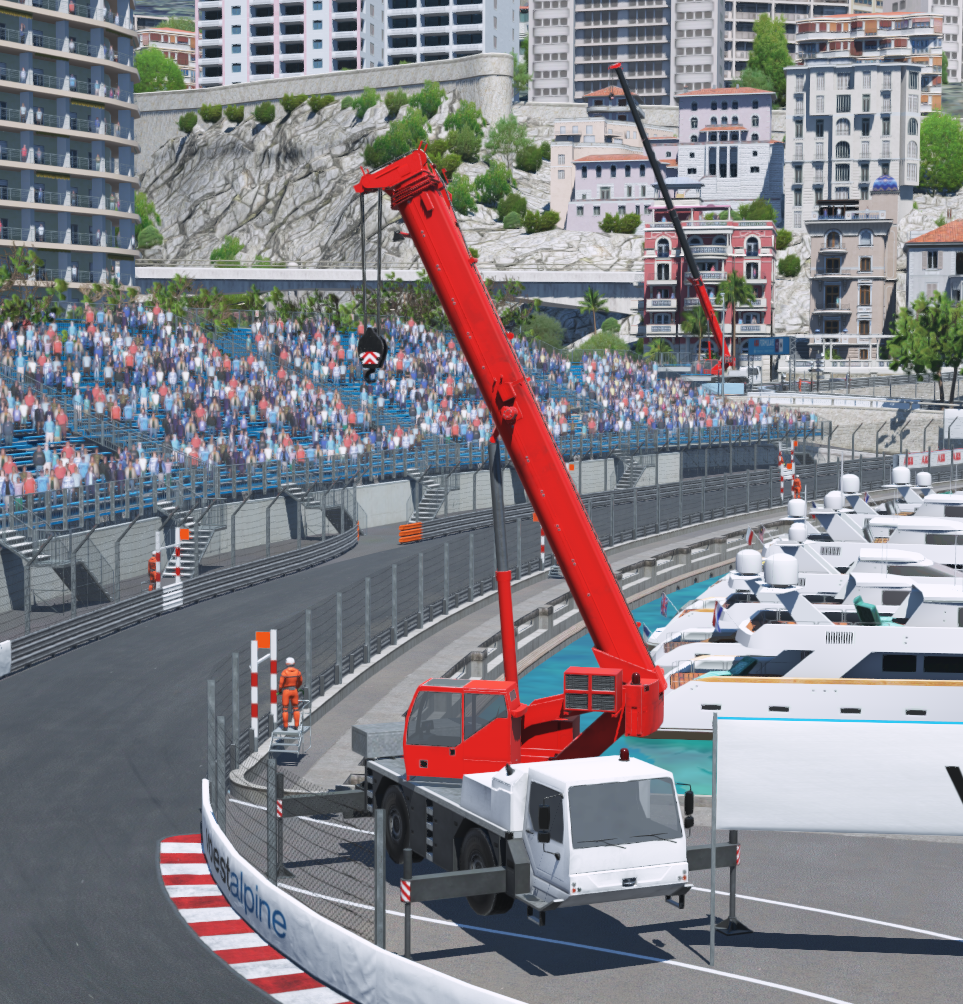
The use case for this so far is some generic buildings at Circuit d'Azur and also the Crane which we introduced at Circuit d'Azur.
In order to do this:
- Alpha mask the areas we wish to be painted in the albedo map. This prevents details such as metal boxes, lights, tyres etc being painted.
- Setup a second colour map, which is basically a colour palette of the options we wish to provide. This map can be small, at around 64x64 pixels per colour option to allow for mip map generation and to prevent colour bleeding.
- Setup second set of UVW, and map various elements to different areas of the palette.
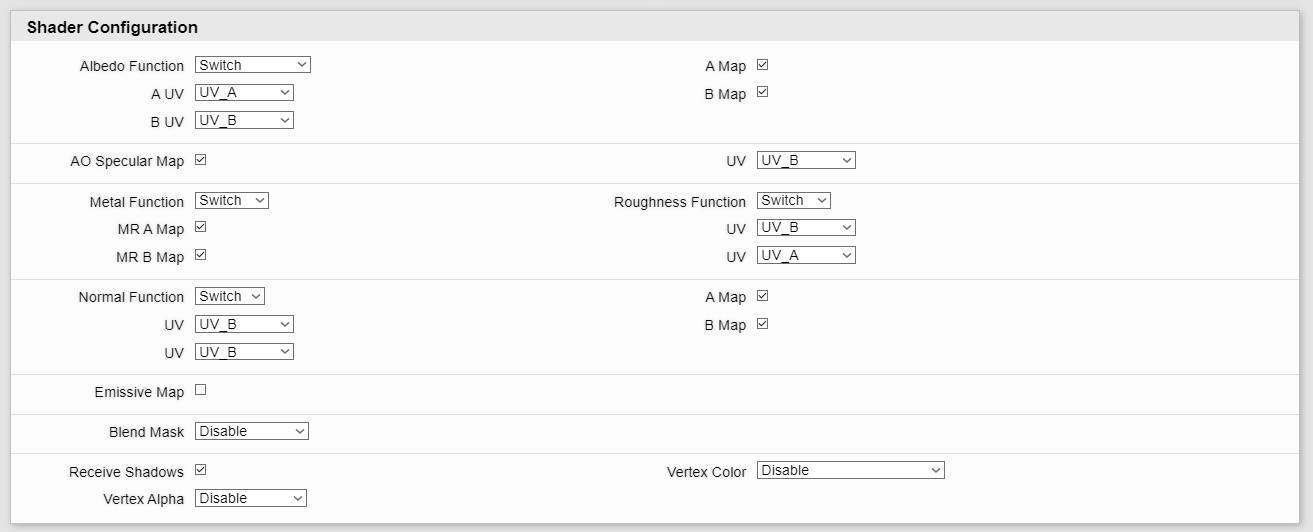
- In the Material Editor, we run a multiply function on the Albedo Map inputs, and we choose AlbedoA_A in the Blend Mask option.
Voila we now have different sections of the truck painted in different colours!
You can see the shader configuration beneath.
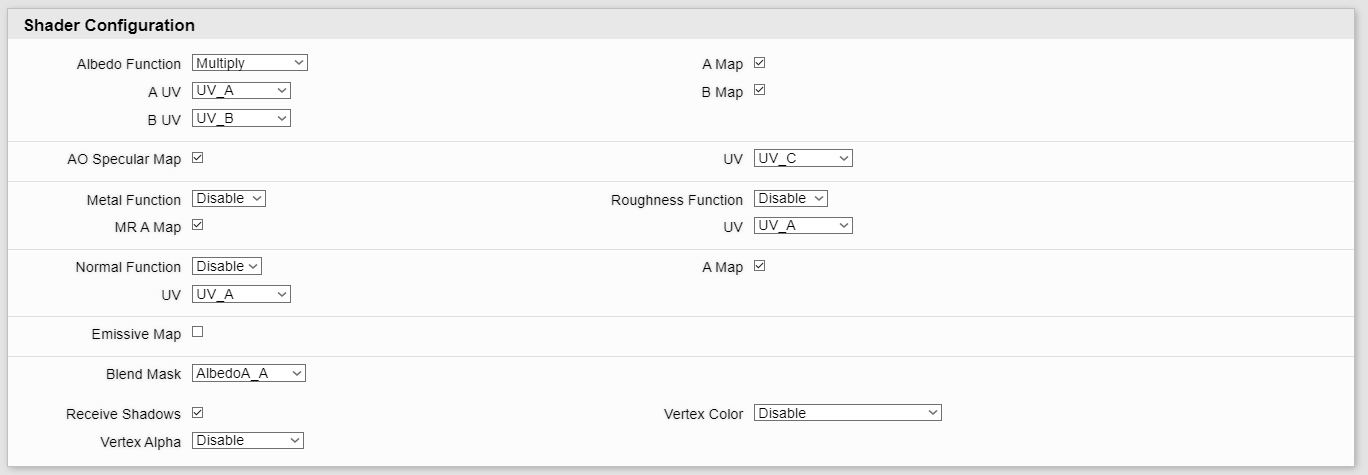
And here are the assigned maps.
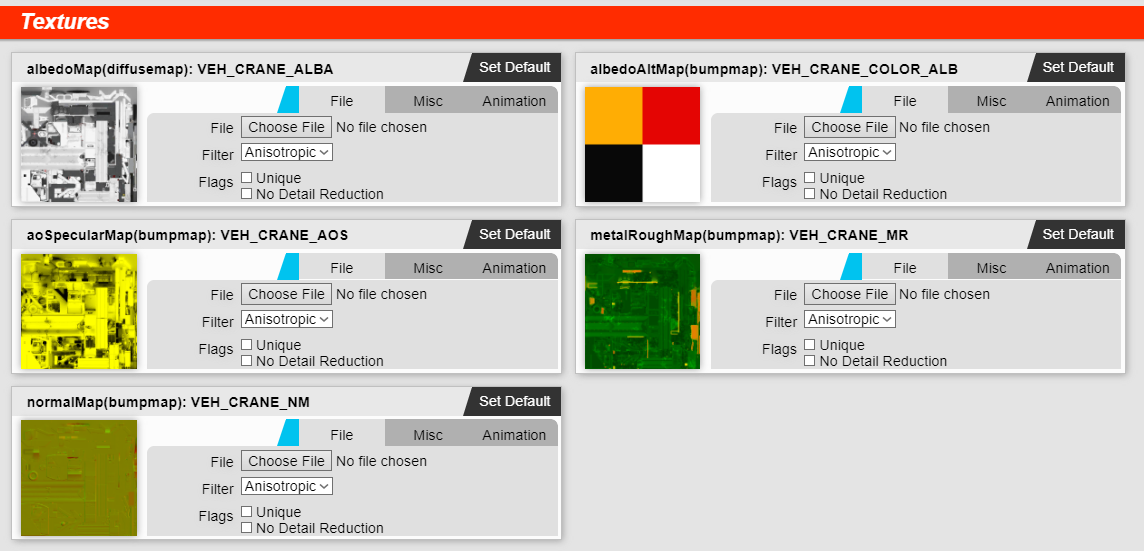
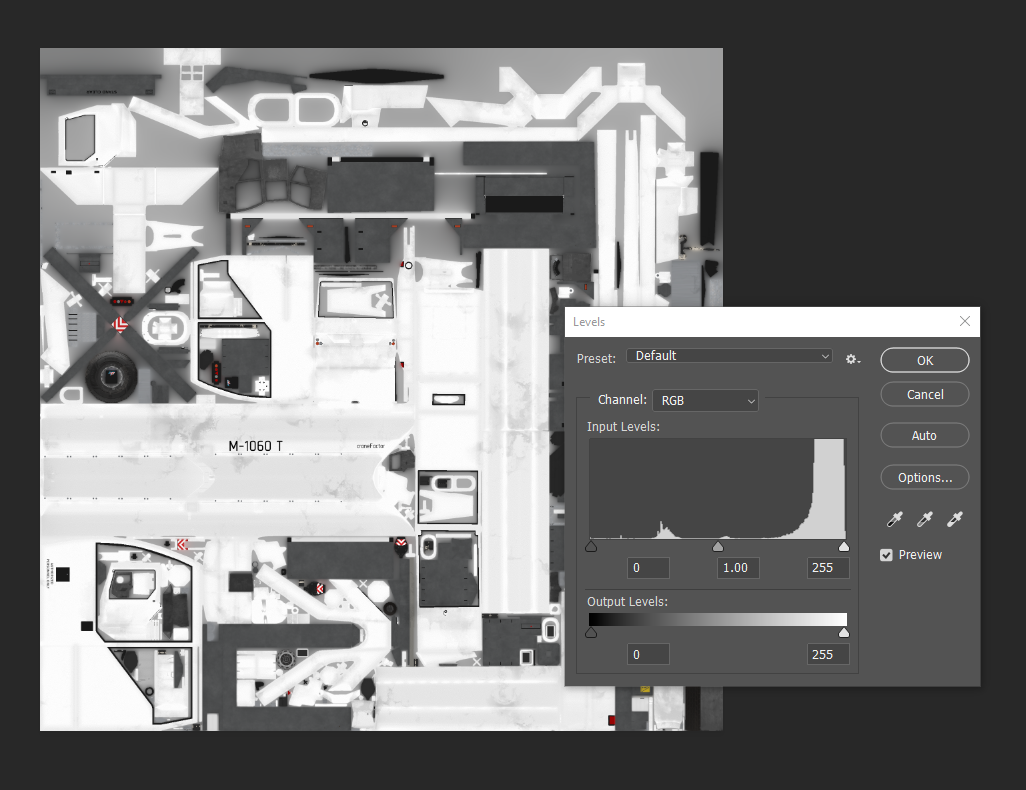
With the alpha masked area in the albedo map, please make sure that it is not too dark. You want this to be setup with unshaded sections completely white, in order to take correctly the colour information.
For bonus points we can also setup modifications to the Metal and/or Roughness maps too. Say we want the red to be more reflective, or we want a metallic effect on one of the colours.
To just modify the roughness:
- Open the colour palette and add an alpha channel. Centre it around 0.5 to not change the roughness. Select areas and modify the alpha. Make each section brighter to be less reflective, or darker to be more reflective.
- In the Material Editor, set the Roughness function to Overlay. Hit Apply. Then disable MR B Map. Hit Apply again. Then tick Roughness AlbB.A. Apply one final time.
- Save the material, and now the Alpha channel of your palette map will also effect the reflectivity of the material.
To modify the metallic and roughness values of the material:
- Setup a second dedicated metal roughness map which follows the same format as the albedo palette map.
- Assign it the same UV as your albedo palette map (probably UV B).
- You may wish to use the Add function for Metal, and set the metal data (Red channel) to 0 by default, only increasing it on palette areas that you wish to.
- I would recommend setting up the Roughness (Green channel) as in the previous example. Use Overlay function and centre around 0.5, adjusting as desired.
Using Standard Blend for blending High and Low Frequency Details
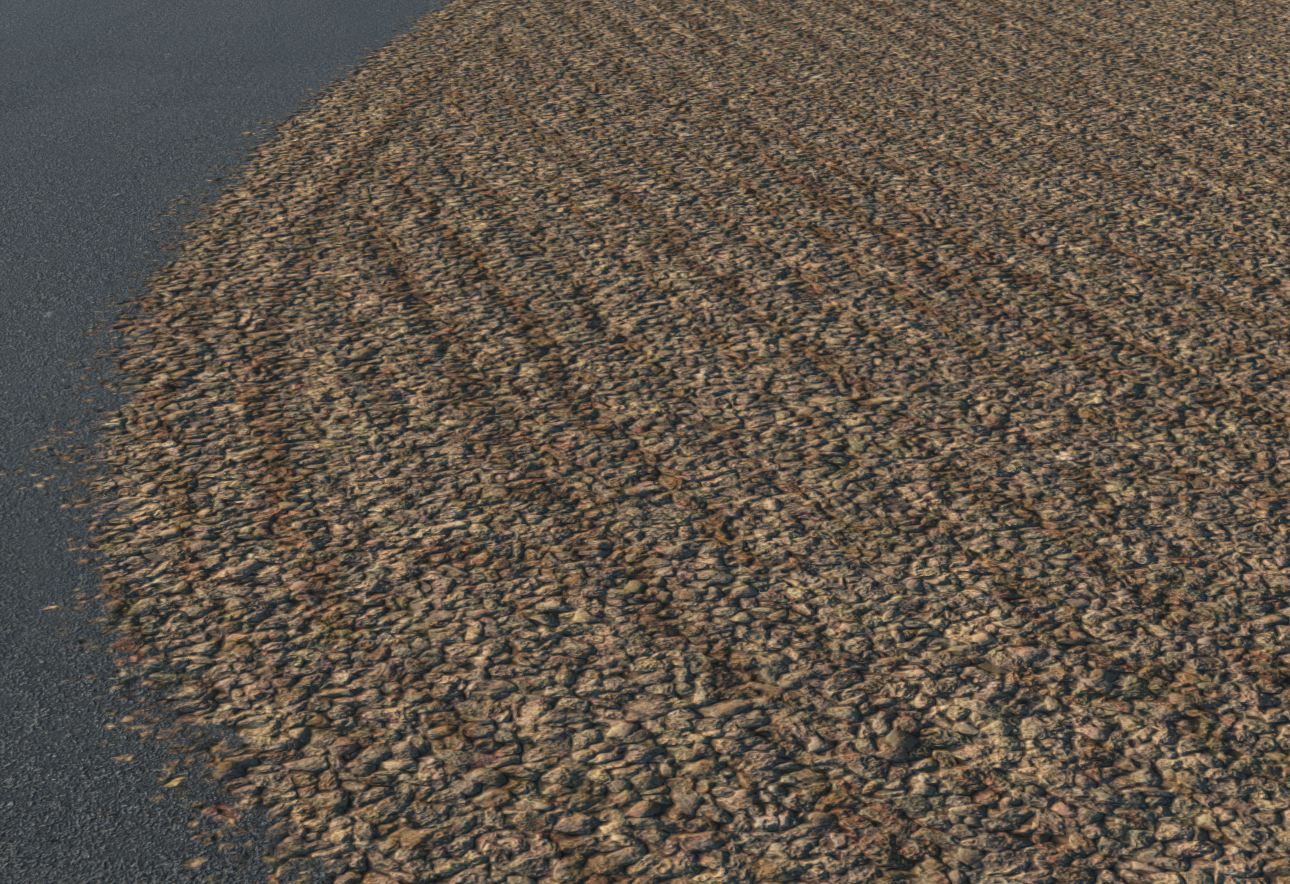
This example shows how we can work in high and low frequency details much better now with the Standard Blend shader. A prime example for this is when setting up gravel traps.
Previously, it was necessary to sacrifice one of the two, but now we can have normal map, roughness details from both high and low frequency working in, so that individual stones have a profile, as well as the raked natural of the gravel showing through too.
The edges are done through a second decal material, giving us these nice patterns.
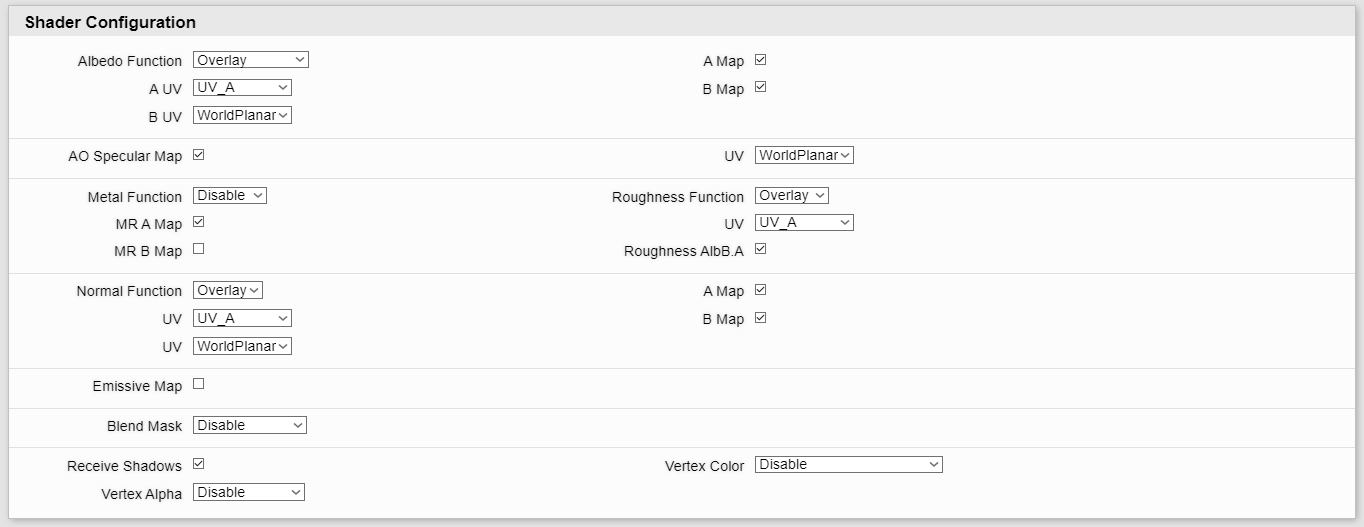
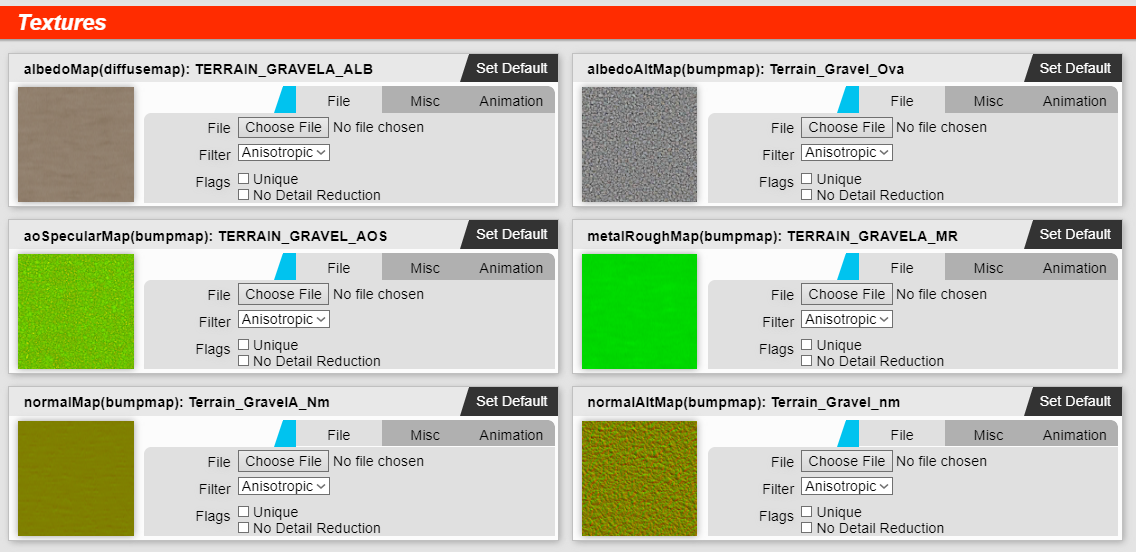
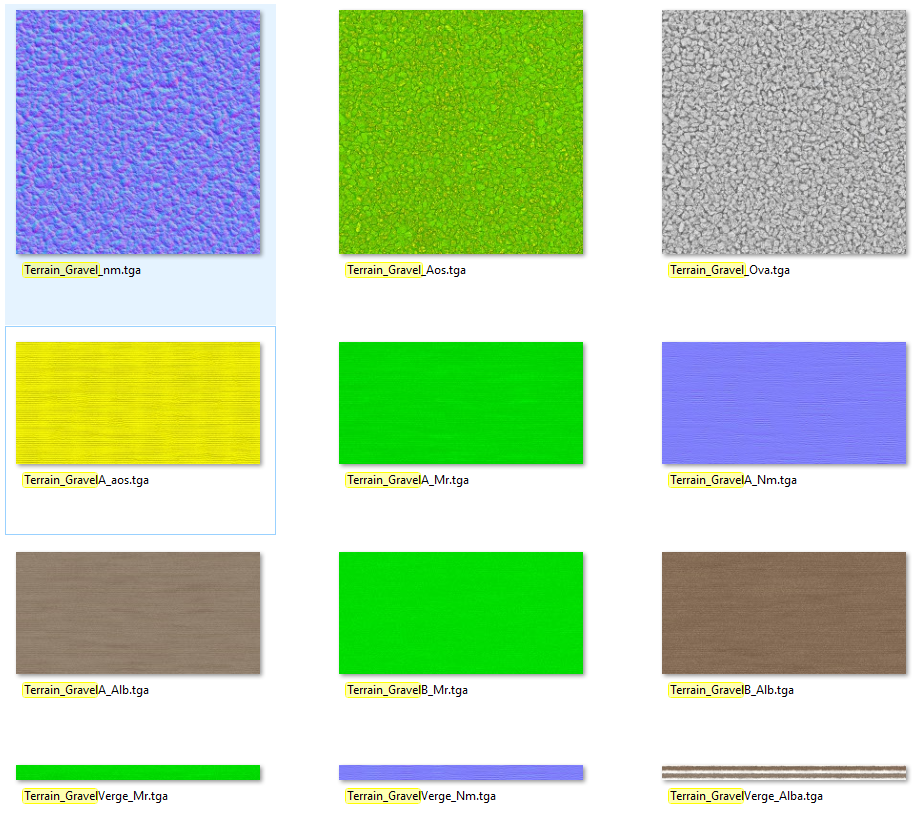
Here we have authored low frequency maps for the A set of Maps, which use UV A. The first set of maps is setup to have the general profile of the terrain, with Albedo, Metal Rough and Normal maps, these set out the grooved nature of the gravel trap.
Then a second set of generic high frequency detail maps are authored. This has an overlay map with the majority of colour information removed, in the alpha channel is a roughness overlay, and additional Ambient Occlusion, Specular and Normal maps.
Then we hook these all up to overlay functions. We can ignore the metallic function since we have no metal in the object.
We are using WorldPlanar mapping on the detail maps to make sure there are no mapping distortions too.