PBR - Using Road / Curb Shader
The Road and Curb Shaders, extends on the Standard Shader and build on the options found in the old non PBR shaders. Additionally you can now enable and disable functionality to allow you to have a much lighter version of the shader for roads outside of the track ribbon for example.
You can find the technical reference for these shaders here: IBL Road & Curb Shaders
It's recommend that you read PBR - Using Standard Shader before proceeding with this article, as issues are not covered again such as UV options and Material Adjust settings.
What's new?
If we take a step back, compared to the previous non PBR version of the shader what has changed? Well a brief summary would be as follows:
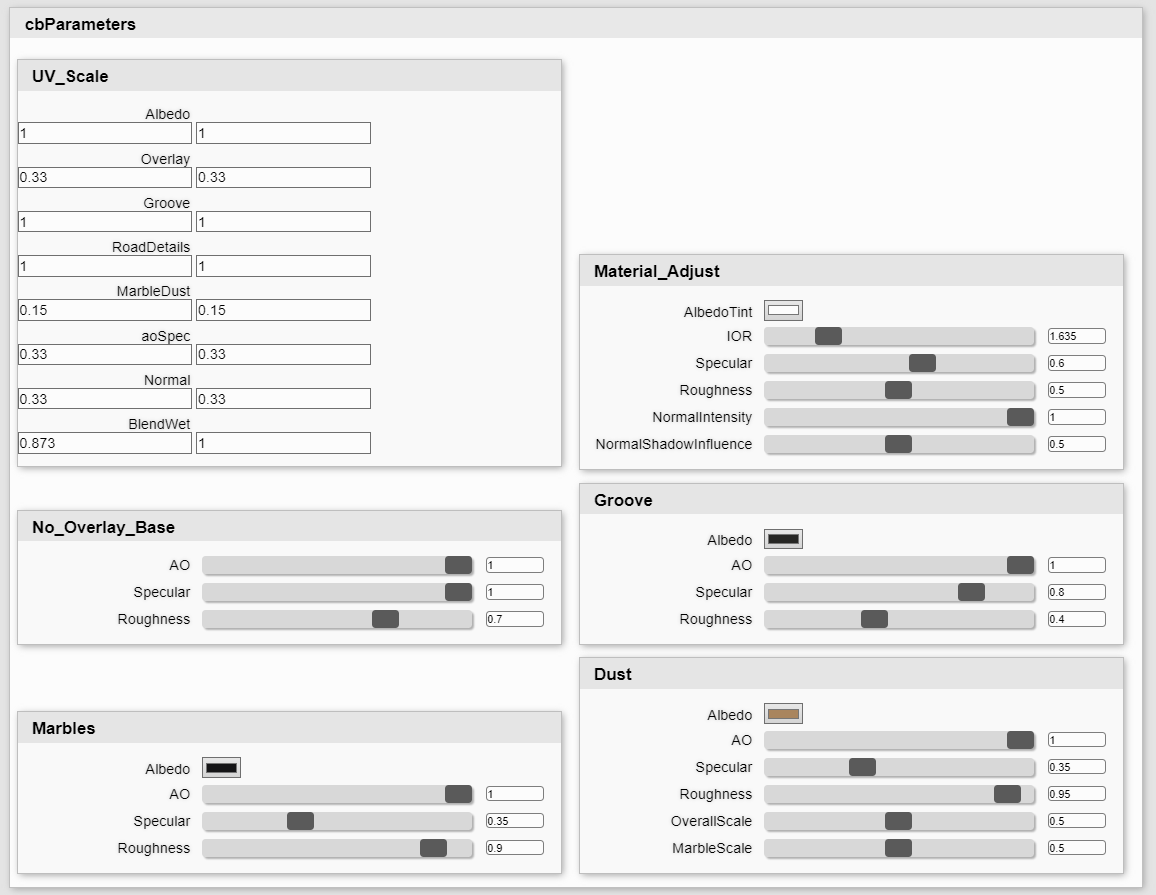
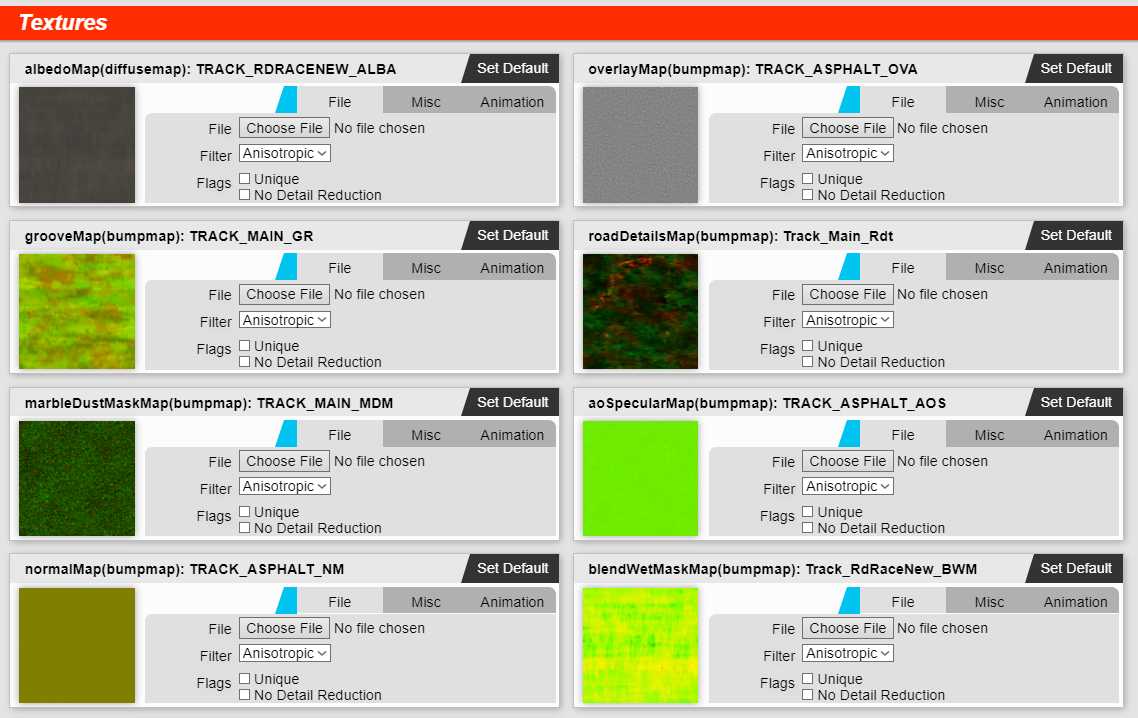
- Roughness masks now packed into alpha channel of Albedo Map
- Road Shader High Frequency map now uses Overlay rather than Multiply blending to allow for accurate albedo values as well as the ability to brighten or darken the albedo.
- Curb Shader allows the use of two albedo maps for the Curb, the second a more dirty worn version will appear as the road grips in, as well as base wear being set by Road Details Map.
- Wet Mask has moved into BlendWetMaskMap. This has a mask for how much to blend in the high frequency map in the Red channel, and the Wet Mask that was in the Albedo Alpha Channel previously is now in the Green channel.
- Groove Map is now a Groove Mask with two channels of data. The first is blended in at the first 50% of RealRoad grip, and the second Blended in on top in the second 50%.
- Road Details Map expands on the Puddle Map, and allows us to paint areas that should have dust, groove wear and blending info by default.
- These allow for a more natural "green" track before RealRoad takes over.
- Variations across the entire scene and one map shared with all materials, so more optimal.
- New Dust feature allows us to paint areas where the road is dustier than others. These areas wear off if cars drive there, and dust can appear in areas that Marbles do too.
- Marbles, Groove, Dust and areas that do not receive an Overlay Map can all be configured uniquely in Shader Parameters.
- Enable or Disable Groove, Marble, Dust, Wet Weather or Puddle Splash features on a per material basis.
All of these are in addition to standard upgrades such as the ability to enable and disable maps and input static values as well as UVW and Material Adjust options explained previously.
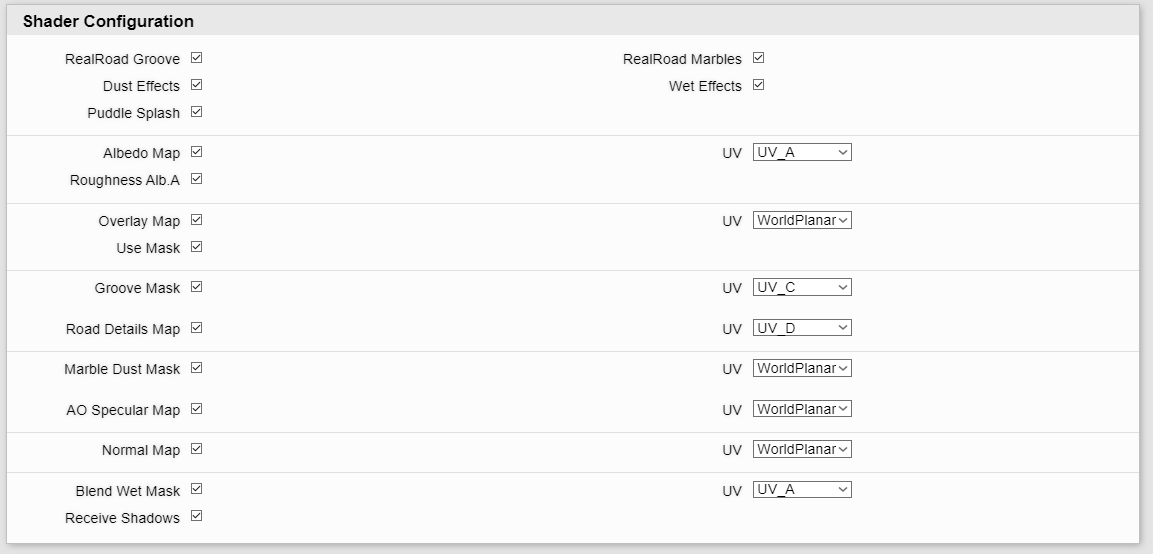
Functional Switches
With the new shader we can enable and disable large features of the Road Shader on a per material basis.
Real Road Groove
This is the build up of rubber on the racing line as cars drive around the track.
The way this is shown is controlled by the grooveMap. This is a two channel mask for the groove.
Map acts as a mask for the effect, and the Albedo, Roughness, Specular and AO is all configured via Shader Parameters.
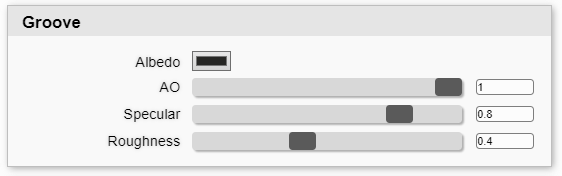
The mask works by blending in the Red Channel over the first 50% of wear and then the Green Channel over the second 50% of wear. The maximum value of the two is used.
For this reason it's recommended that the two masks are different, and the red mask slightly darker than the green mask.
Additionally, pre-baked wear can be configured by painting in details to the Road Details map - Green Channel, if it is being used.
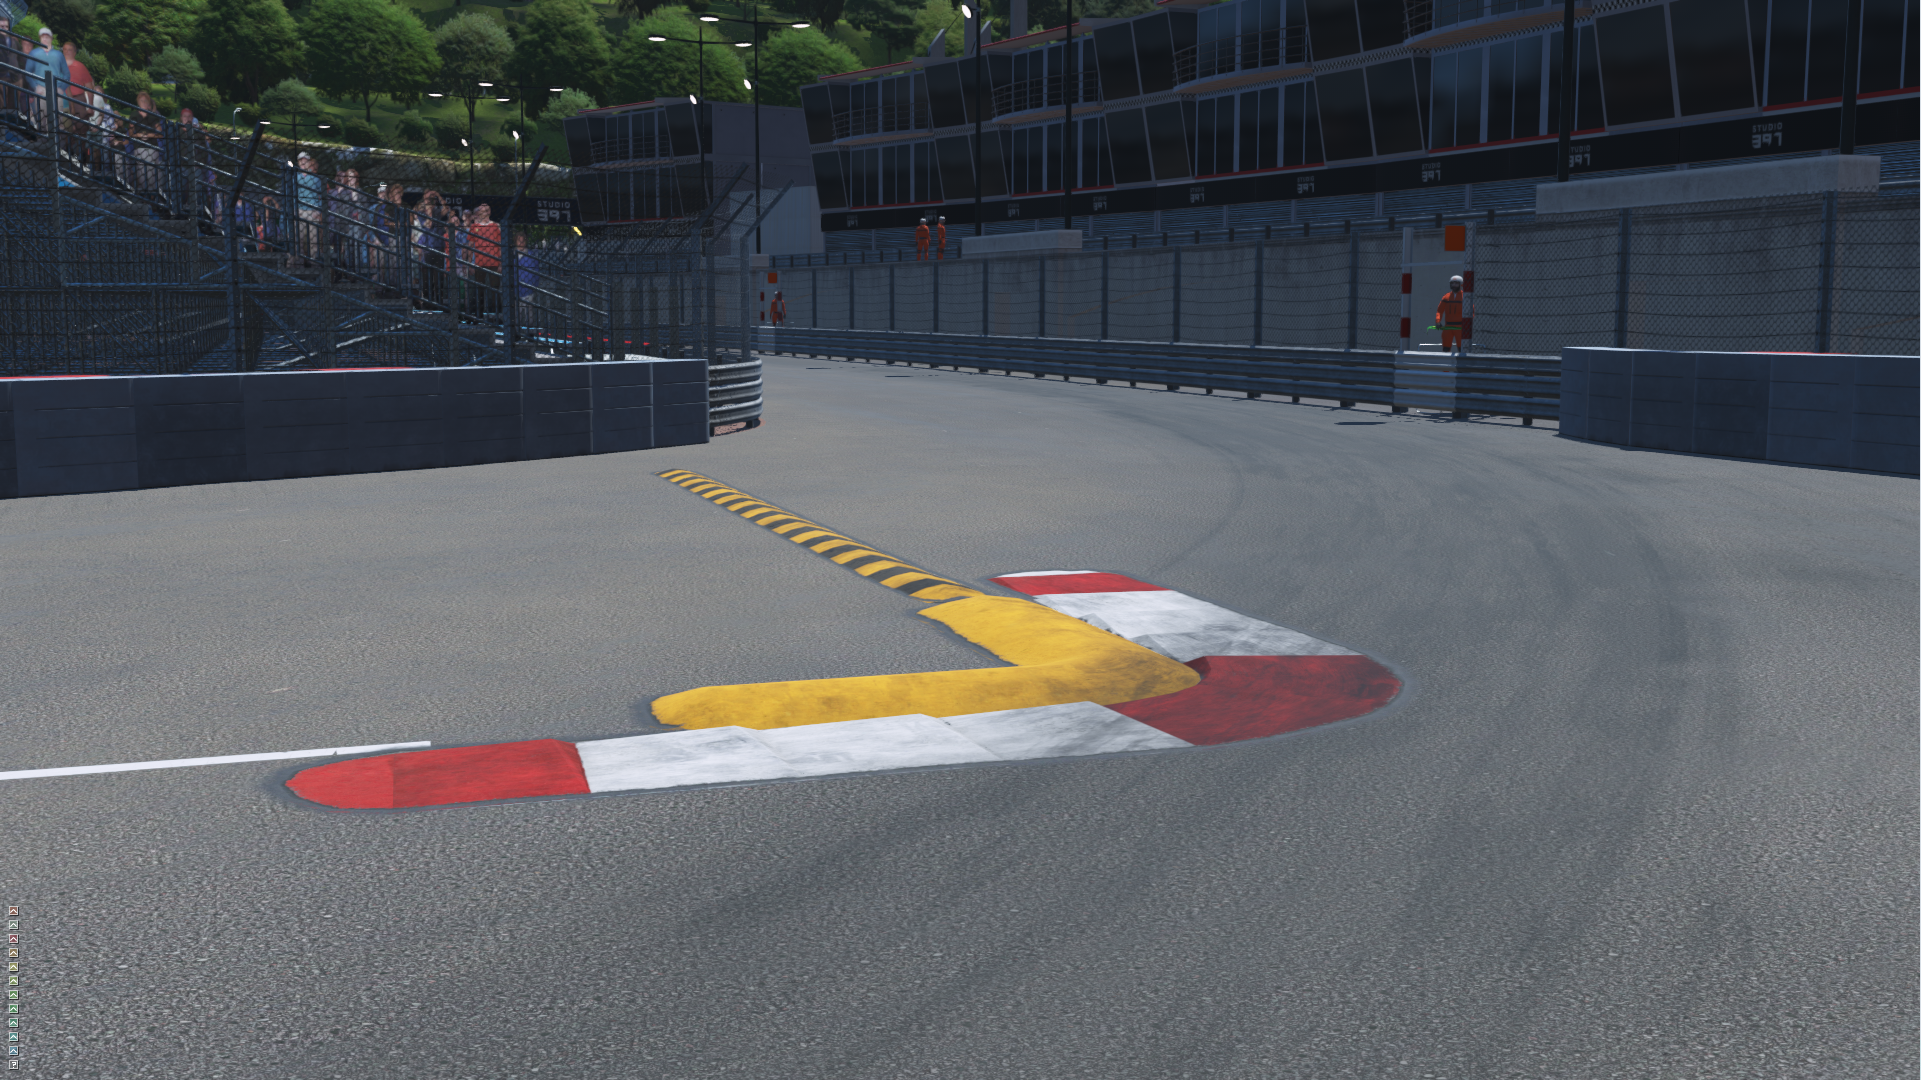
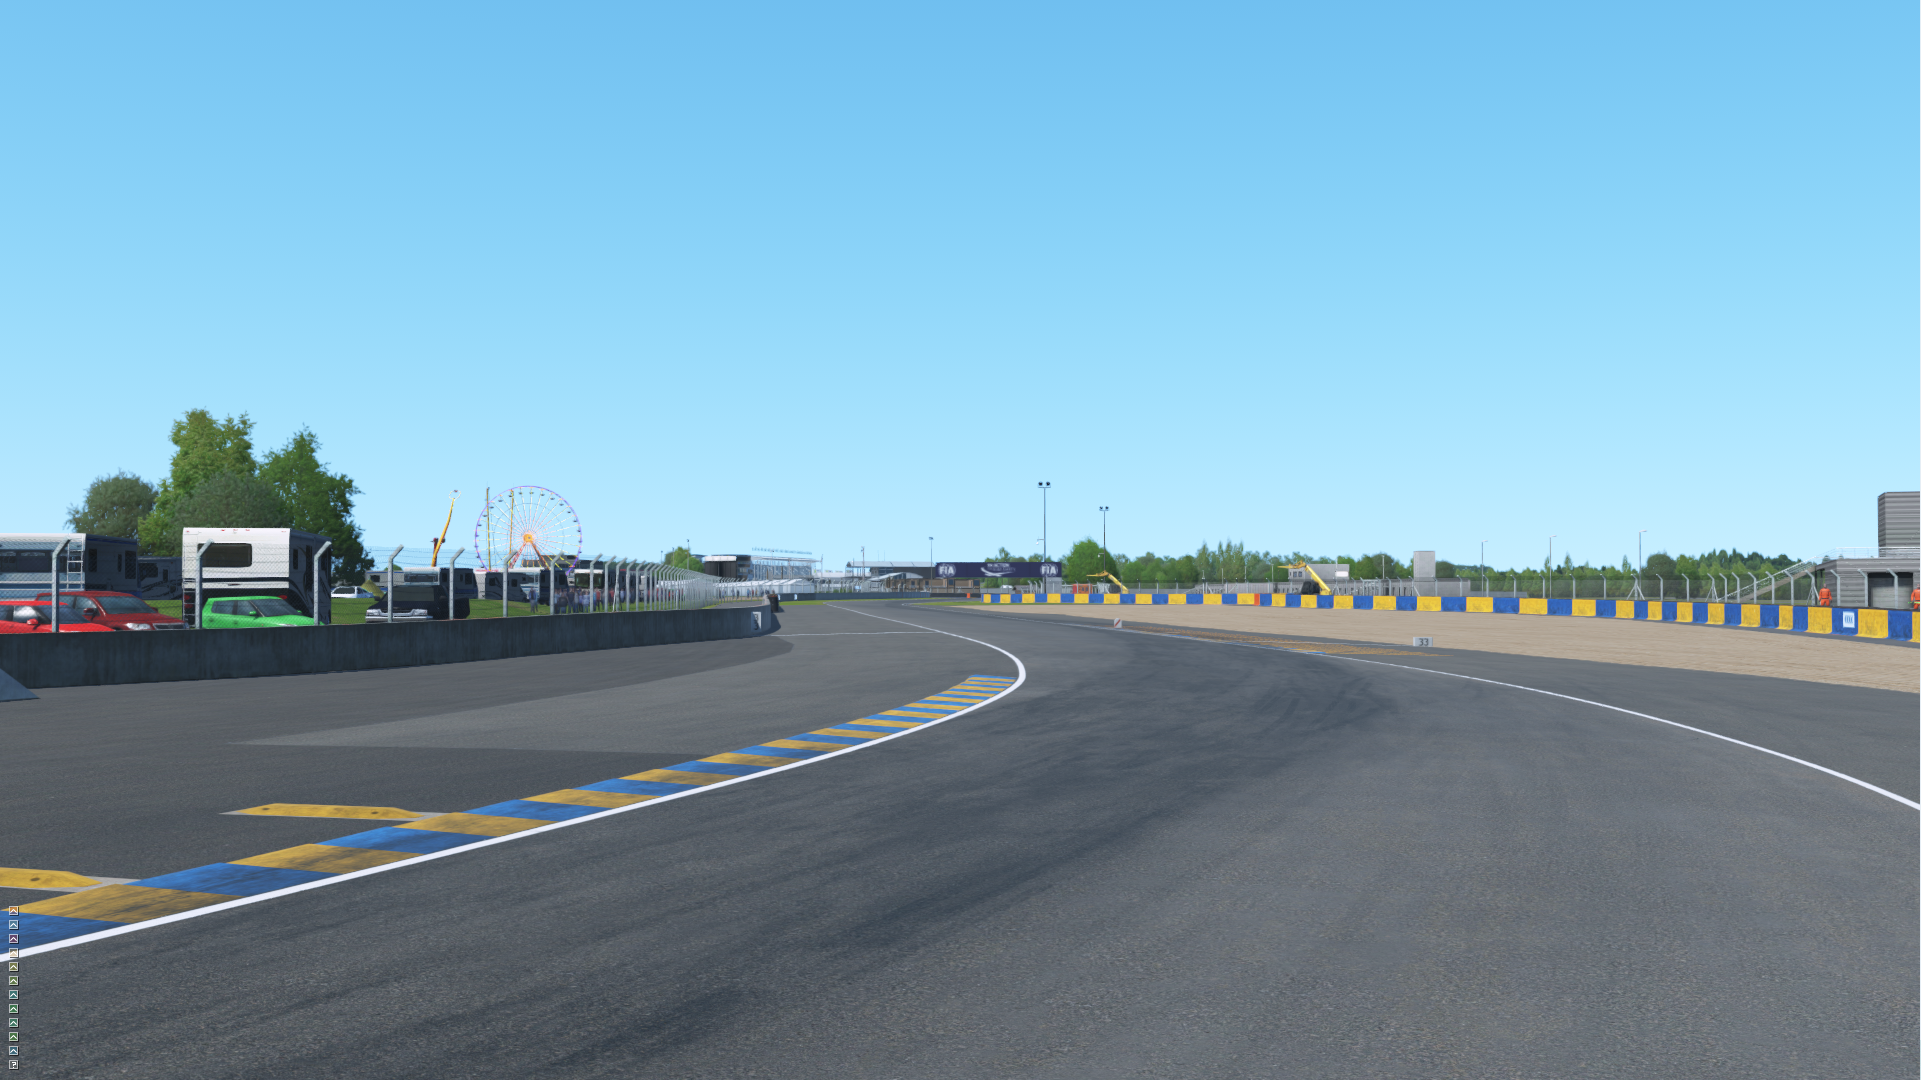
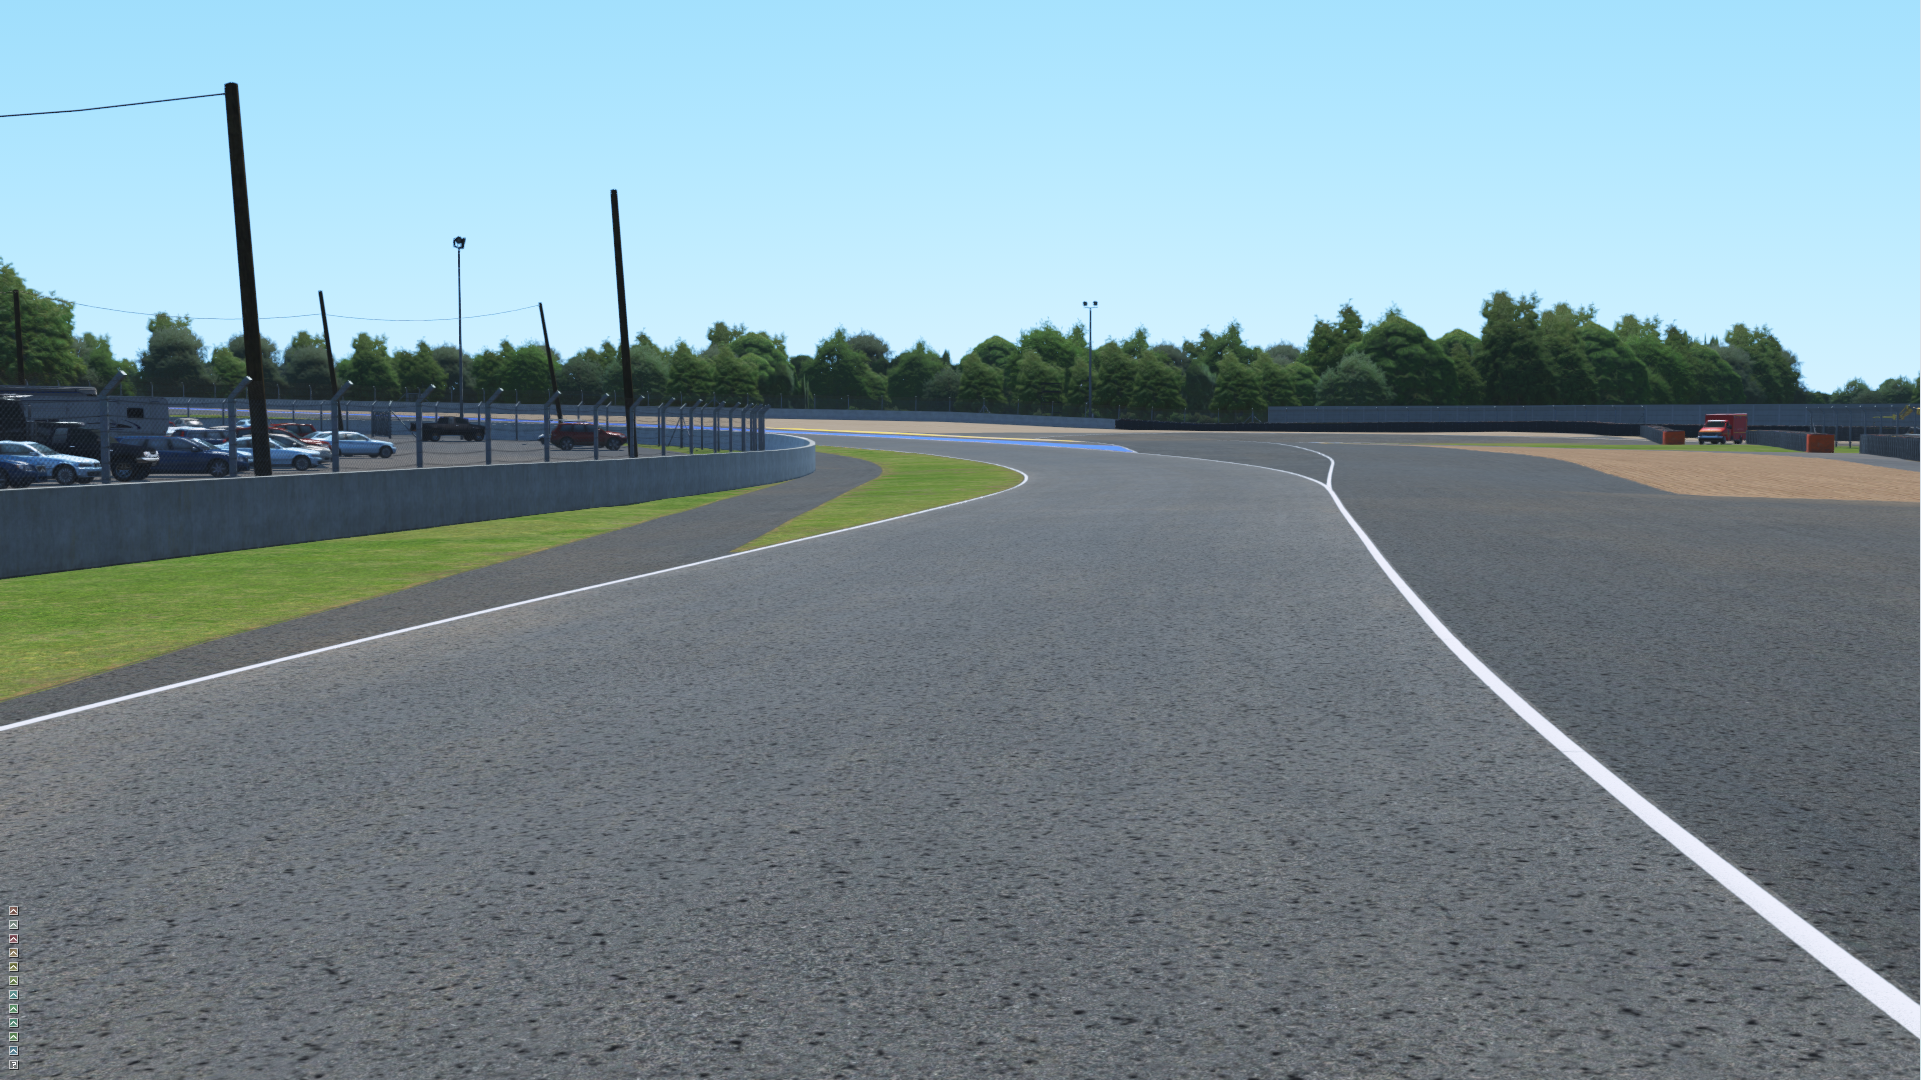
Beneath shows the groove effects with "Heavy.rrbin" at Le Mans.
We should limit this effect to drive able surfaces, and as before for it to be dynamic objects need to be prefixed with "RaceSurface".
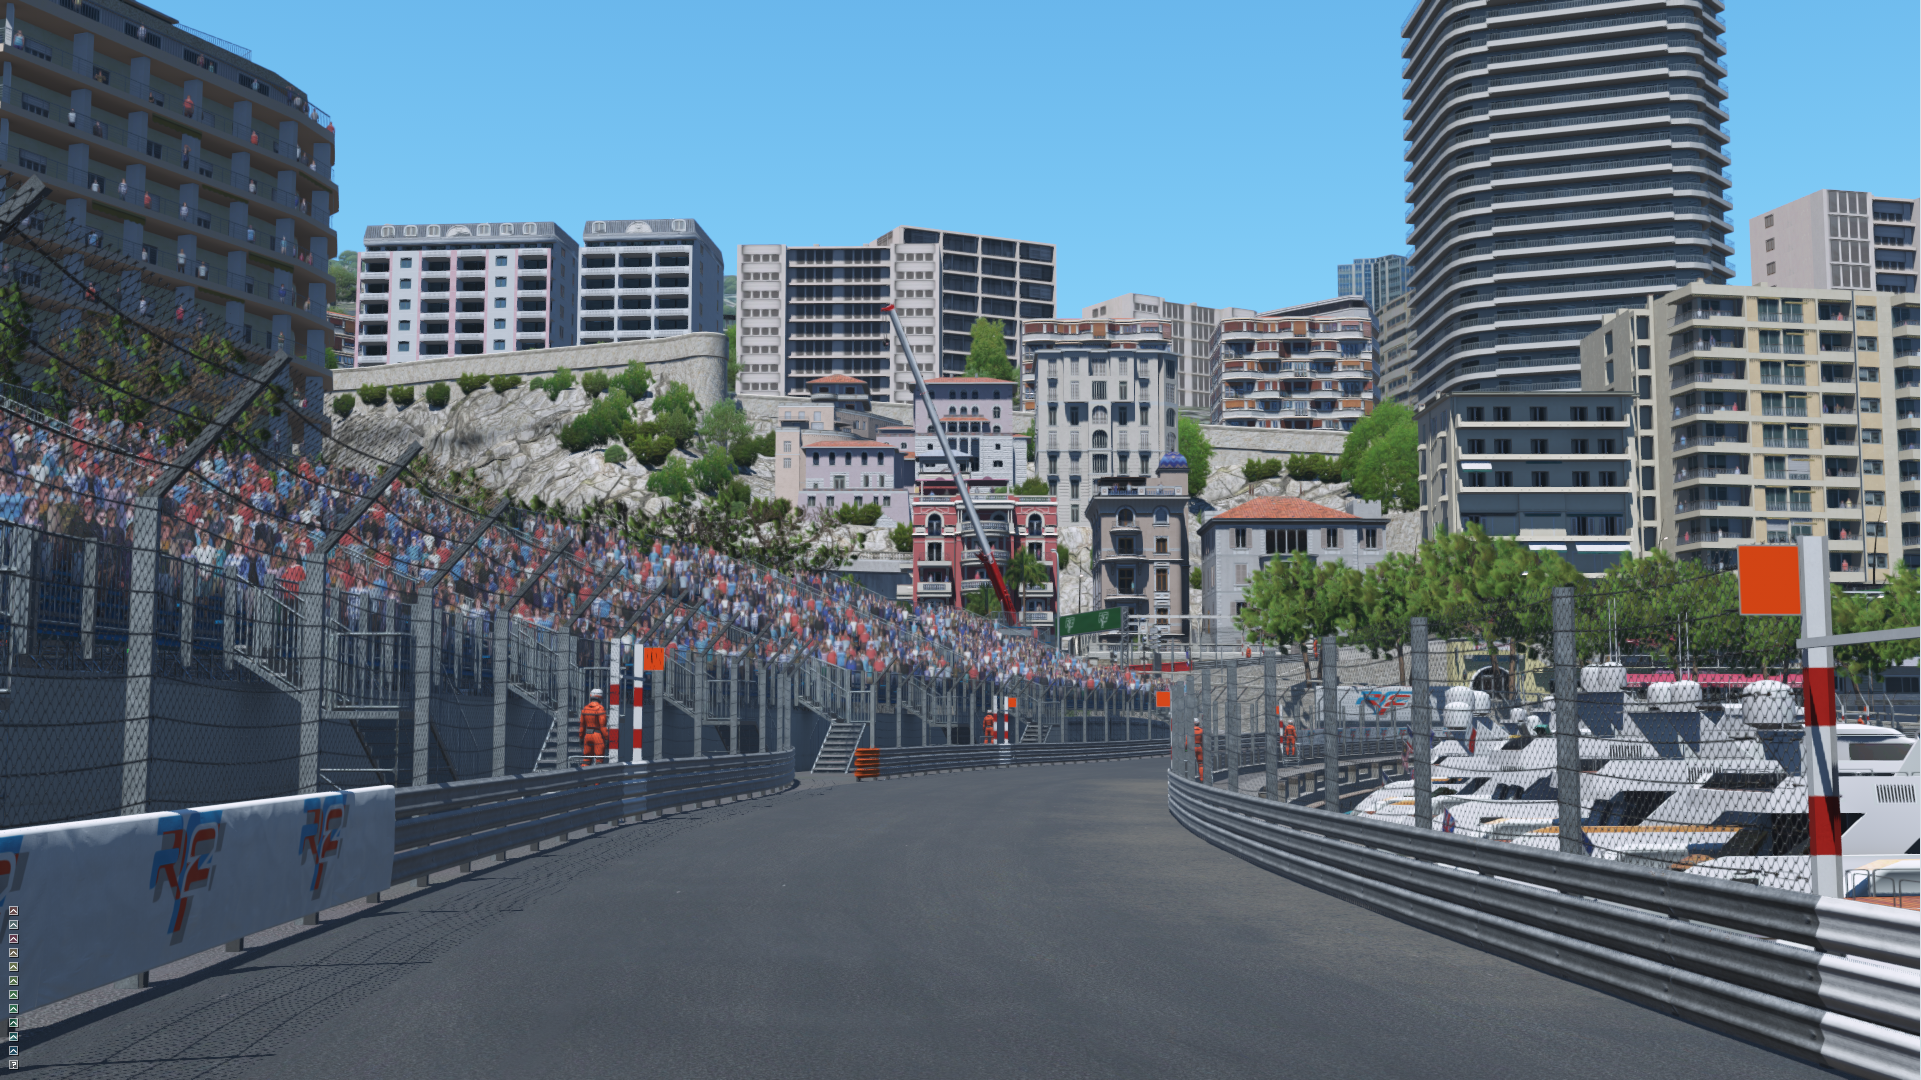
Real Road Marbles
This is the build up of rubber "marbles" off the racing line as cars drive around the track.
The way these are shown is controlled by the red channel of the MarbleDustMask map, and the Marble profile in the Shader Parameters. Similar to how the Groove works.
Unfortunately there is no space to add a normal map for the marbles and as such they just appear as a static overlay. Normal map information beneath them is ignored though.
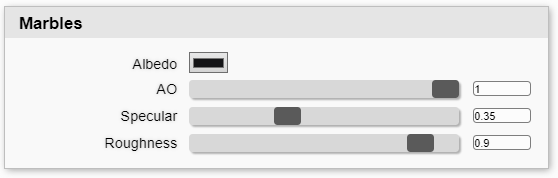
Beneath shows how Marbles would look if they were everywhere!
We should limit this effect to drive able surfaces, and as before for it to be dynamic objects need to be prefixed with "RaceSurface".
Dust Effects
Via the red channel of the Road Details Map we can paint in areas that we wish dust to occur on the track by default. Dust will then be removed when cars drive over the section, and can be added in areas Marbles occur too.
This effect is profiled very similar to the way marbles are. The green channel of the Marble Dust Mask Map contains an opacity mask for the tiling dust pattern.
There are additional settings in the Dust parameter section where you can configure the visual profile (it's colour, AO, Specular & Roughness).
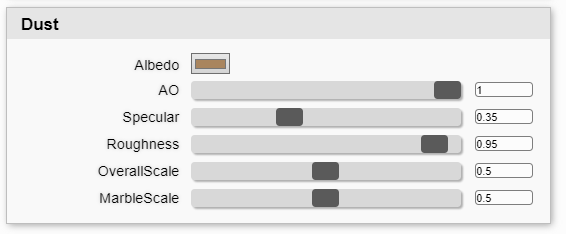
Additionally there are scalars to limit the overall maximum amount of dust, as well as how much dust should appear underneath areas where Marbles build up.
We would limit this effect to drive able surfaces.
Wet Effects
Wet Effects covers the entire range of wet effects on the road. From darkening the albedo as the road gets damp, to the reflections both from puddles, and also seams that follow the road surface.
The seams that follow the road surface are controlled by the BlendWetMaskMap Green Channel. The areas that are black on this become more reflective when damp than those that are not.
For large surface puddles, we paint them in a puddle map, similar as before. This is now packed into the alpha channel of the RoadDetails map.
The shader code for handling wet weather at this time is the same as the old shader, aside from some lightness clamps. There are intentions to improve this in the future.
Puddle Splash
It is possible to disable rain drops splashing in puddles with out disabling any other of the wet weather features. This maybe recommended for road surfaces outside of the track ribbon.
Using Asphalt Type Maps
A good way to setup unique types of roads is to group together asphalt detail maps by type and use these as sets.
This is done by using an Overlay, Normal and AO Specular Map to create a profile for the finer details of the road.
With the Overlay map, the rgb values are applied to the Albedo map, and the alpha channel is applied to the Roughness map.
Set all of these up to use WorldPlanar mapping either directly in the shader or through the UVW you export, and with the same scale.
Additionally these details can be blended out via the Blend Mask found in the Red Channel of the Blend Wet Mask.
A typical good suggestion for this is to have it use the same mapping as the Albedo map, but stretched ever so slightly so that the details don't tile perfectly. This will break up tiling patterns on the road a little bit.
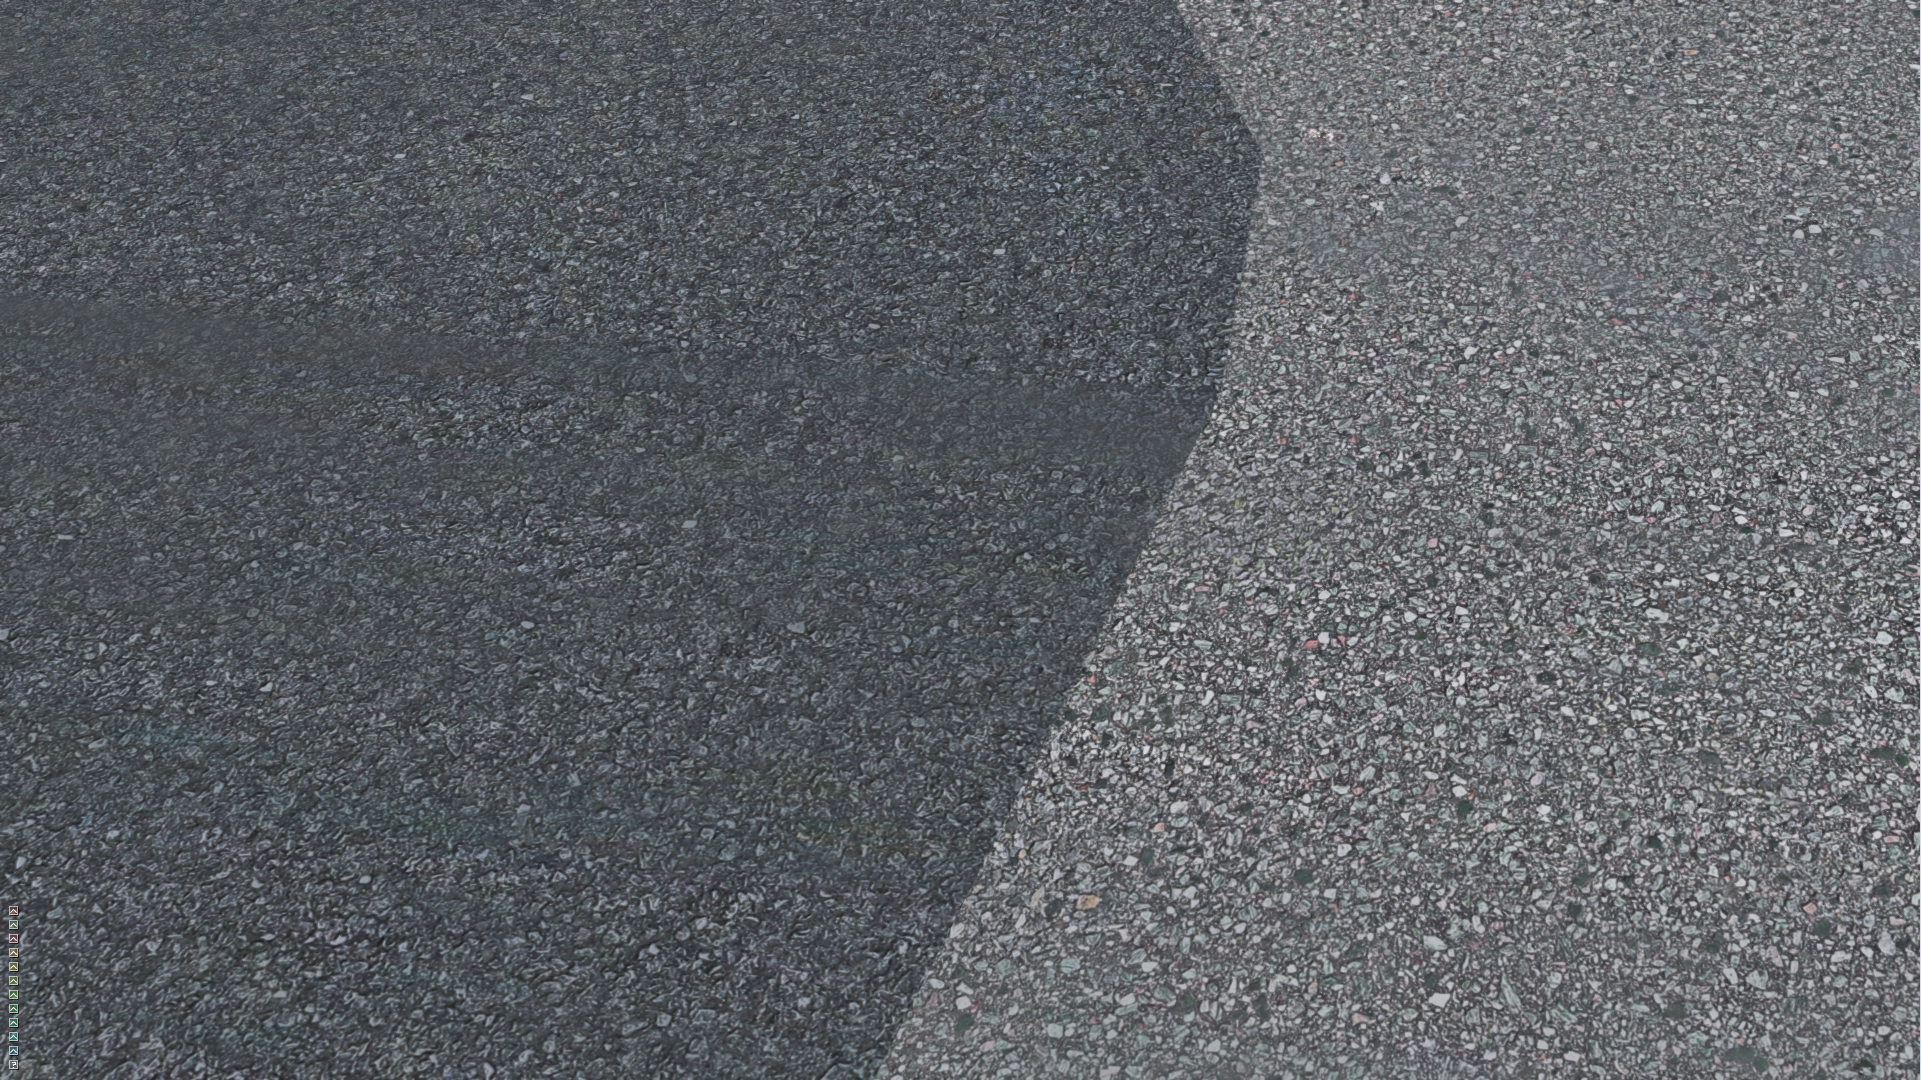
![]()
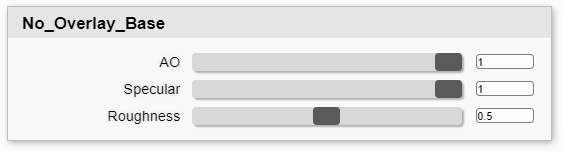
In the above image you can see some areas where the detail map is not being used as strongly. The values used in this area are configured by the No Overlay section in Parameters. Note that Roughness value is used as an Overlay, where AO and Specular are just multipliers.
This effect can be disabled by disabling the Use Mask option next to Overlay Map in the Shader Configuration area.
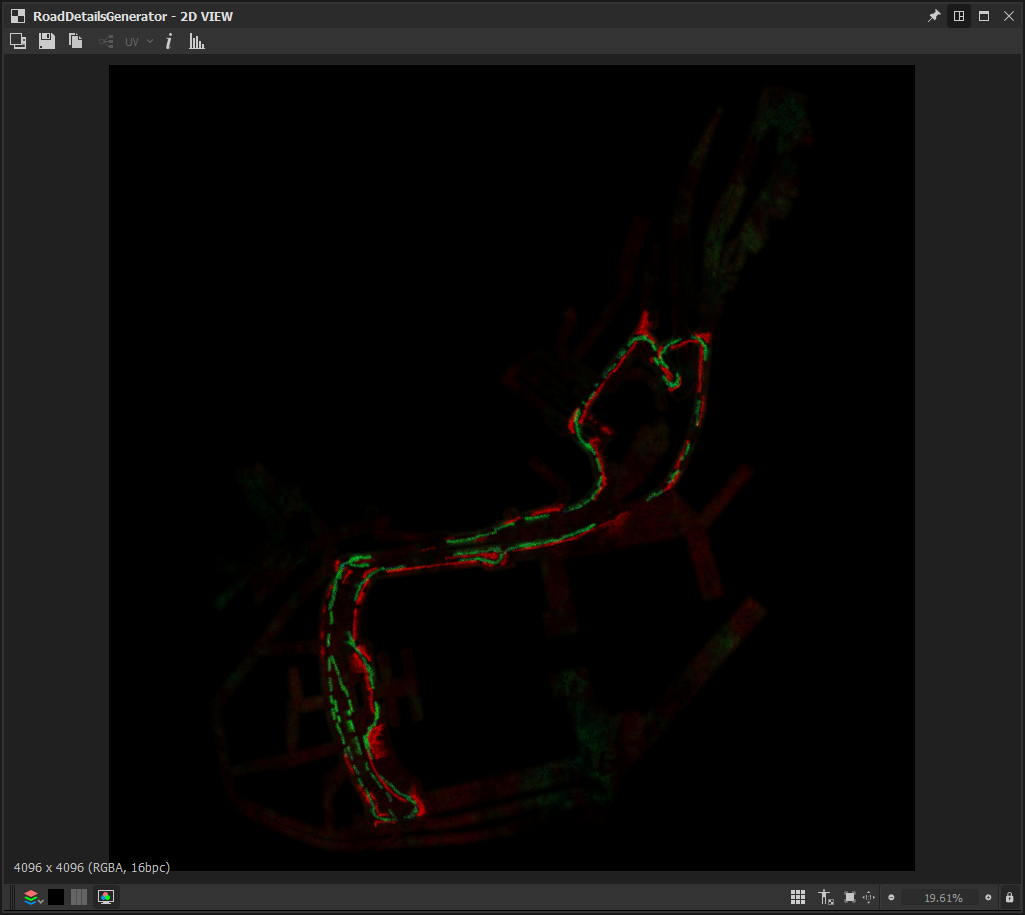
Generating the Road Detail Map
The Road Detail Map is a Map which covers the entire drive-able surface and should be shared with all road and curb materials.
It tells us where dust should appear, allows pre-baking of groove, adds wear effects and also contains the puddle map information.
Here I explain how you can generate this map using 3ds Max and Substance Designer.
There is an early version of a Substance generator for the Road Details Map available in the Substance Utility Pack
This generator takes several inputs as follows:
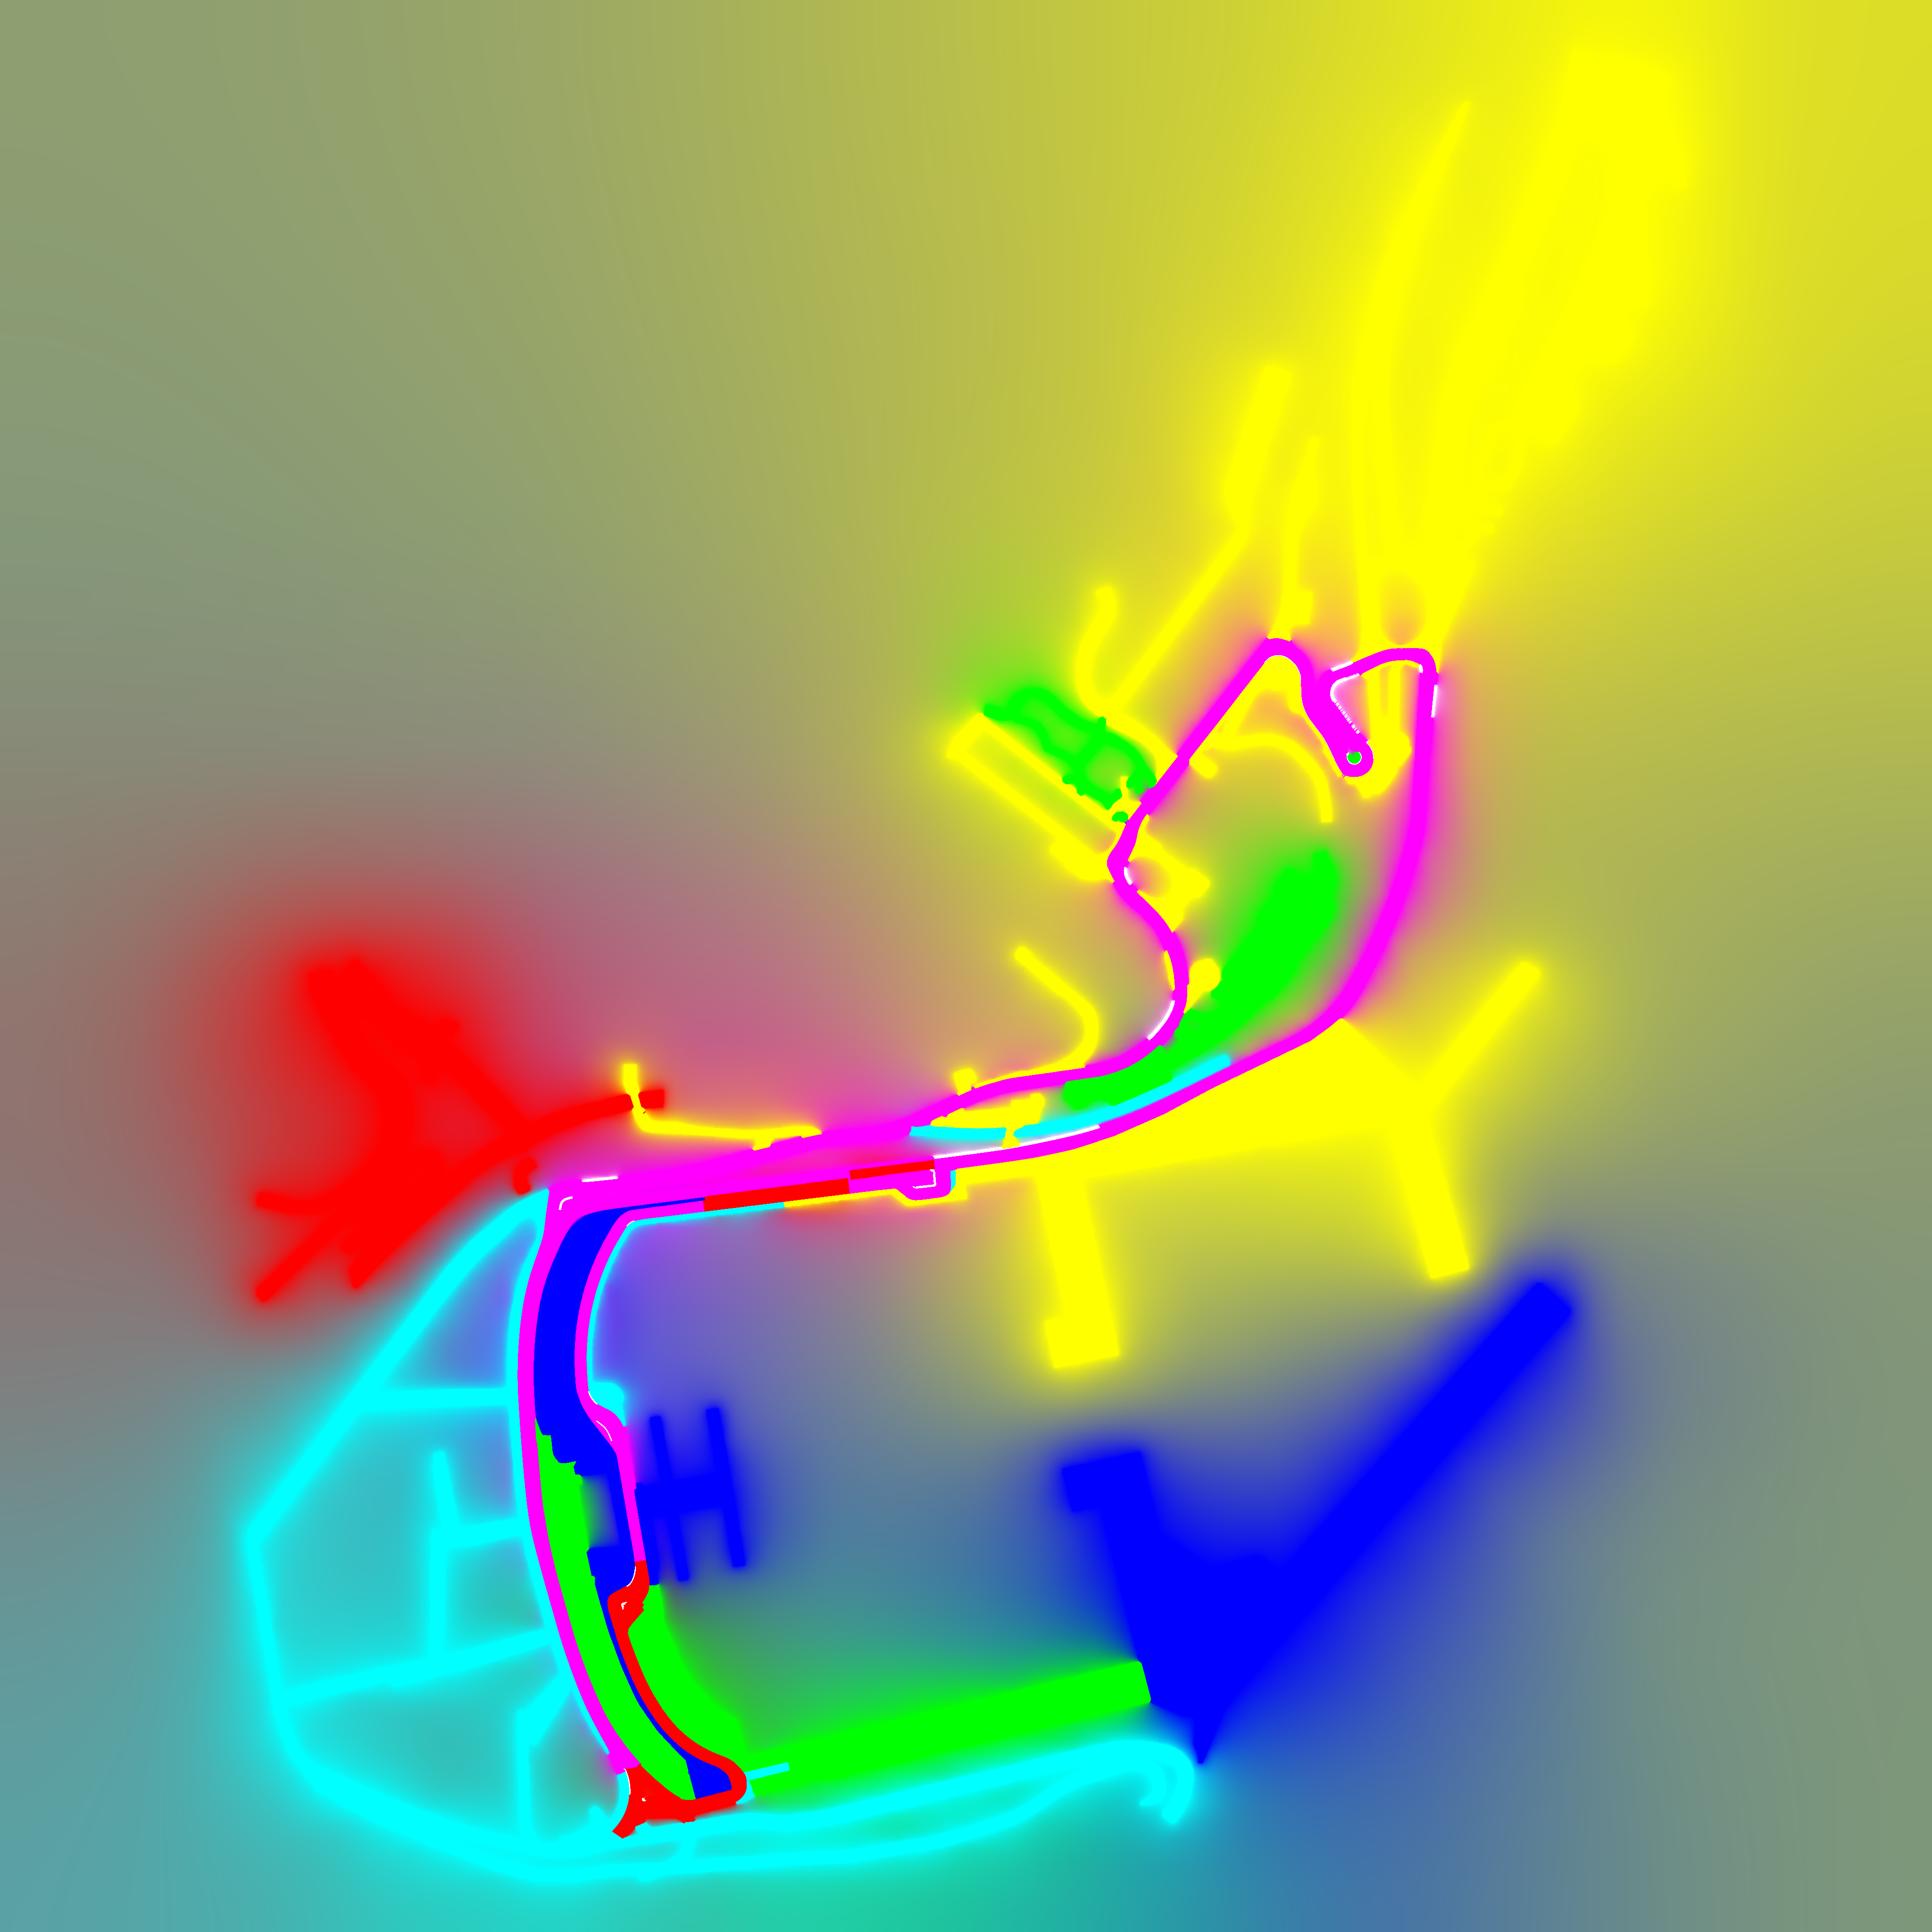
- A material colour map with up to 4 different materials to bake puddles water along material seams.
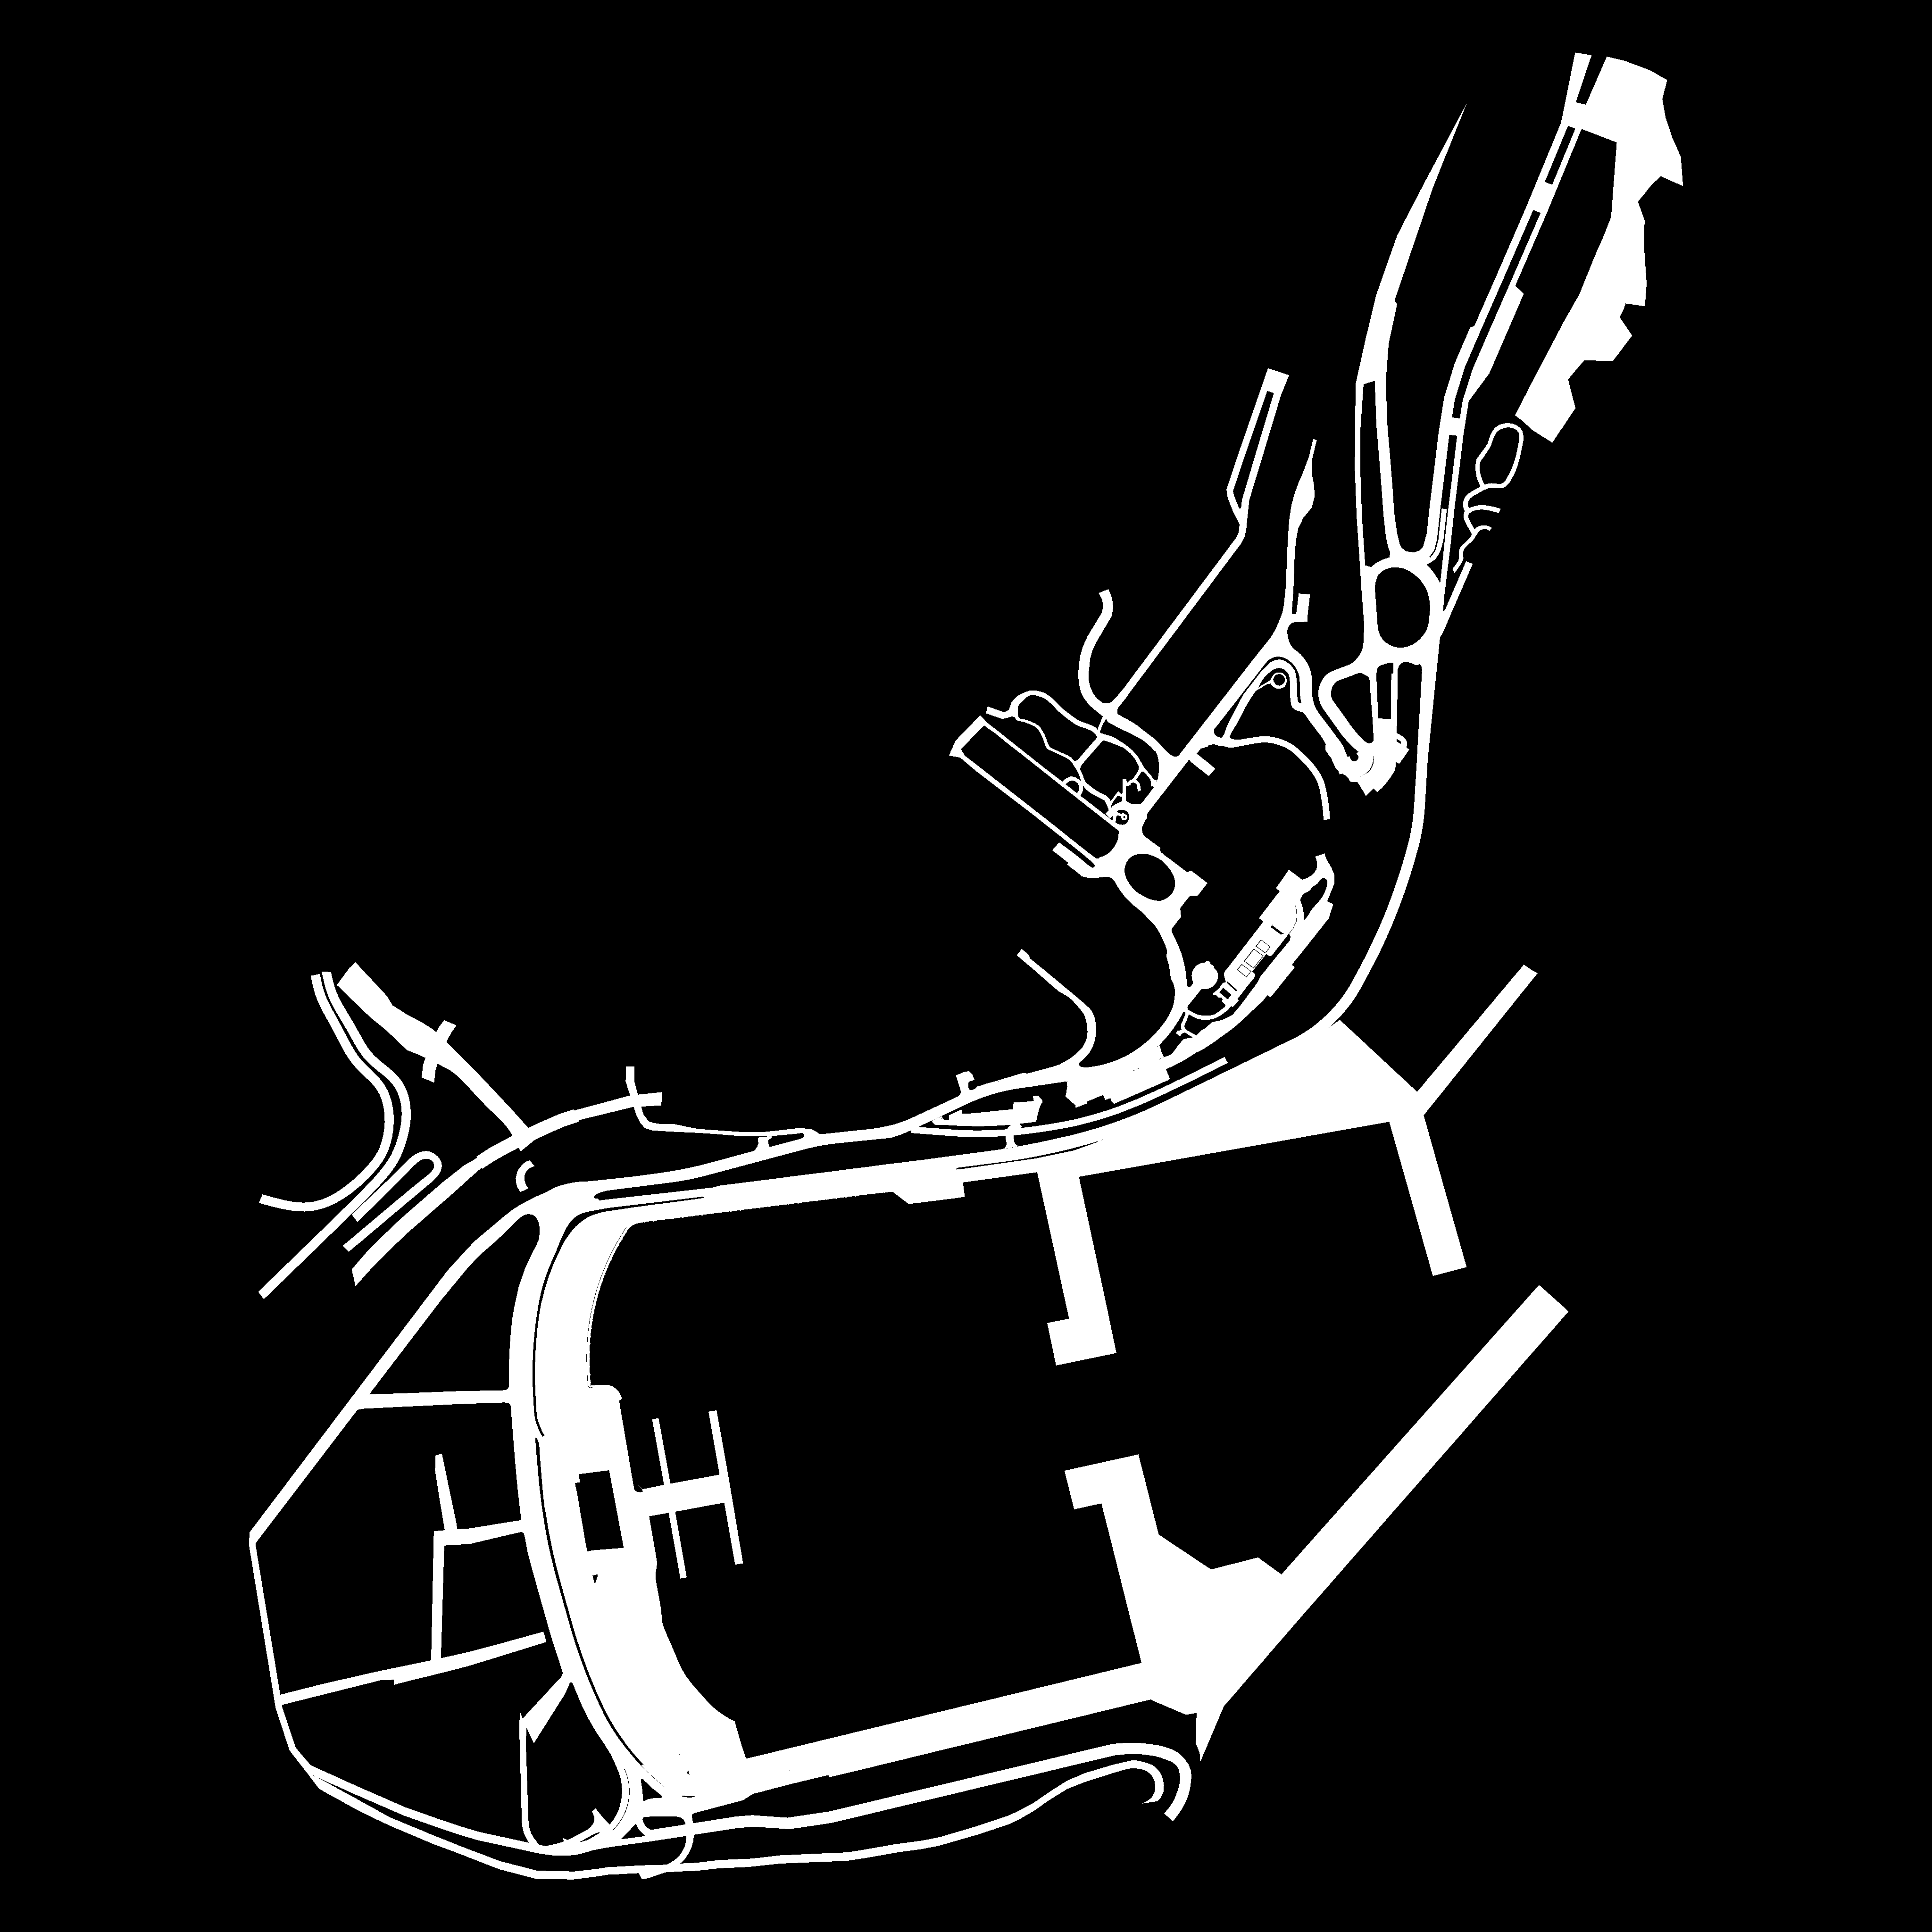
- A mask for all the roads, to bake puddles along the edges of roads
- A 16 or 32bit height map for the roads to bake puddles in natural dips in the surface
- A detail mask, this is vertex colour painted on the mesh where you wish for Dust (R), Groove (G) and Wear (B) to show. Paint in max, export FBX and render Vertex Color in Substance Designer.
In order to generate most of these inputs, it is necessary to do the following:
3ds Max
- In max, duplicate all road meshes and merge them.
- Remove all UVW data, and then acquire a UVW map modifier in channel 1 with the same mapping as the RoadDetailMap uses.
- Before you start vertex painting, you need to set all the vertices on the model to black (make sure you unhide all vertices as well to make sure you don't miss any).
- Paint in Vertex Colour the areas you wish for dust, groove and wear to appear.
- Use separate Red, Green and Blue vertex colour modifiers with add blending mode on the 2nd and 3rd ones.
- Paint using brush with around 5m width
- No need to be super accurate, this is an overall mask. We will add detail in substance.
- Clone the multi material and convert to standard materials.
- Export an FBX file of the object.
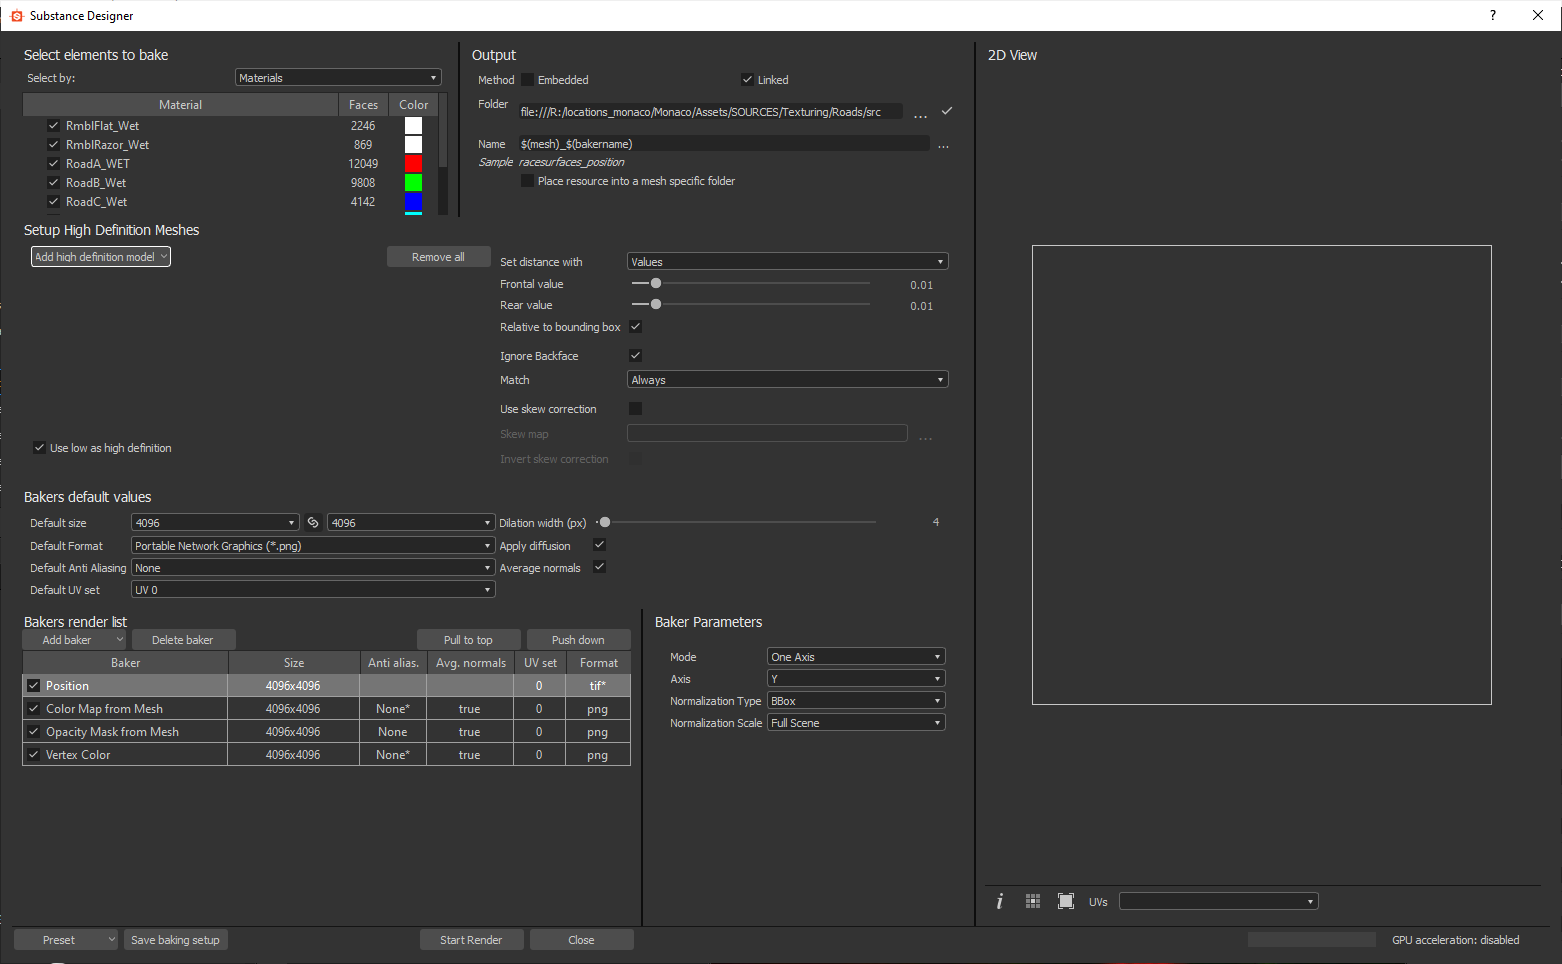
Substance Designer
- Link the FBX file in Designer and now we can bake our maps. (see Bakers info). Within the baking interface:
- Configure the materials to have unique colours as appropriate.
- Assign Curbs white
- Then you can assign Red, Green, Blue and Pink by default to 4 other materials.
- Apply any 5th colour to other materials (say Black).
- Setup a Height Map bake.
- Add a baker for Position
- Settings: Y axis only, BBox and Full scene options.
- Make sure to save in tif format to ensure full resolution of the height map.
- Setup the Material Color bake.
- Add a baker for Color Map from Mesh
- Tick use low as high definition under high definition meshes.
- Choose Material Color as Color Source.
- This file can be saved as a PNG
- Setup the Road Mask
- Add a baker for Opacity Mask from Mesh
- Once again PNG is fine here
- Setup Vertex Color
- Add a second baker for Color Map from Mesh
- Rename the baker to Vertex Color (double click on the name to do this)
- Select Vertex Color as the Color Source
- Start Render and this will output all your required inputs.
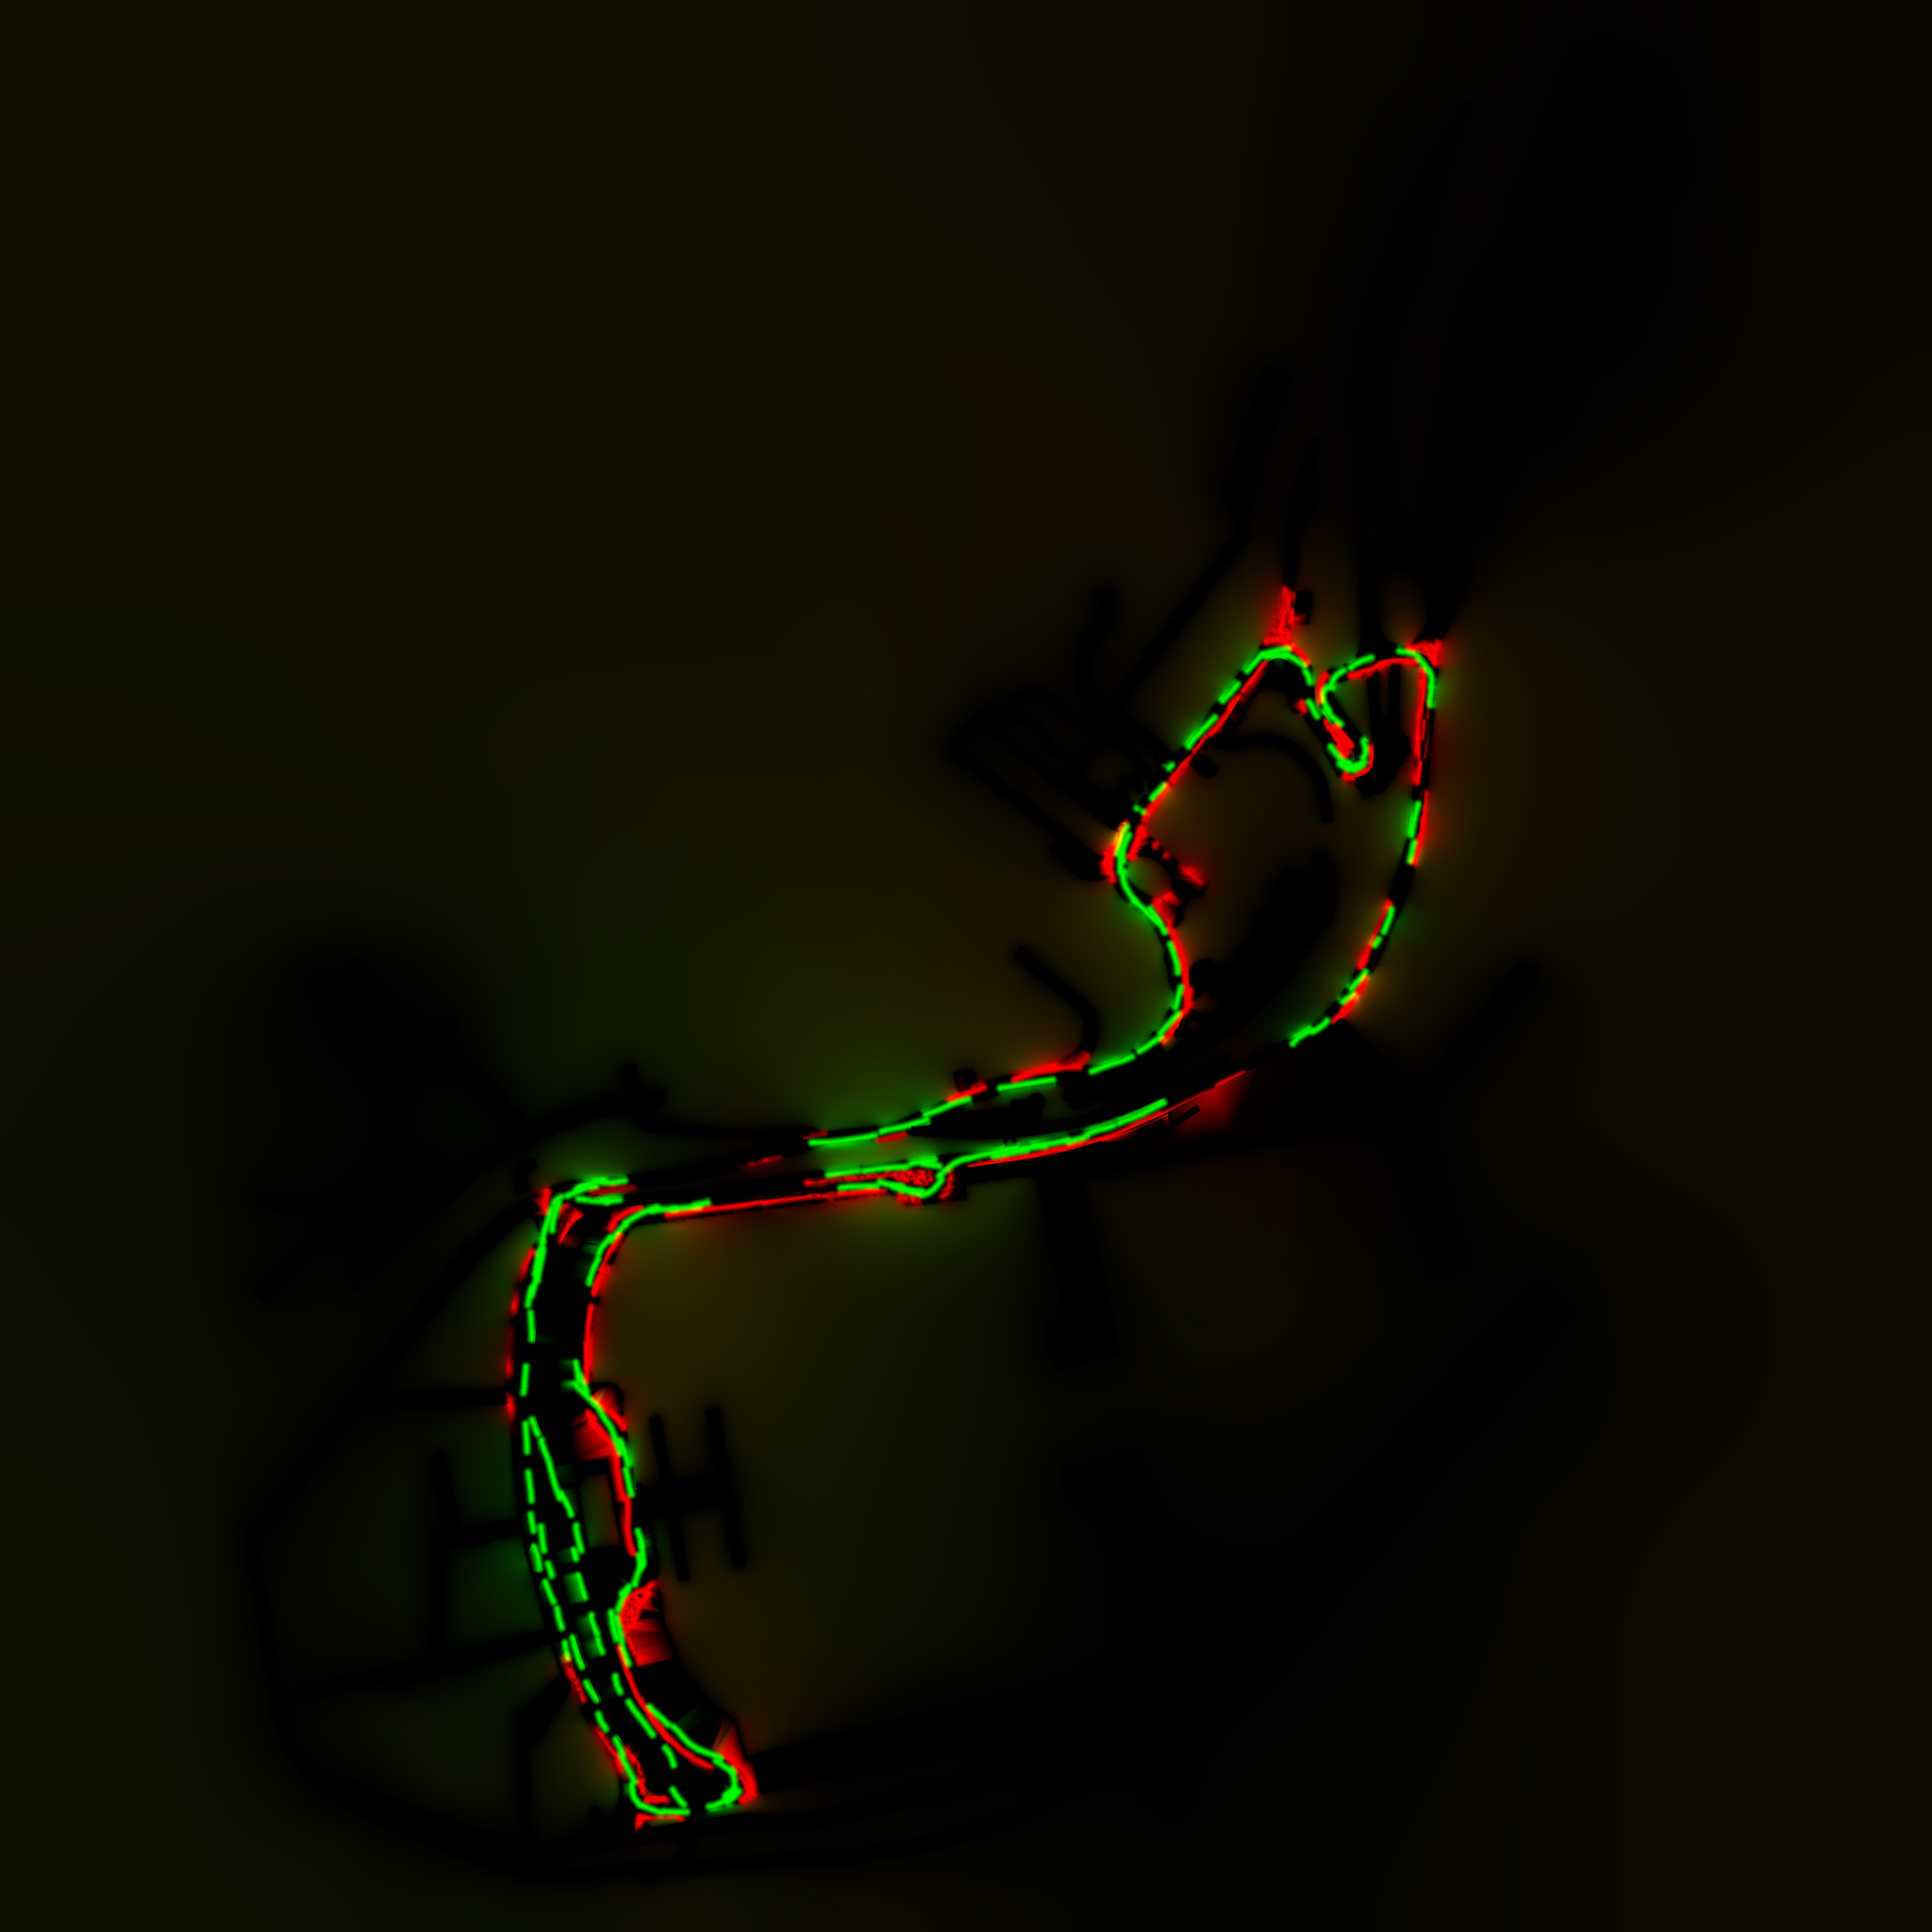
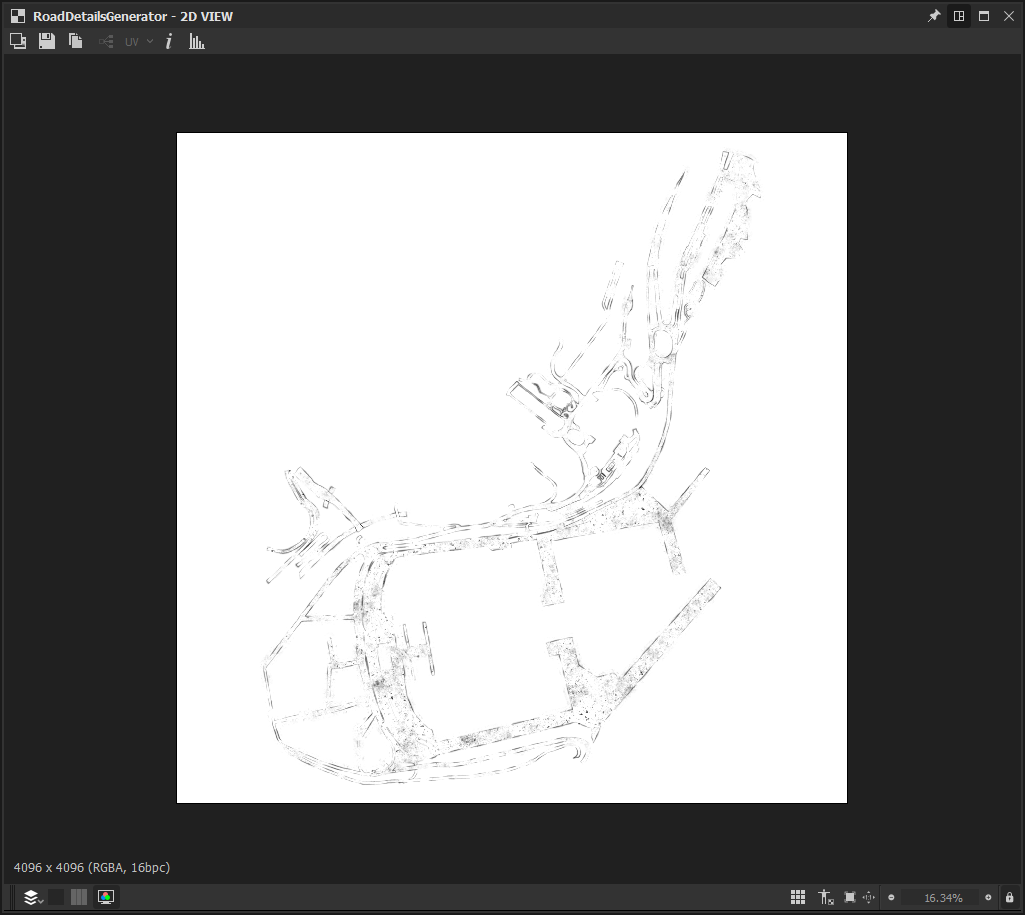
Beneath you can see the sample setup for Circuit d'Azur.
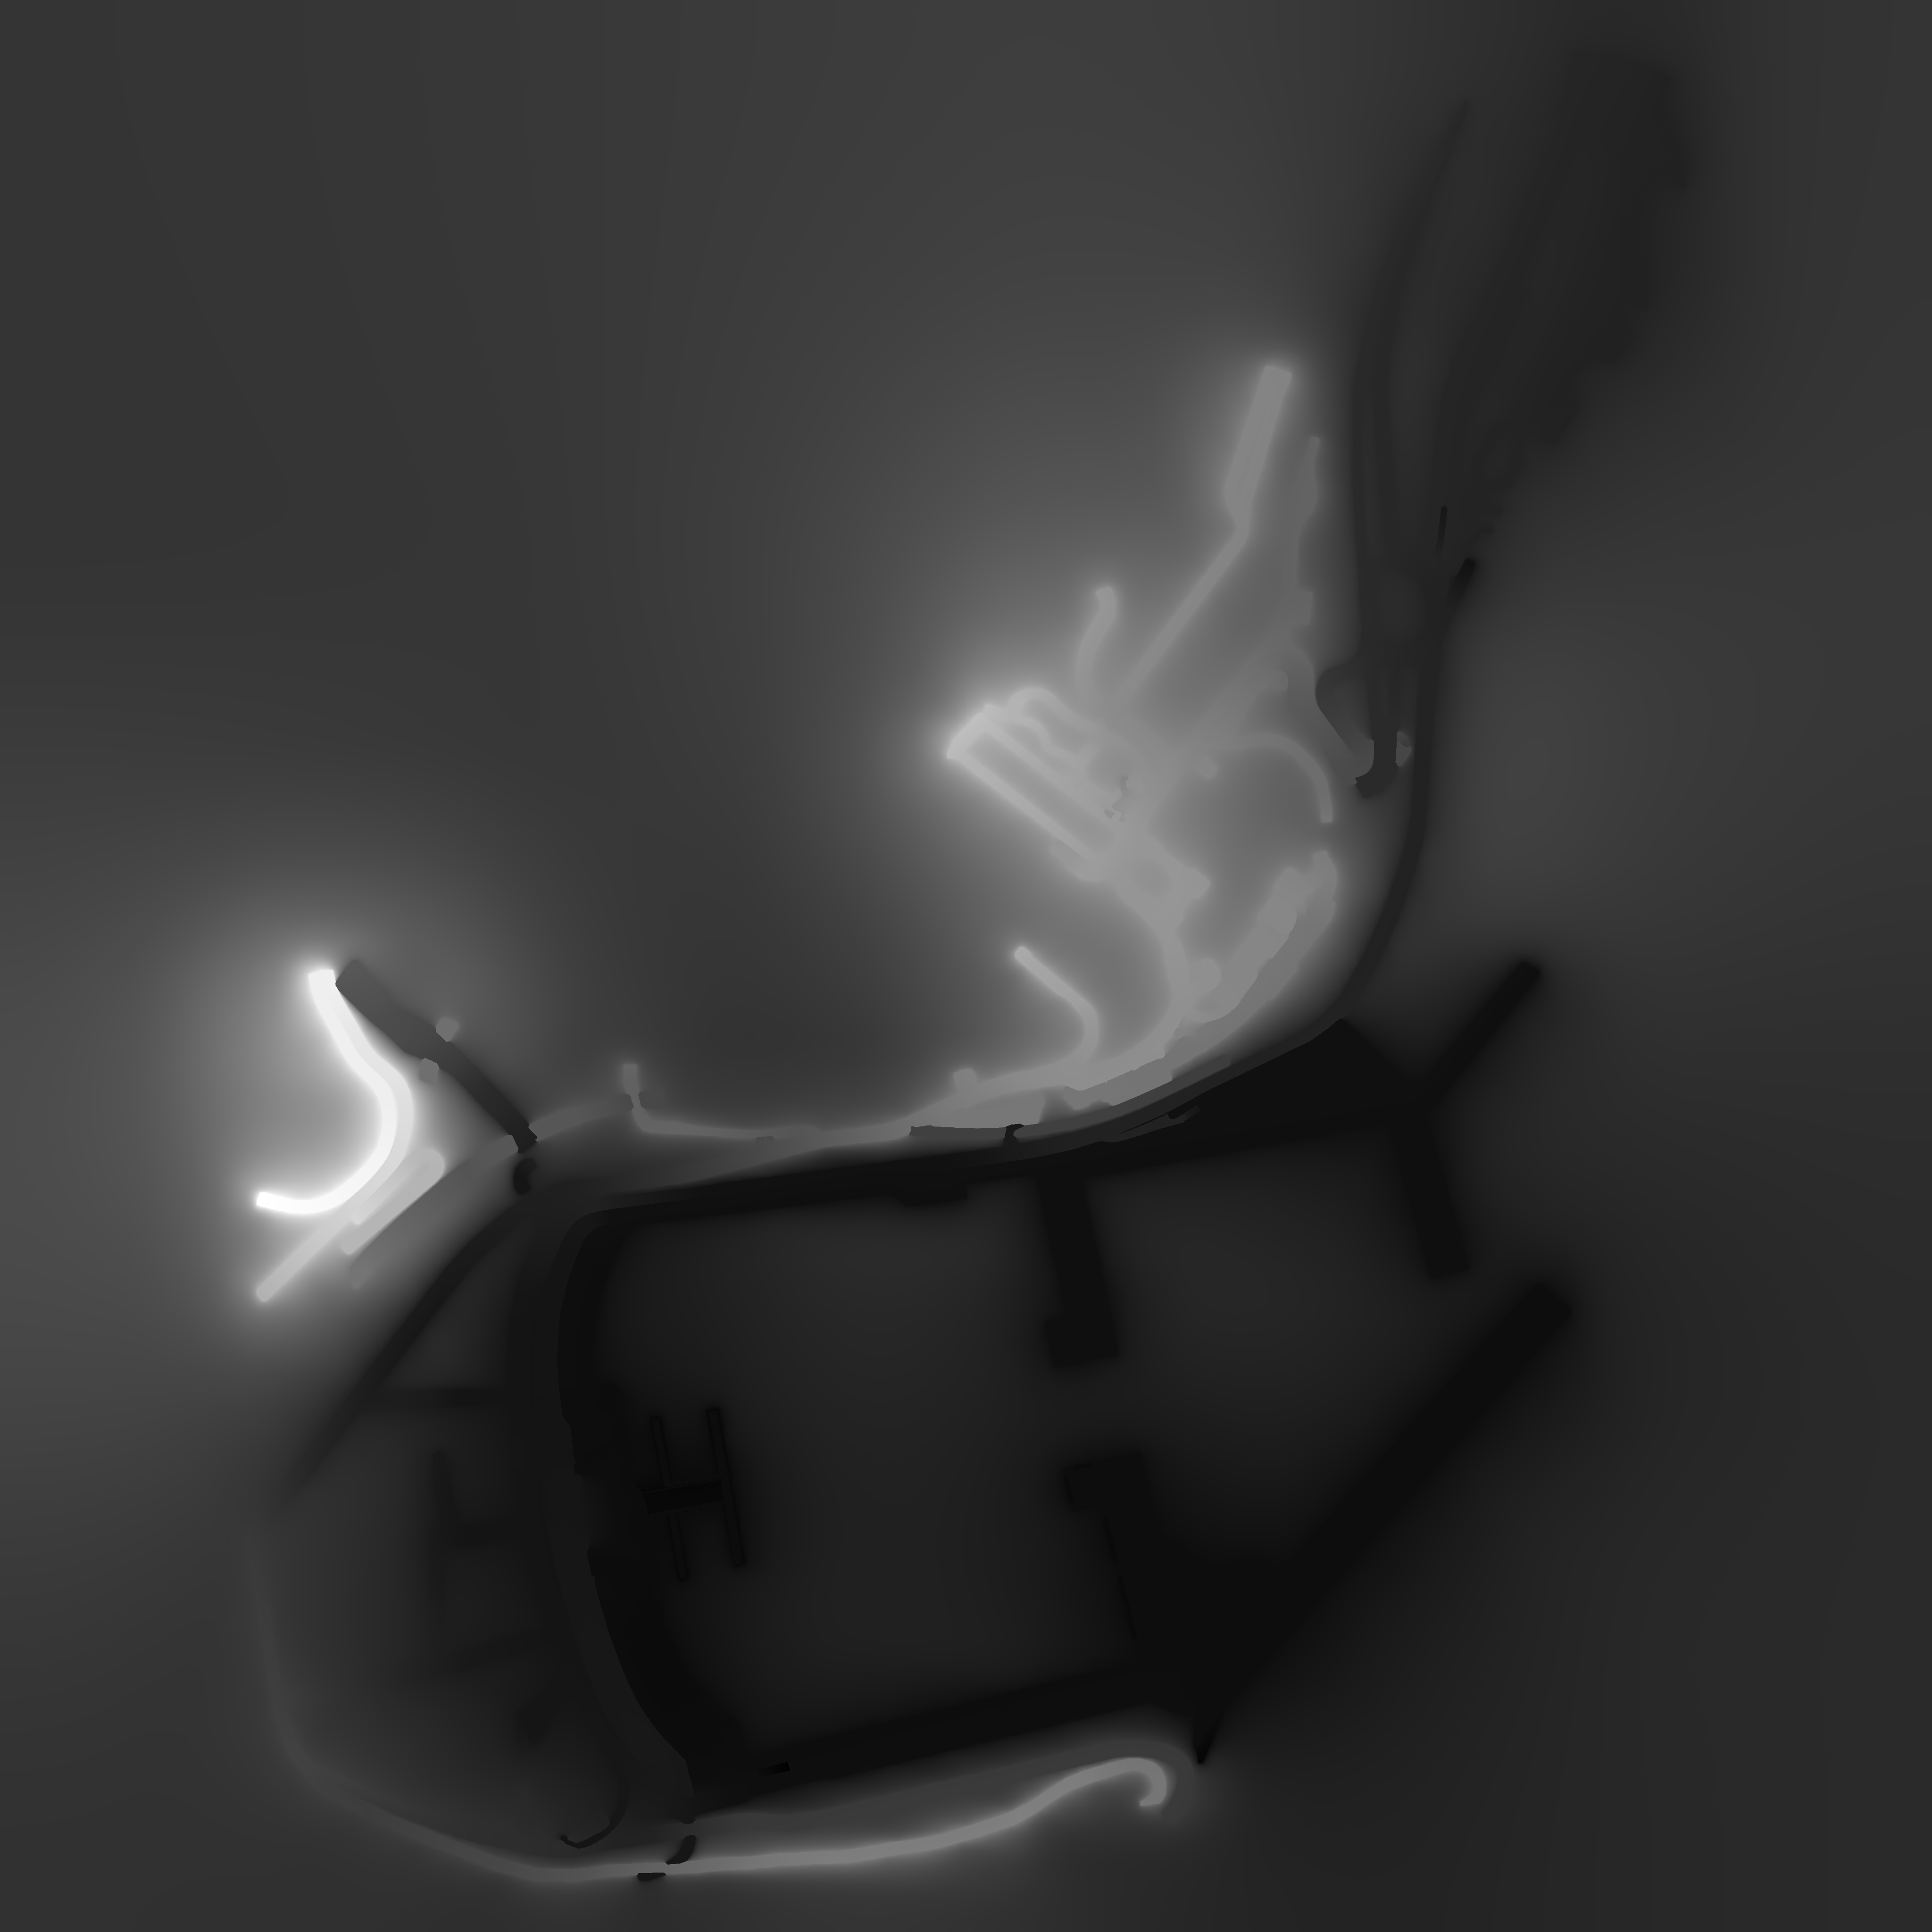
Hook up the generated masks to the RoadDetailsGenerator as follows:
- Position → Height
- Color Map from Mesh → Material Mask
- Opacity Mask → RoadMask
- Vertex Colour → Detail Mask
You can then configure various parameters and scalars to adjust the effects as you please.
The generator outputs both the final result and various steps along the way to help you fine tune the settings.
Sample Final Road Details Map:
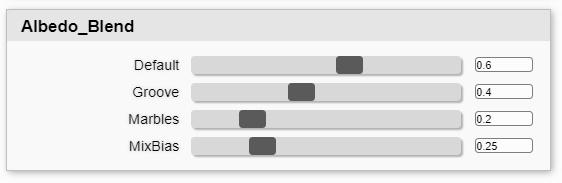
Curb Shader Albedo Maps & Blending
When using the Curb Shader, the maps are re-arranged a little and we have a second Albedo Roughness Map to play with.
These two maps are blended together based on the road information so that in some areas the same curb can look more worn.
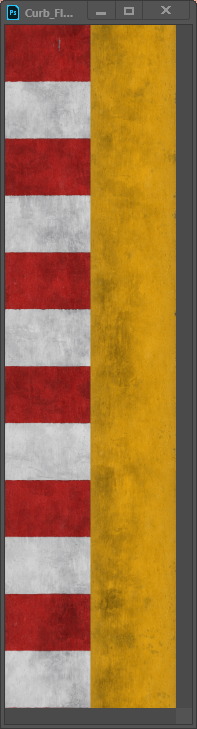
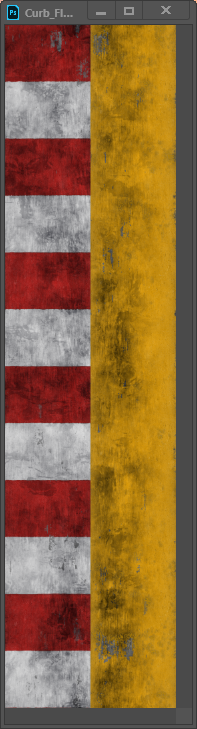
The shader parameters beneath allow us to configure this, splitting up how much of an effect comes from the Road Detail Map's Wear Information found in the blue channel, as well as how much the blend occurs based on current Groove and Marbles levels.
The blend is carried out using a mix map function, using the blendMask and the bias configured beneath.