Ambient Probes
This guide will help the Artists to implement Ambient Image Based Lighting to the tracks, to improve lighting in the scene.
A brief introduction to Image Base Lighting
IBL is a technique that instead of using a single flat and arbitrary ambient color, it's creating an image, from sampling the scene around, with sky, sunlight and everything, and then mapping this image onto a dome (a sphere). That dome will be used to project that image lighting toward its center, that in our case is the track scene. This process is called convolution.
Thanks to this process, the ambient color will show many variations that have been sampled from the actual scene, giving the scene a much more natural and richer look
How our version of IBLA works
In our version of IBLA, we have two options to manage the influence of the irradiance, applied to the scene.
The main one, which is also the stock version required for all tracks, it's the Global Irradiance probe. This is a main probe, that must be placed in a representative area of the track.
Important
The second option is to use 3D Volumes (Convex Hulls), which are the best option for occluded areas of the track, like garages, tunnels, or roads in between high buildings... and any similar situation where we need to sample the light from the inside of a volume. In the case of a pitlane with garages, that Hull would be nothing more than an easy volume mesh, covering that area, and with a probe inside it, placed in the best position to sample the surrounding.
In general, for a track with garages, a Global Probe and a Hull volume, it's enough to give the entire track a balanced ambient light.
If needed, we can use more hulls, just in case we have tunnels, and other places where the track has very unique situation than the rest of the course. Like, for example, a course that does flow in the middle of a grass field, and then enter in a city. In this case more hulls are probably the best option to sample and interpolate the two different situations.
We can only have 1 Global Probe.
Where to place a Probe in the track scene
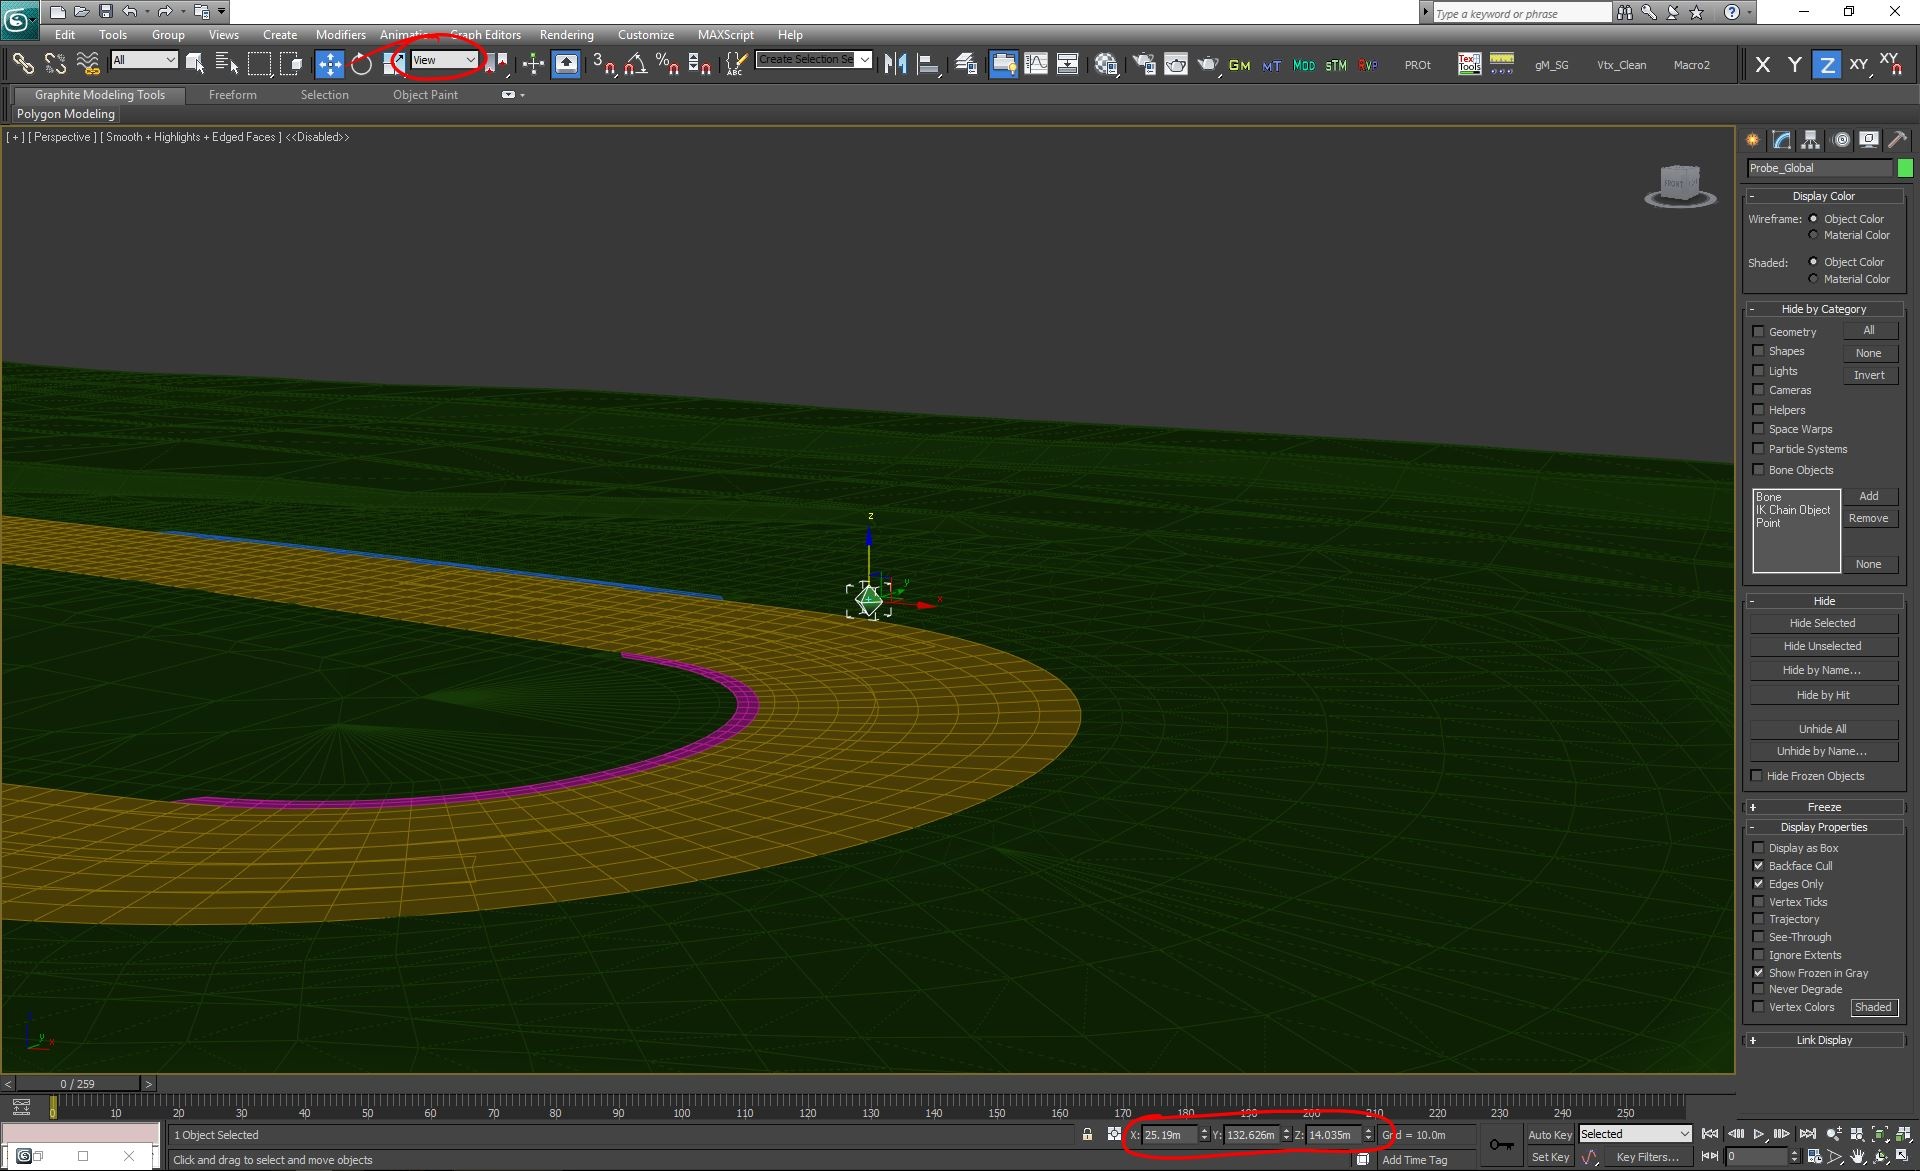
As said earlier, for the average track, the best place to place a Global Probe, is where we have a representative view of the surrounding. It's important to place the Probe always above the road centerline, to avoid sampling to much green from the grass infield.
In terms of procedure, all we have to do is to create a small dummy sphere (like 30cm diameter), and let's call it Probe_Global, just as reference. This mesh, as its name in the model, are not used by the code. They are just reference for us, to extract the Probe coordinates. We do not export this mesh.
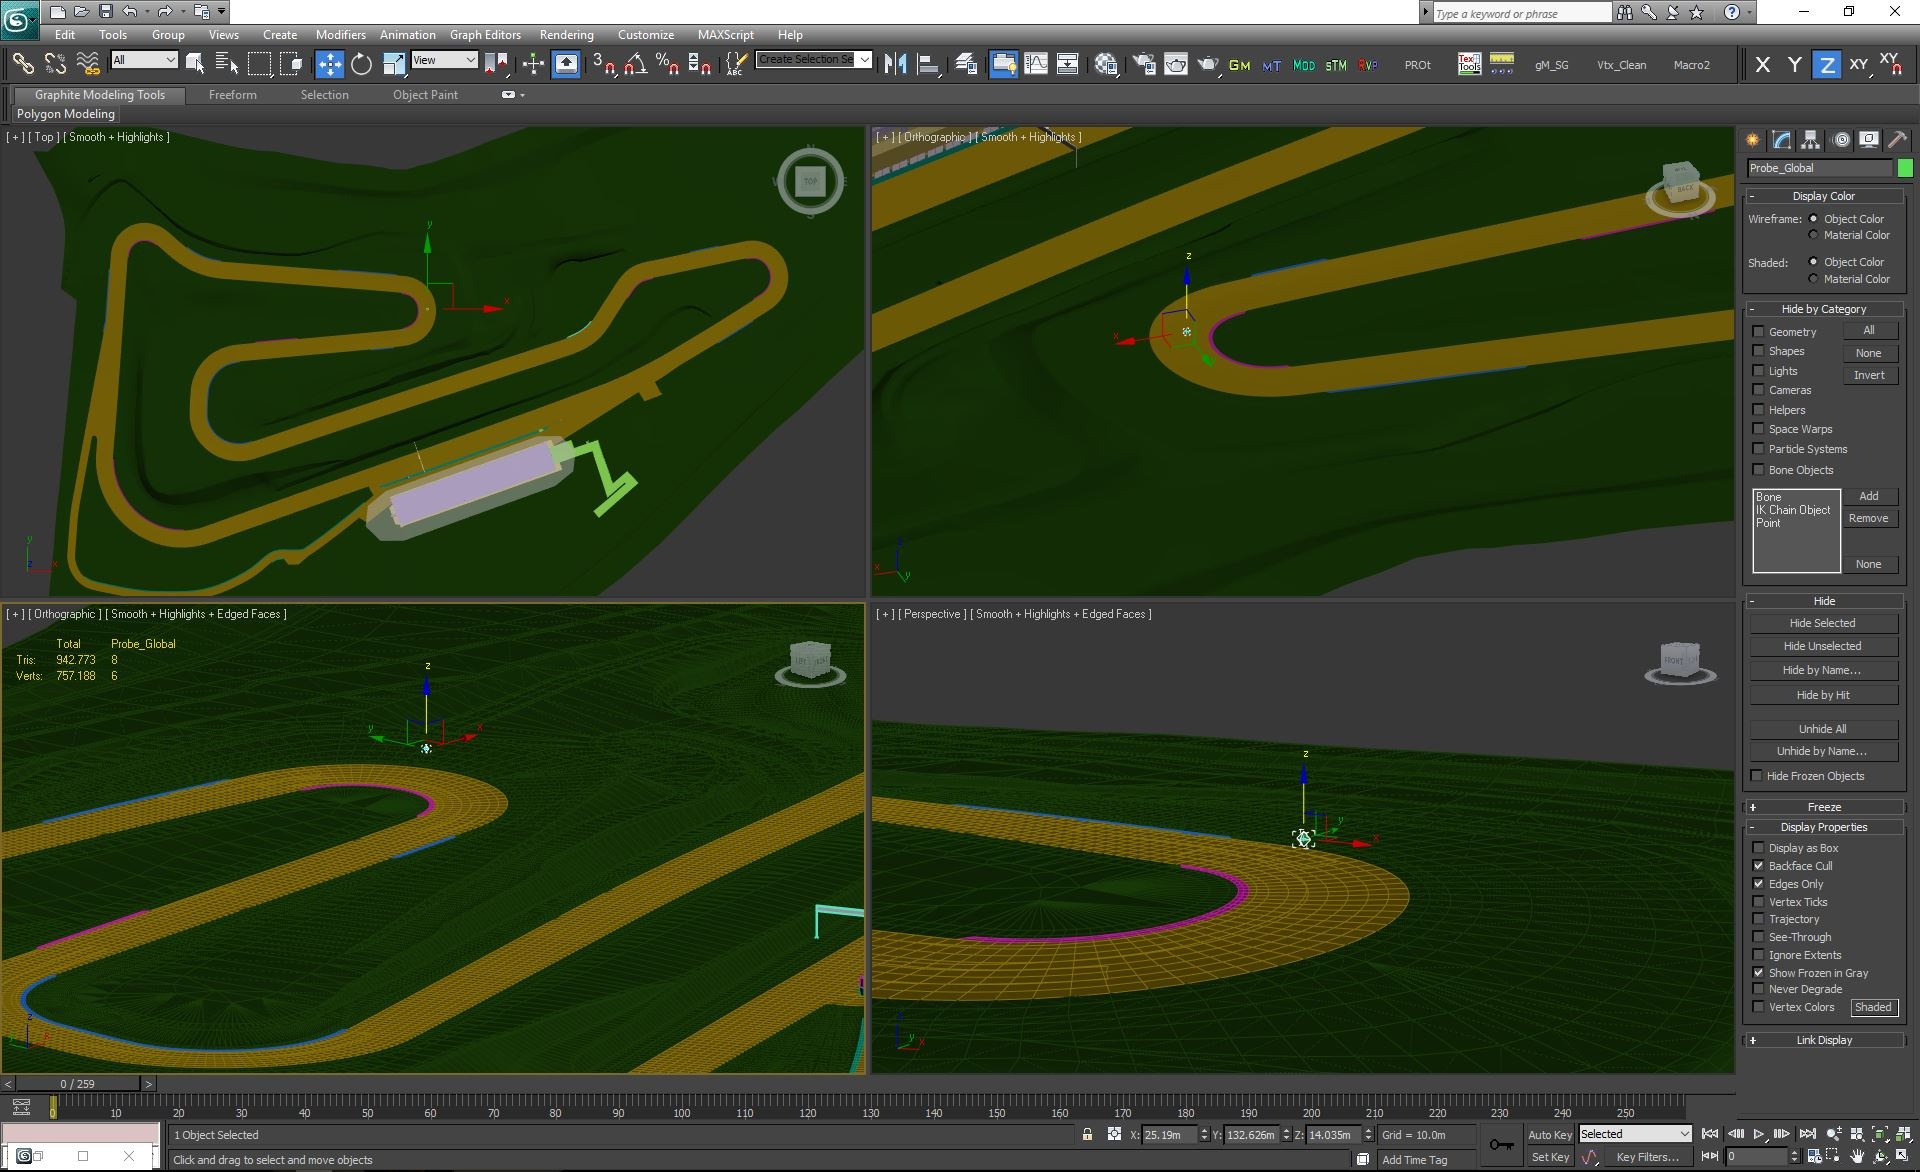
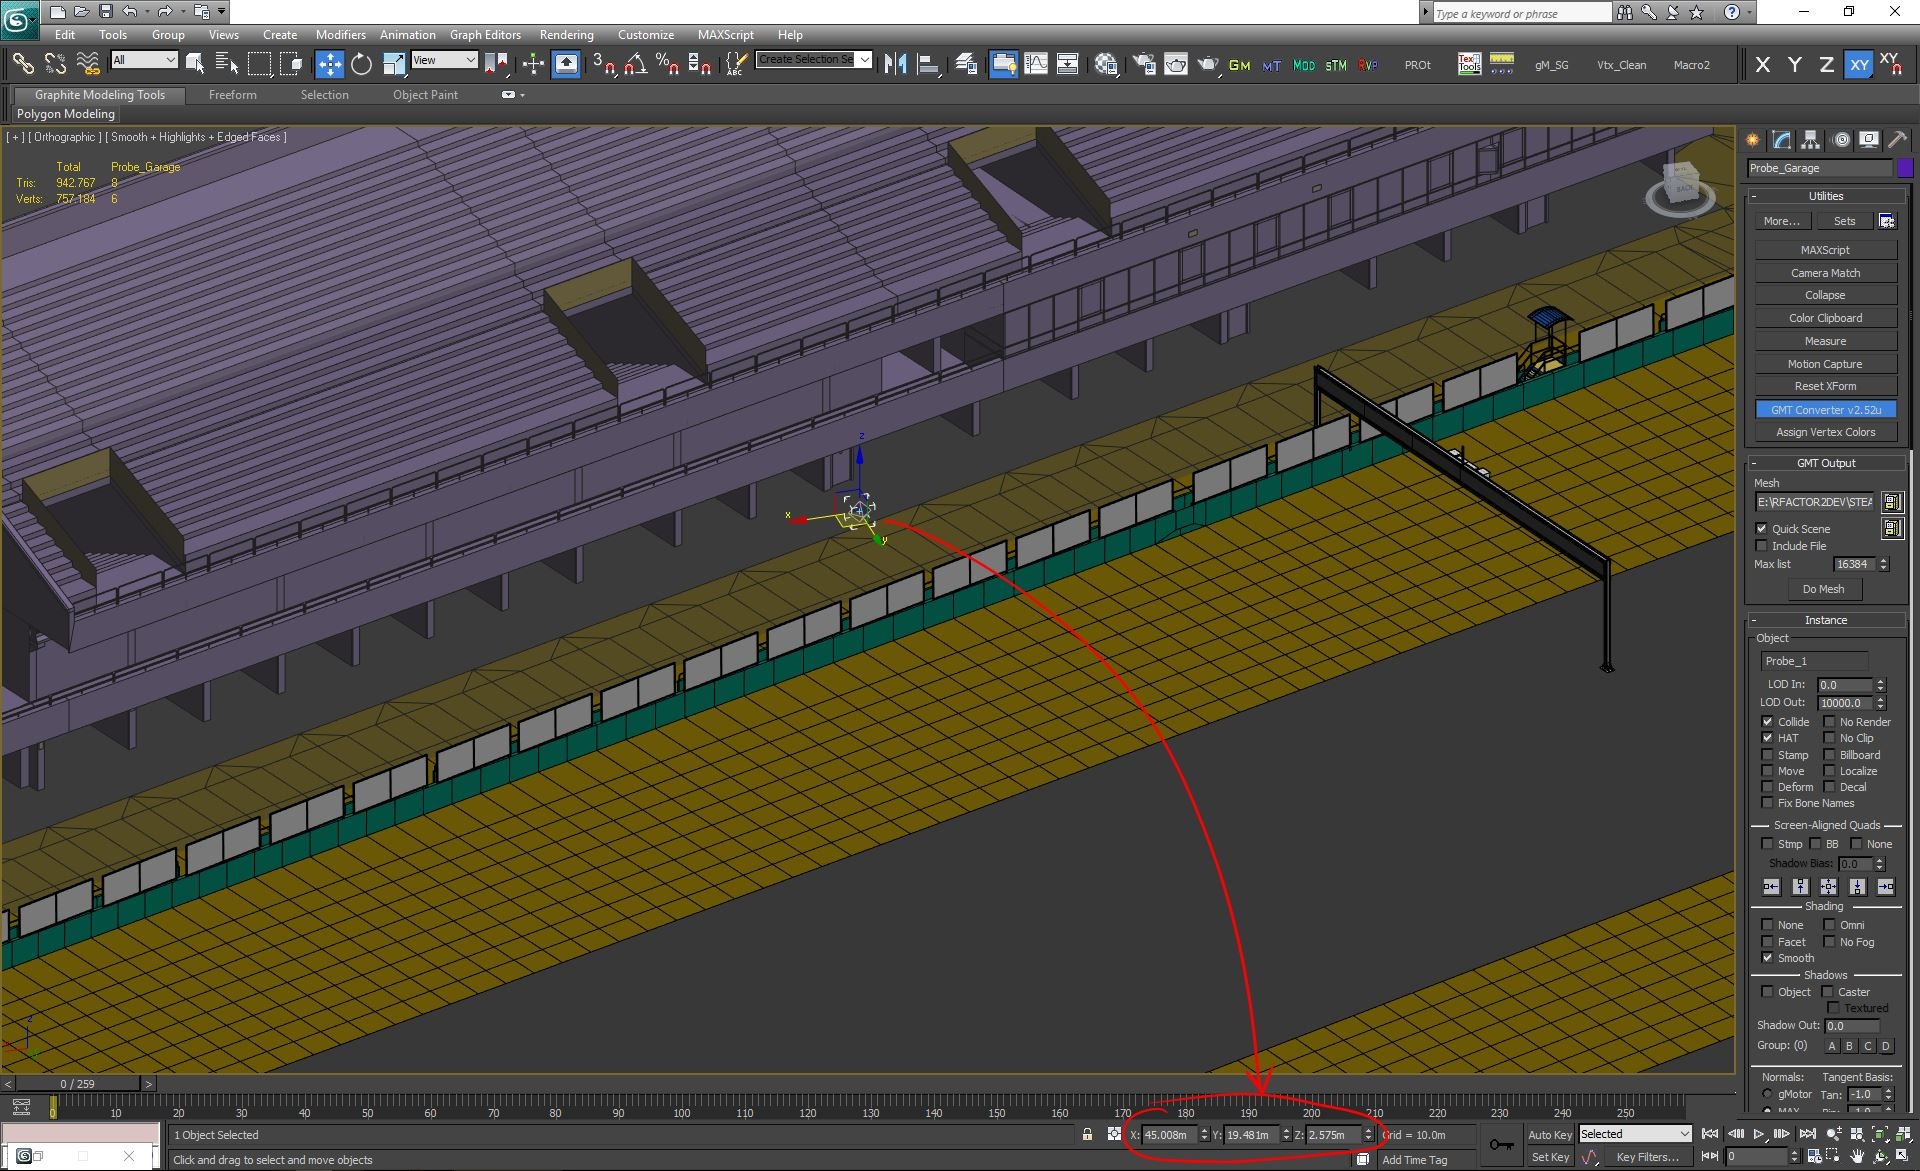
Once we have placed our dummy sphere on a place that we think it's good, all we have to do is to copy and paste the X,Y,Z coordinate in our Track .SCN file.
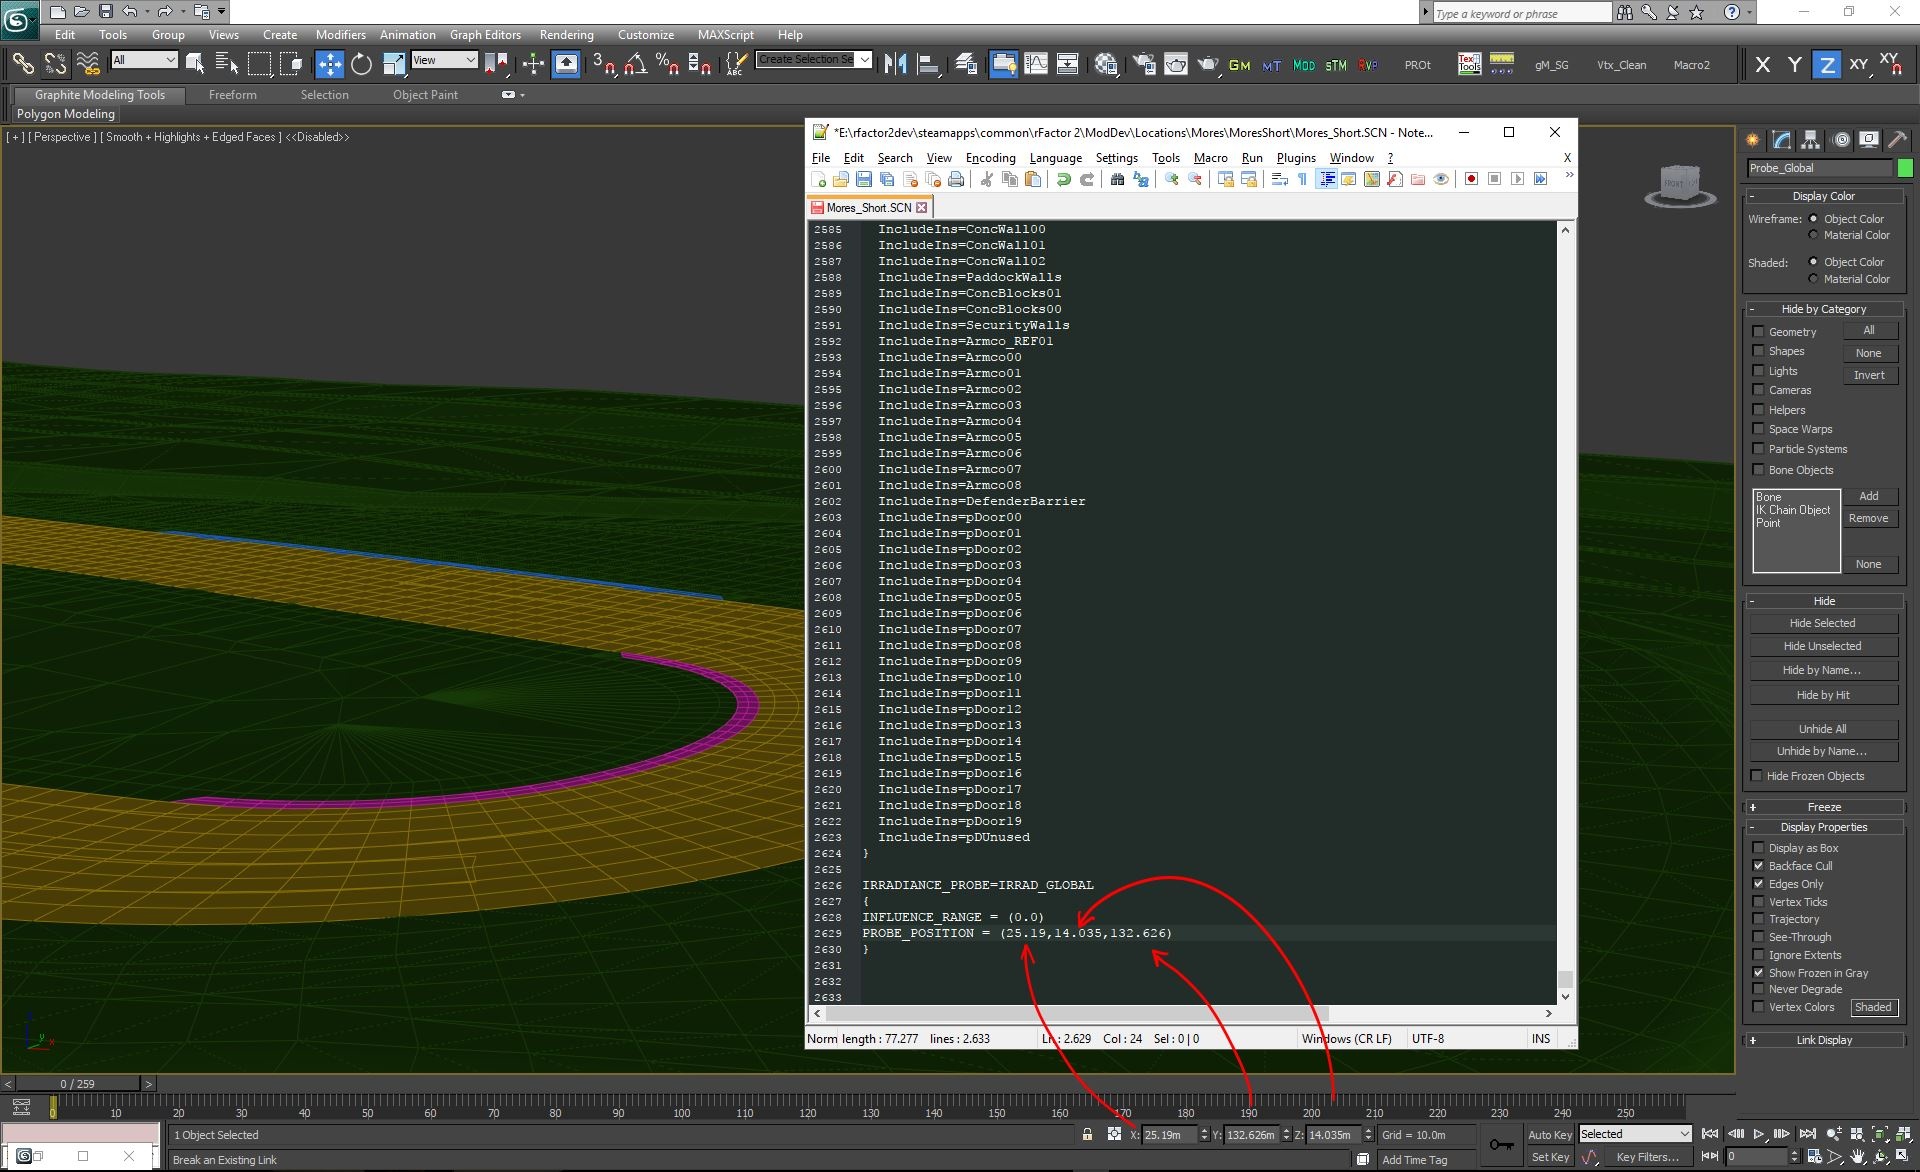
Like any other Reflector, our Probes are sitting at the end of the scene (.SCN) file, using this syntax;
IRRADIANCE_PROBE=IRRAD_GLOBAL
{
INFLUENCE_RANGE = (0.0)
PROBE_POSITION = (25.19,14.035,132.626)
}
The only section that we need to edit, is the PROBE_POSITION. You don't need to assign an INFLUENCE_RANGE for the Global probe. This will affect the entire scene, until (and if) a Hull, or more, will be found in the scene, and then interpolated with their own ranges.
Remember that we have Y-up in the .SCN, while our 3D Max is using Z-up, so just be sure you are assigning the Z to Y, and the Y to Z, when copying the values from 3Ds Max to the .SCN file.
Also be sure you are using dots "." as a decimal separator, instead a comma "," which is used to identify the 3 axys in the PROBE_POSITION coordinates set.
How to create and place a Hull in the track scene
To create a hull we just model an easy closed volume mesh (can be open at the bottom), that can also use chamfered sides, so that we don't have just a primitive box volume. We can also use just a simple primitive box for places like regular garages etc. Just avoid too many faces for these mesh as this is affecting the calculation. Too many faces can impact the performance, especially if we have multiple Hulls with many faces. Keep it simple.
We'll be shaping and placing this volume on top of structures that can be viewed from the inside. In this case we have garages sitting inside that big grandstand;
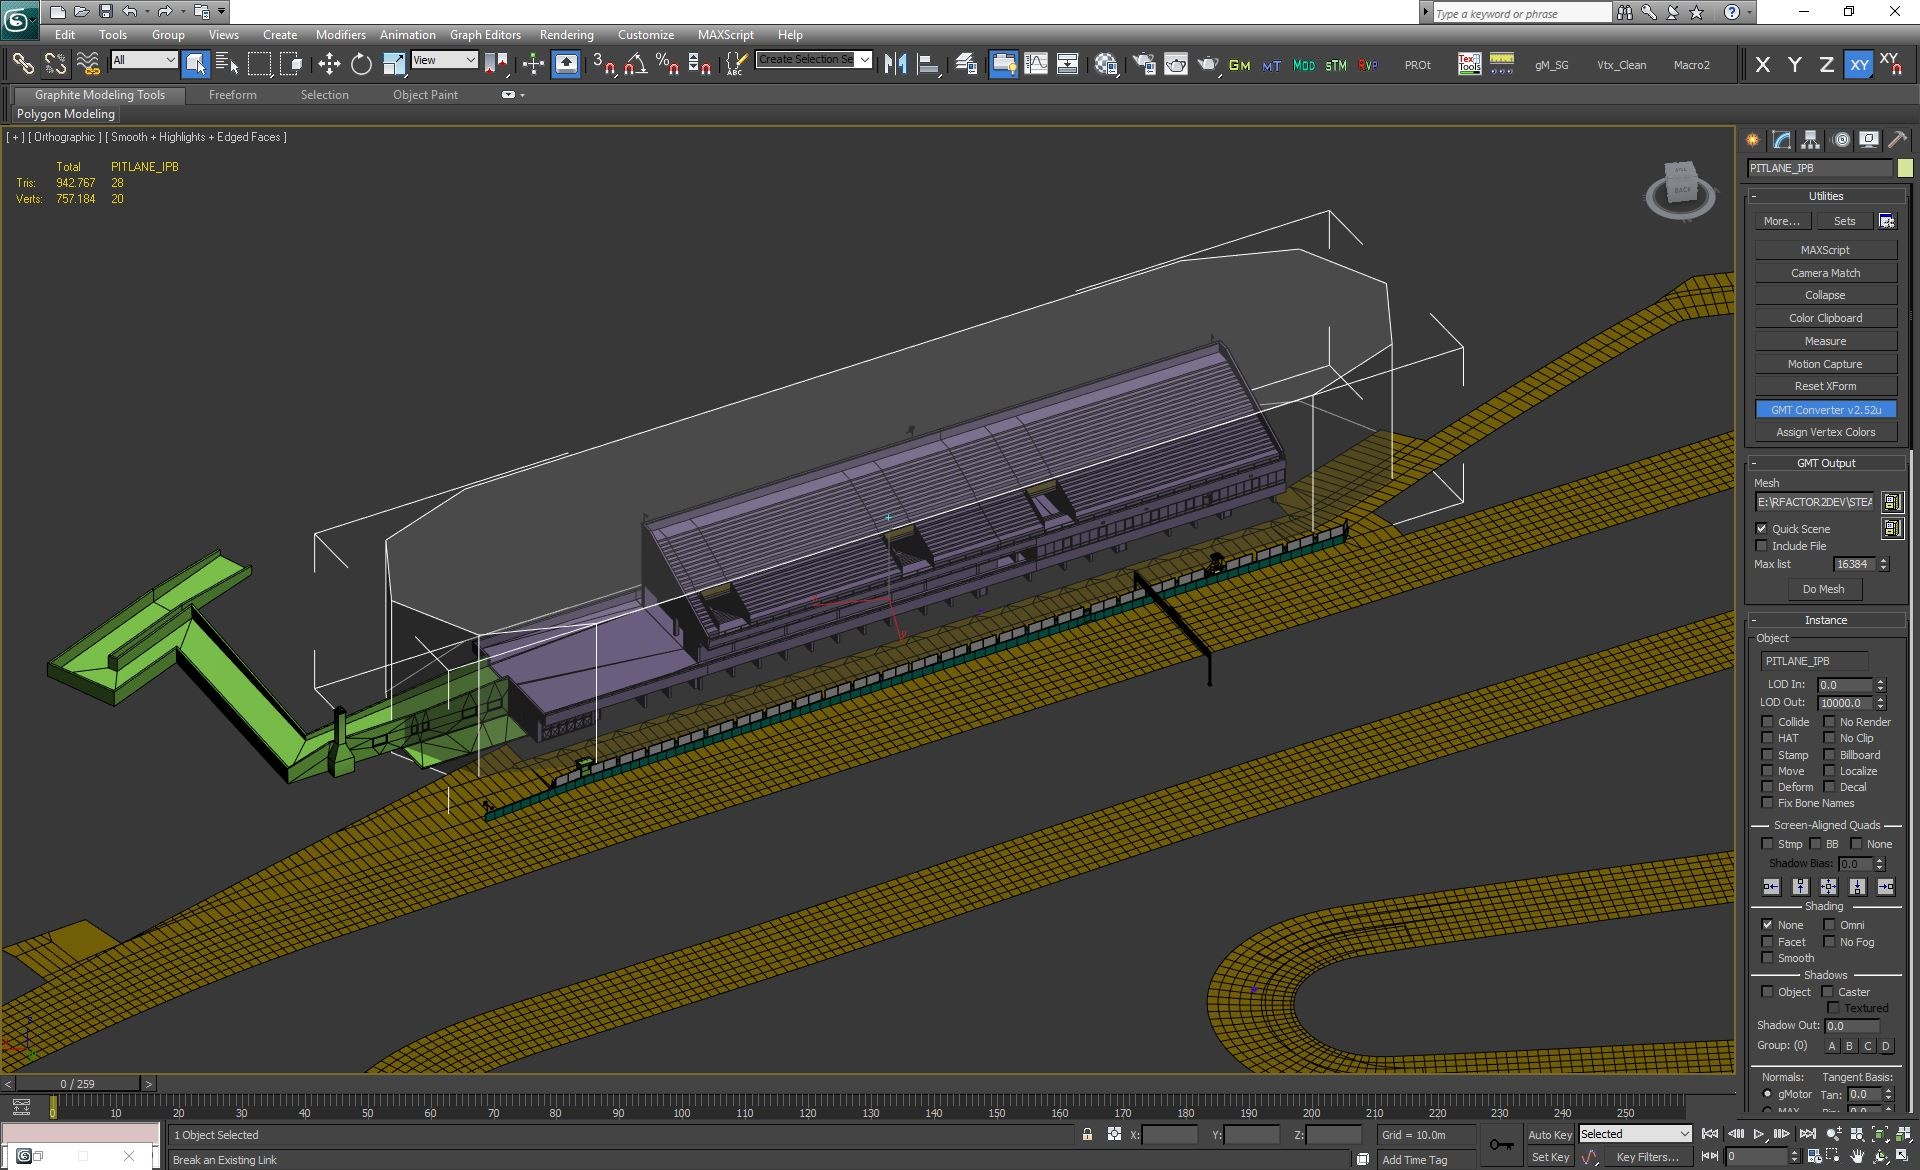
We will also create another dummy sphere, for the probing, thad does sit inside that hull. Let's keep this probe low on the ground, and just above the pitlane ground, in front of the garages. You can also put the probe just inside the garages if you want a more "occluded" sampling. We don't suggest this practice, as would make the transition more visible and less natural.;
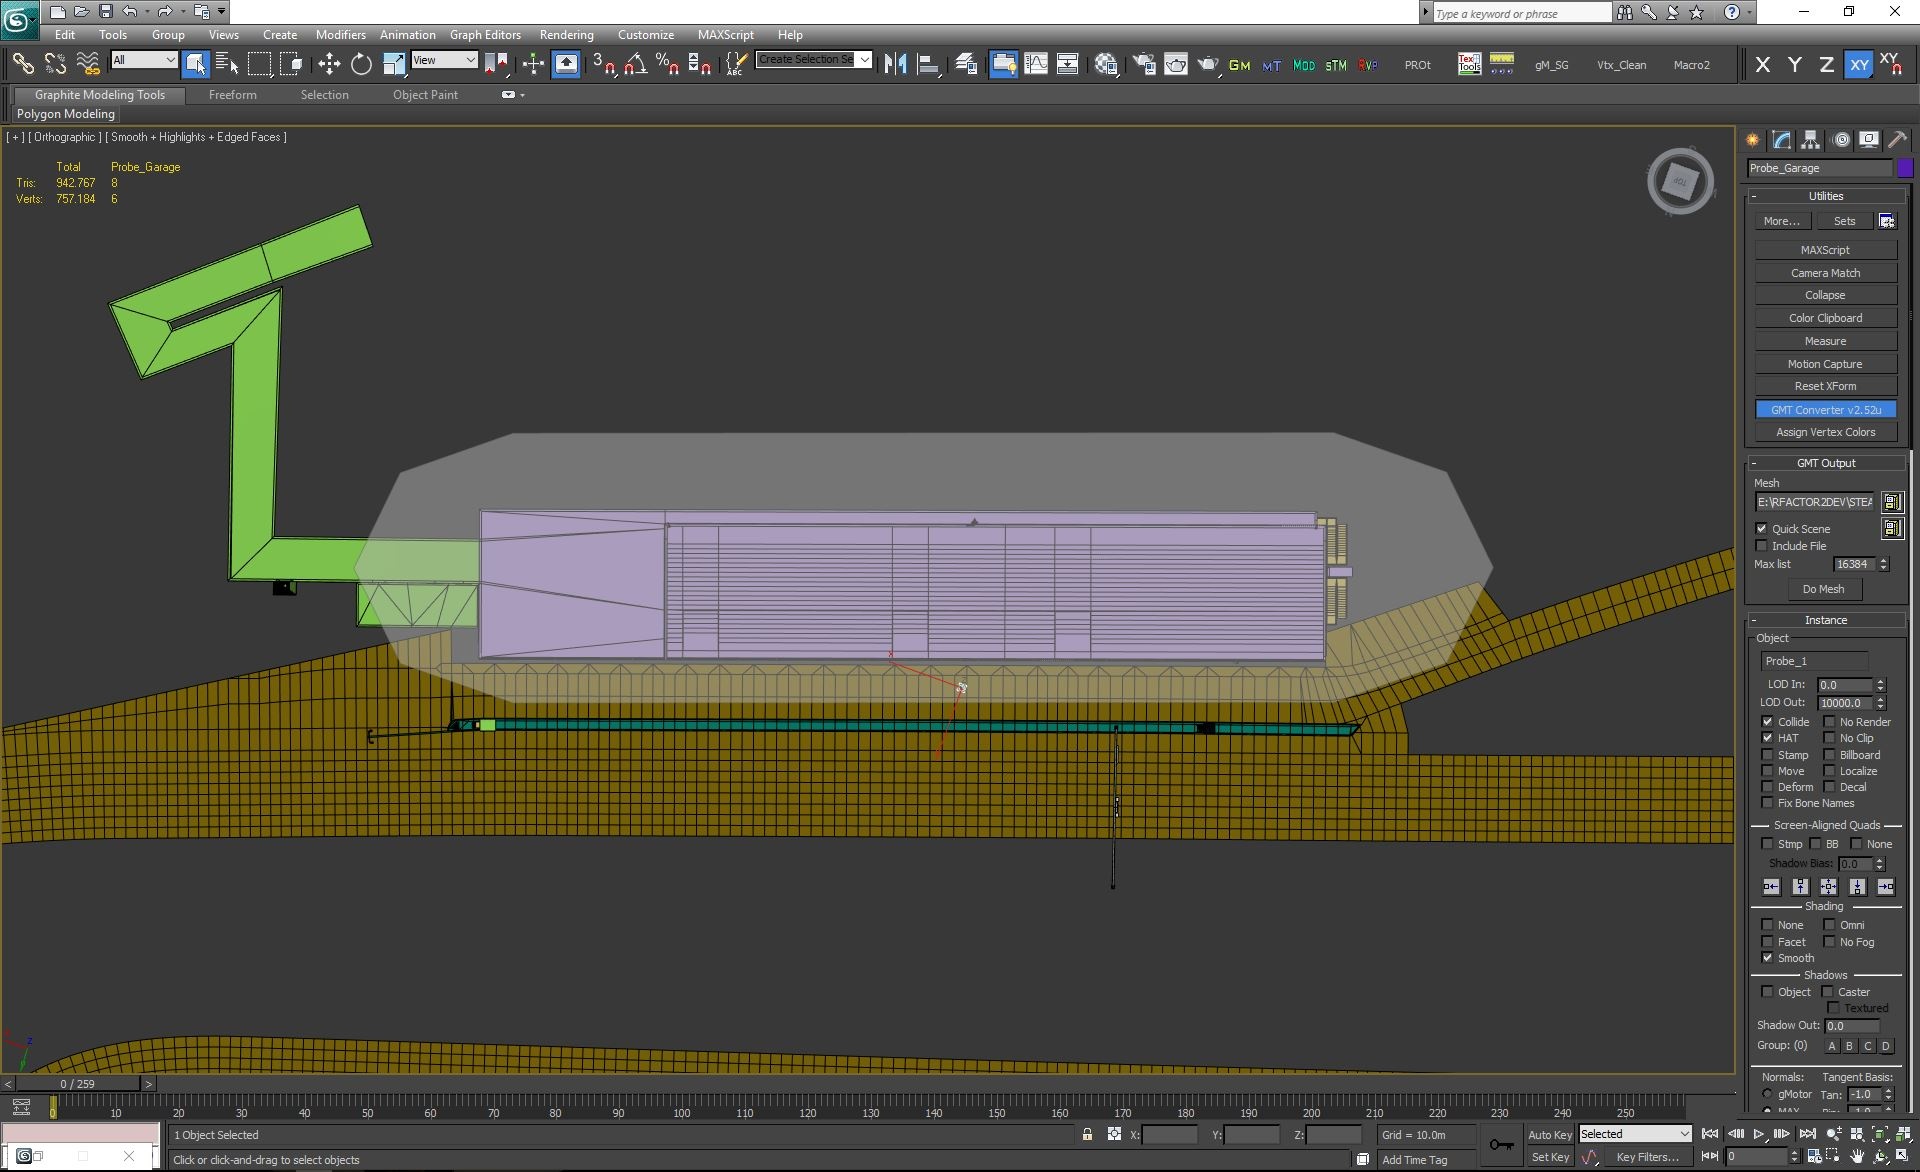
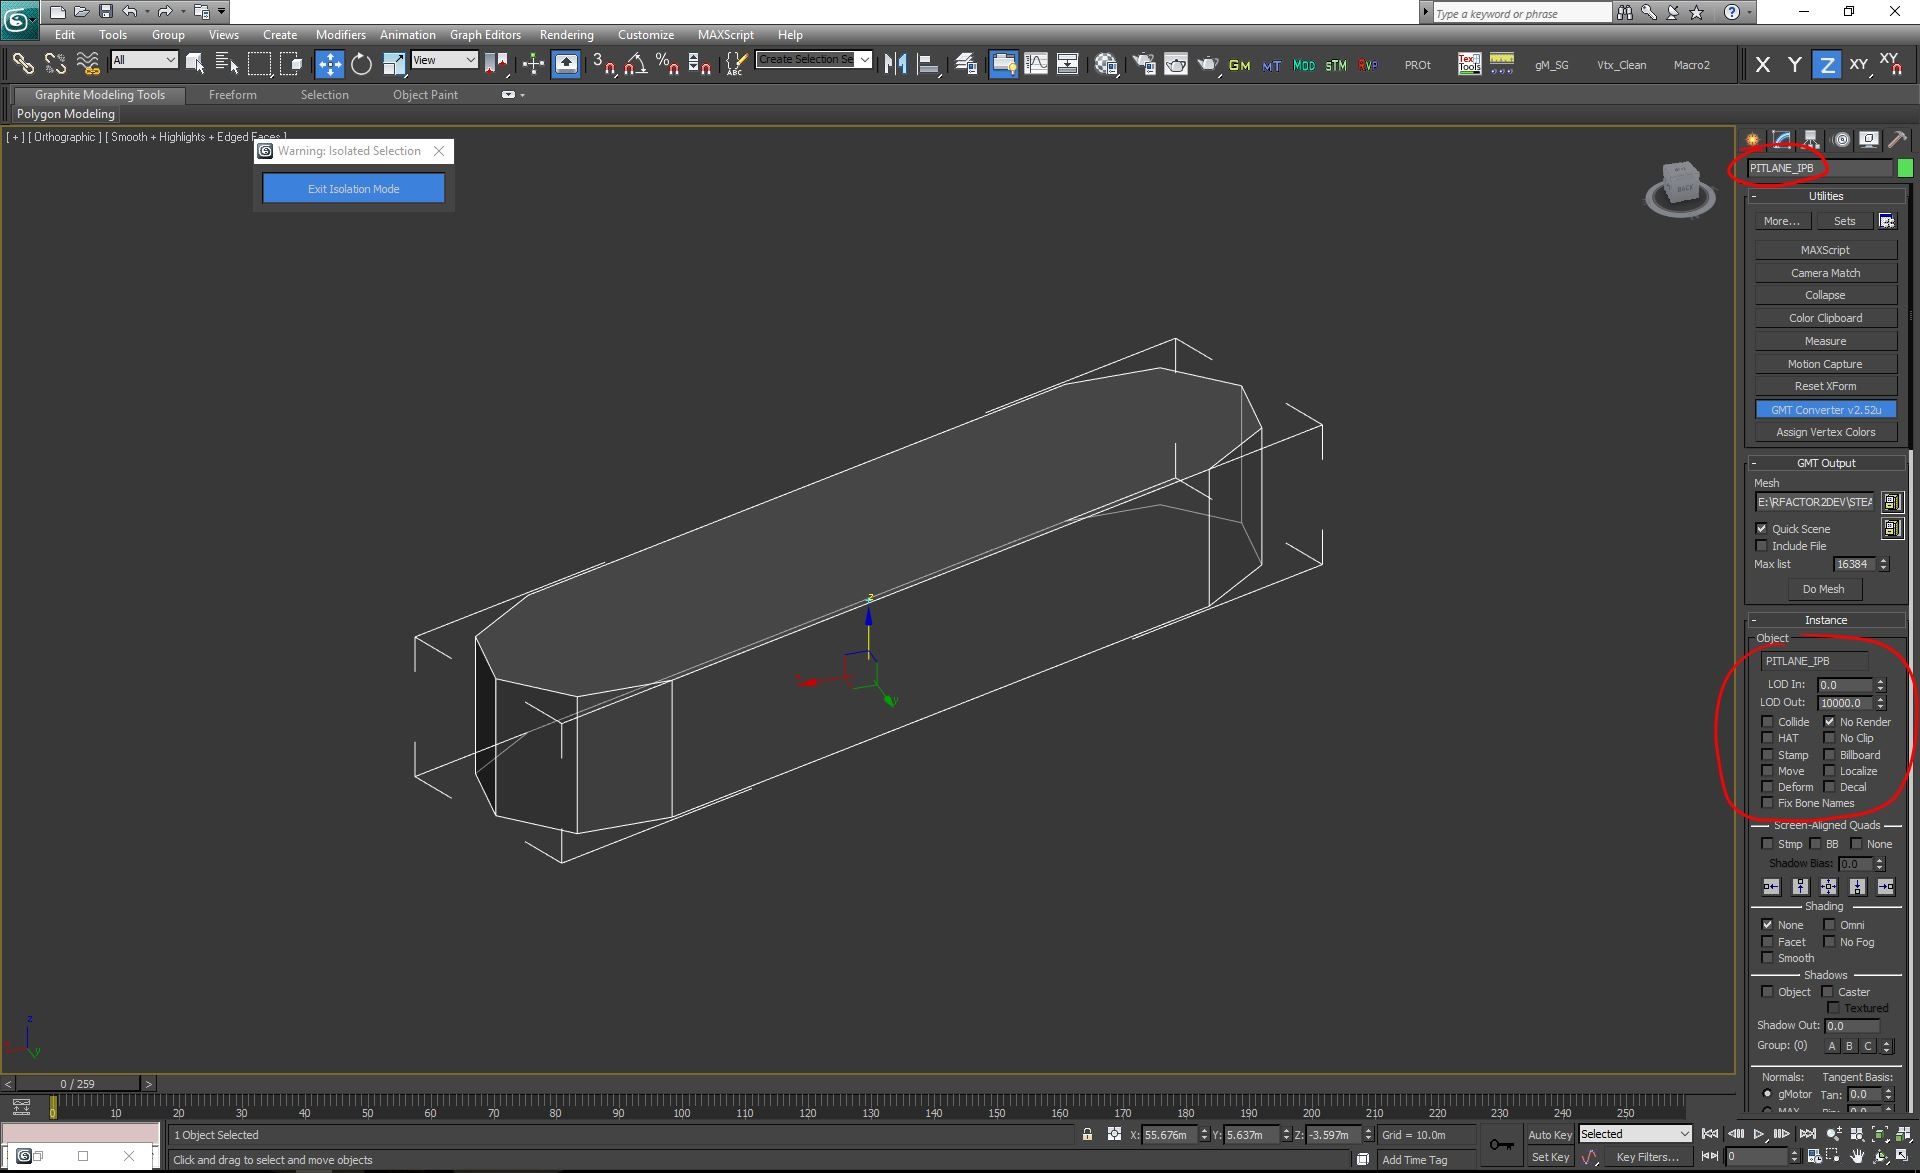
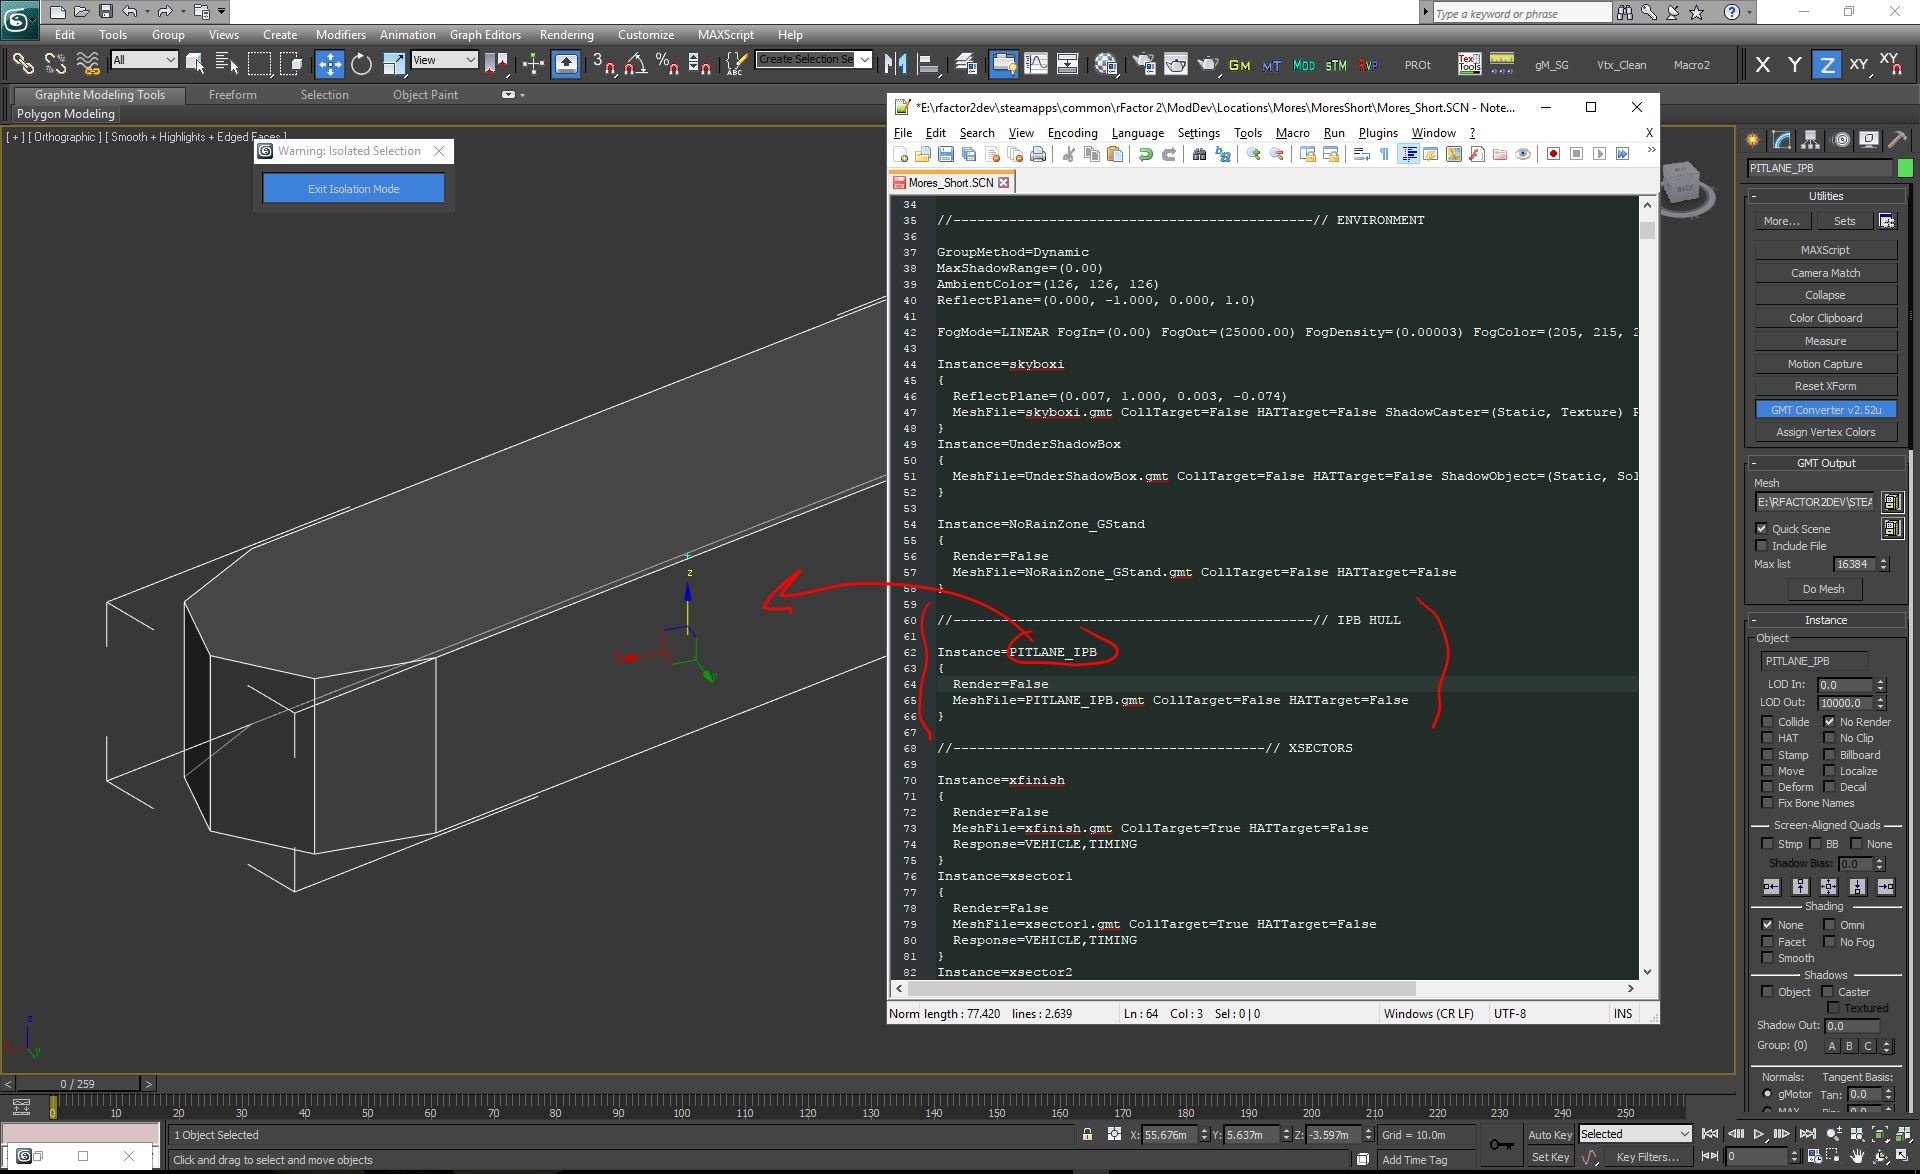
The volume needs to be properly named using the "_IPB" suffix, and flagged as NoRender, No Coll, No Hat, like here in the picture. Since you need to export this as any other .GMT, you have to give it a quick mapping and assign it a material. We do suggest to create a dummy material that you know it's being called by only this mesh.
Once it's ready and flagged properly, we can export it in our track GMTs folder;
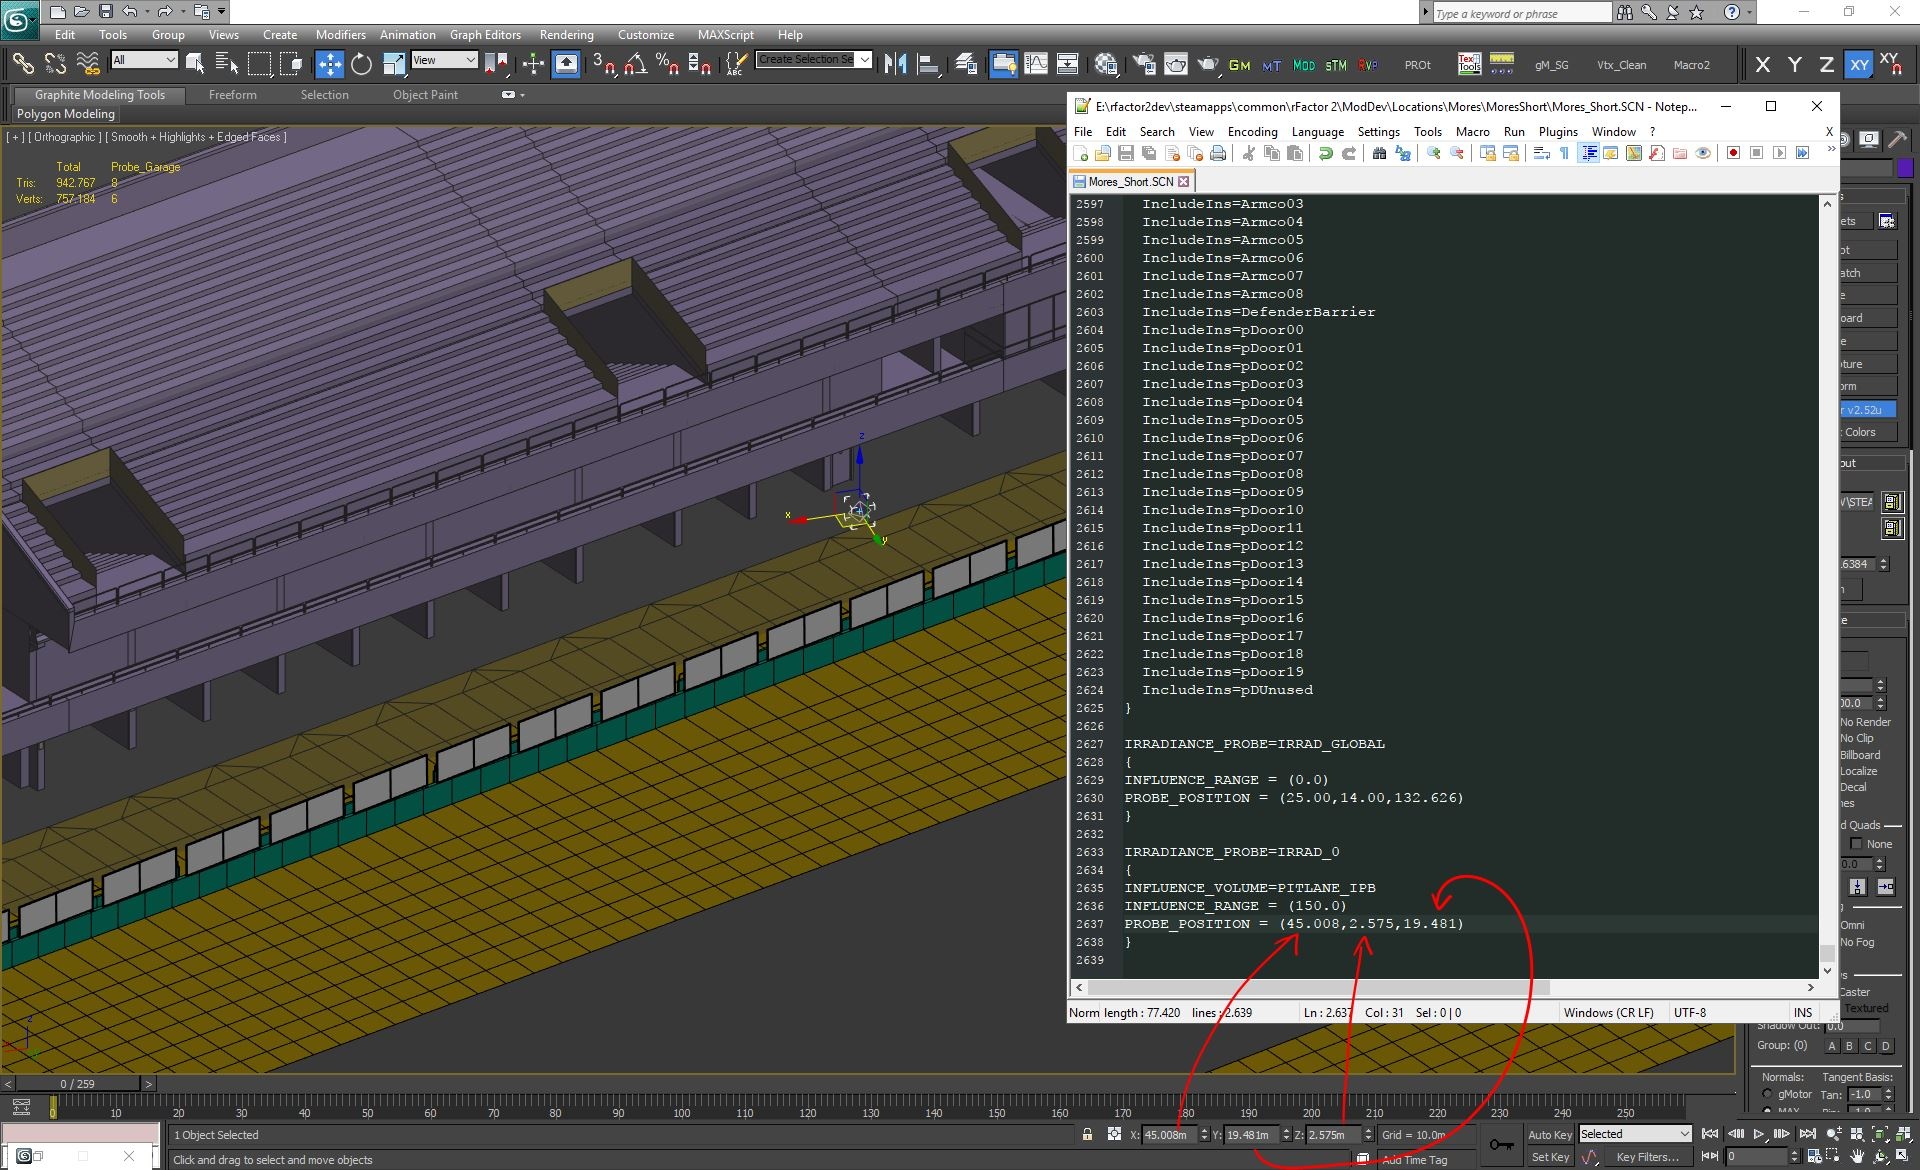
After that it's time to edit our scene (.SCN) file, as we did before, but this time we have a new and different Syntax for the Hulls;
IRRADIANCE_PROBE=IRRAD_0
{
INFLUENCE_VOLUME=PITLANE_IPB
INFLUENCE_RANGE = (25.0)
PROBE_POSITION = (45.008,2.575,19.481)
}
The first entry is the for the IRRADIANCE_PROBE name. In this case we have just one Hull, so we'll be IRRAD_0. If we need to add more Hulls, this will become IRRAD_1, IRRAD_2 etc...
The second entry is for the name of the Hull instance, that in our case is PITLANE_IPB
It is possible to have multiple influence volumes in the same probe. Just repeat the influence volume line with a different hull.
The third is for the range of the irradiance, that is the fading outside the hull faces, that the probe will effect things in the scene. In this case we want that huge pinky grandstand to affect the pitlane area with its colors, so we'll be covering all that area around the garage and pitlane pink walls, so we used 25.0 meters.
The fourth is for the probing coordinates. As before remember to swap the Z-up with the Y-up when you paste the coords from 3Ds Max to the .SCN;
Last step, we need to load our Hull mesh, in the scene file (.SCN), as we do for any other instance in the scene. Be sure the mesh is flagges as NoRender.
You can place this at the top of the scene file, just before any other instance, or where you usually keep the "feature" instanced, like the NoRainZone, Skyboxi, etc... That is not mandatory, you can place it where you want in the scene file, just try to keep it in a place where you can easily check and verify its presence;
Repeat this operation for any Hull you want in the track. For a tunnel is pretty much the same thing; create a volume that can contain the entire tunnel, and place its probe just inside the tunnel, in between the road ground and the tunnel ceiling. Give the Irradiance range a distance that does interpolate properly with the "inside" (Hull) and "outside" area (Global_Probe). If the Hull is pretty much matching the tunnel mesh, you can use a very short range, like couple of meters, so you get a cool transition between the light inside the tunnel and the light outside it.
You can also use micro Hulls to sample the ambient in a place with many trees surrounding the track, so that you want some "greenish" dominant hitting the area. To do so you can just create a very small hull (30cmx30cm box), and place it just above the centerline of the tarmac, in that area. Just use that Hull coordinates for the Probe Position, and use a range that does start from that micro Hull to to the area where you don't have these trees around, anymore. This trick will interpolate the Global_Probe to this Hull in between the high trees, giving that area a grinish and darker shader. Yes, this is more or less imitating a Global Illumination.
Typical mistakes to avoid
- Introduce an IRRAD hull in the .SCN, without exporting the mesh. This will generate an error and a crash on track loading.
- Too many hulls in the track may slow down the render time. Just do limit their usage as much as you can.
- Irradiance range for the hull is either too short or too long. This would make either the hull working not as expected or make the interpolation with the Global Irradiance, too long for the purpose.
- Probing under ground. This is the worst case, as usually ends in a total blue environemnt, since the sampling it's gonna be only from the sky dome
- Probing above grass. This will give you a too strong greenish dominant to the scene. Always probe above tarmac centerline, high enough to sample the surrounding, not too high to avoid sampling to much sky dome. Usually everything under 12/15 meters above the ground is good to go.
- Probing against walls or other vertical elements. Again, this should be avoided as it's introding strong color dominants in the ambient. Always place your Global Probe in a open area, not too close to walls, buildings etc.
How to check the IBLA in mod dev
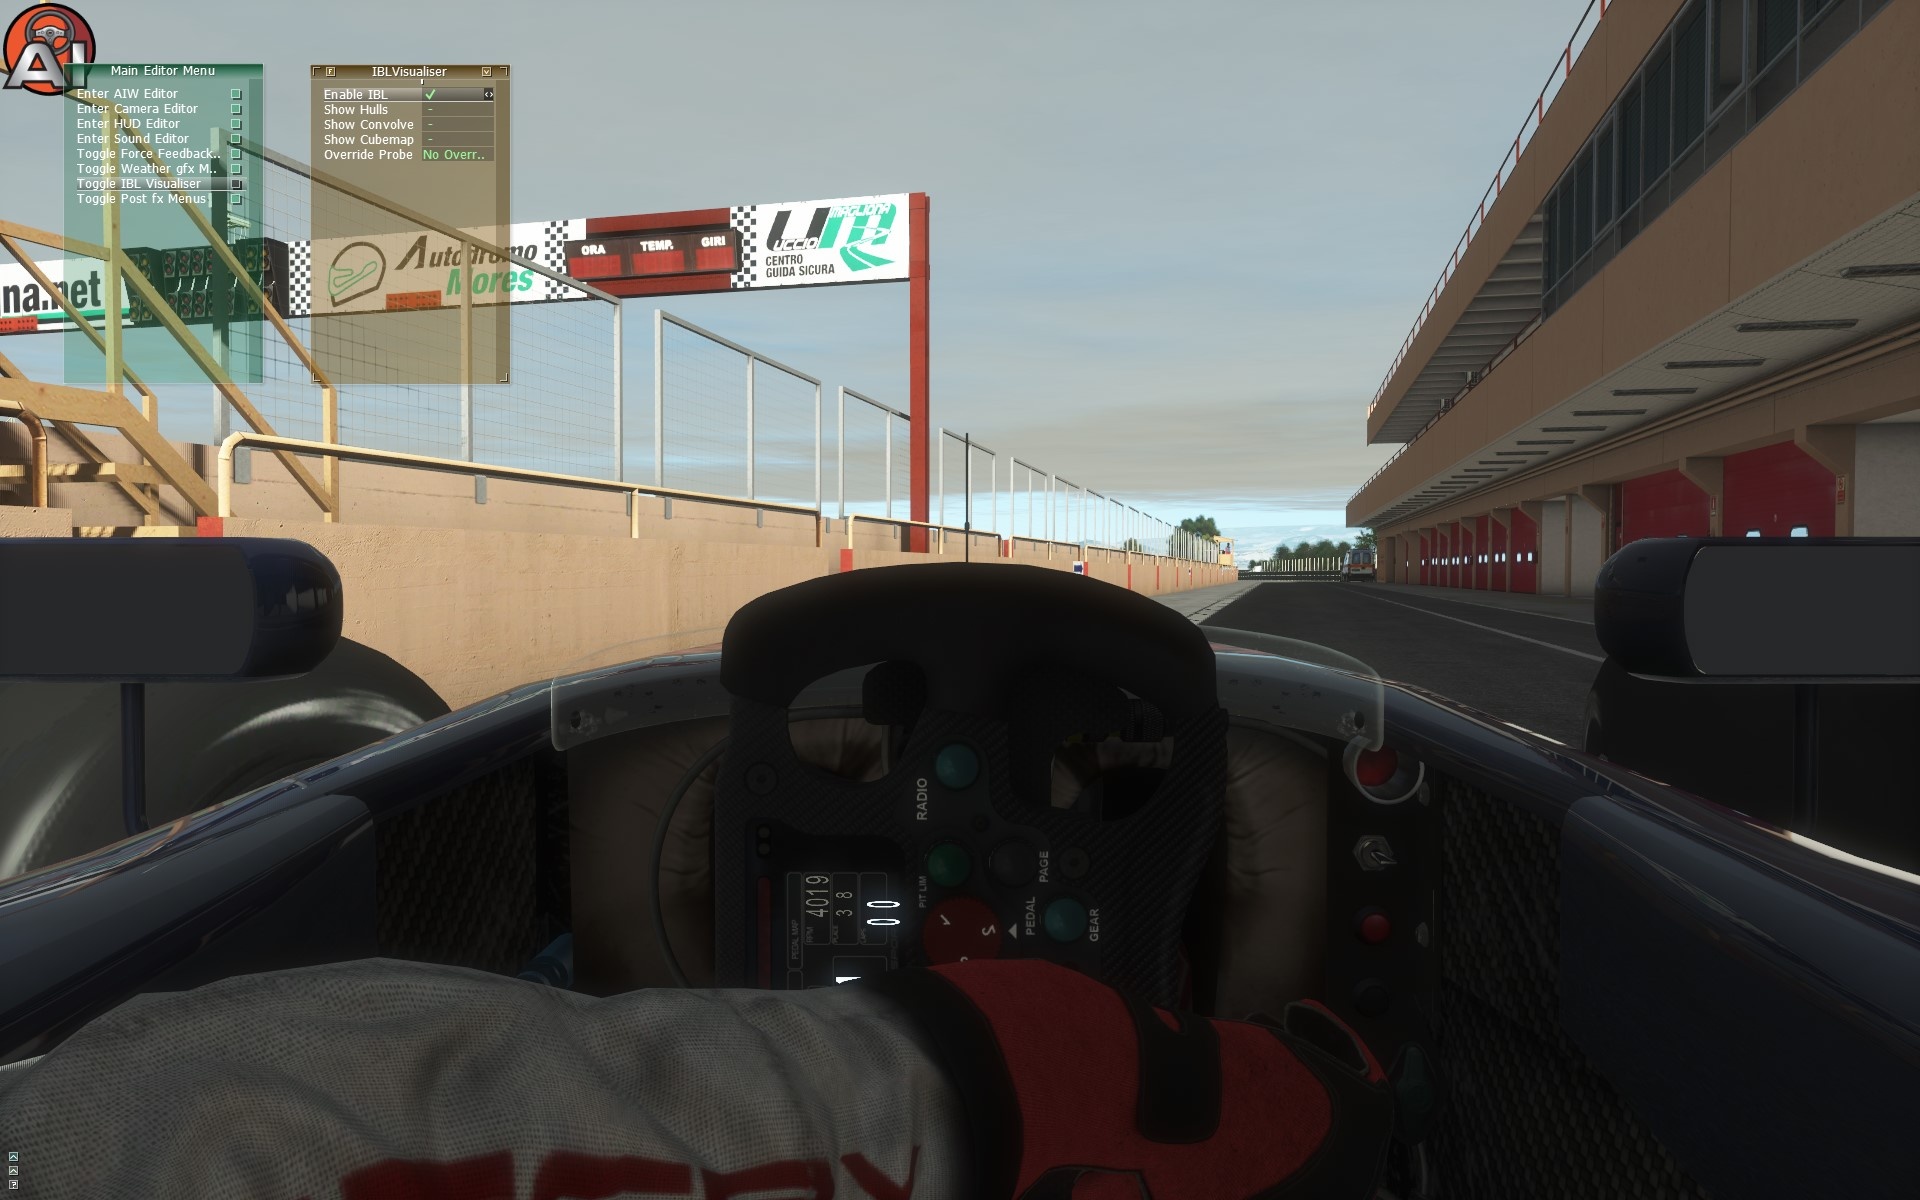
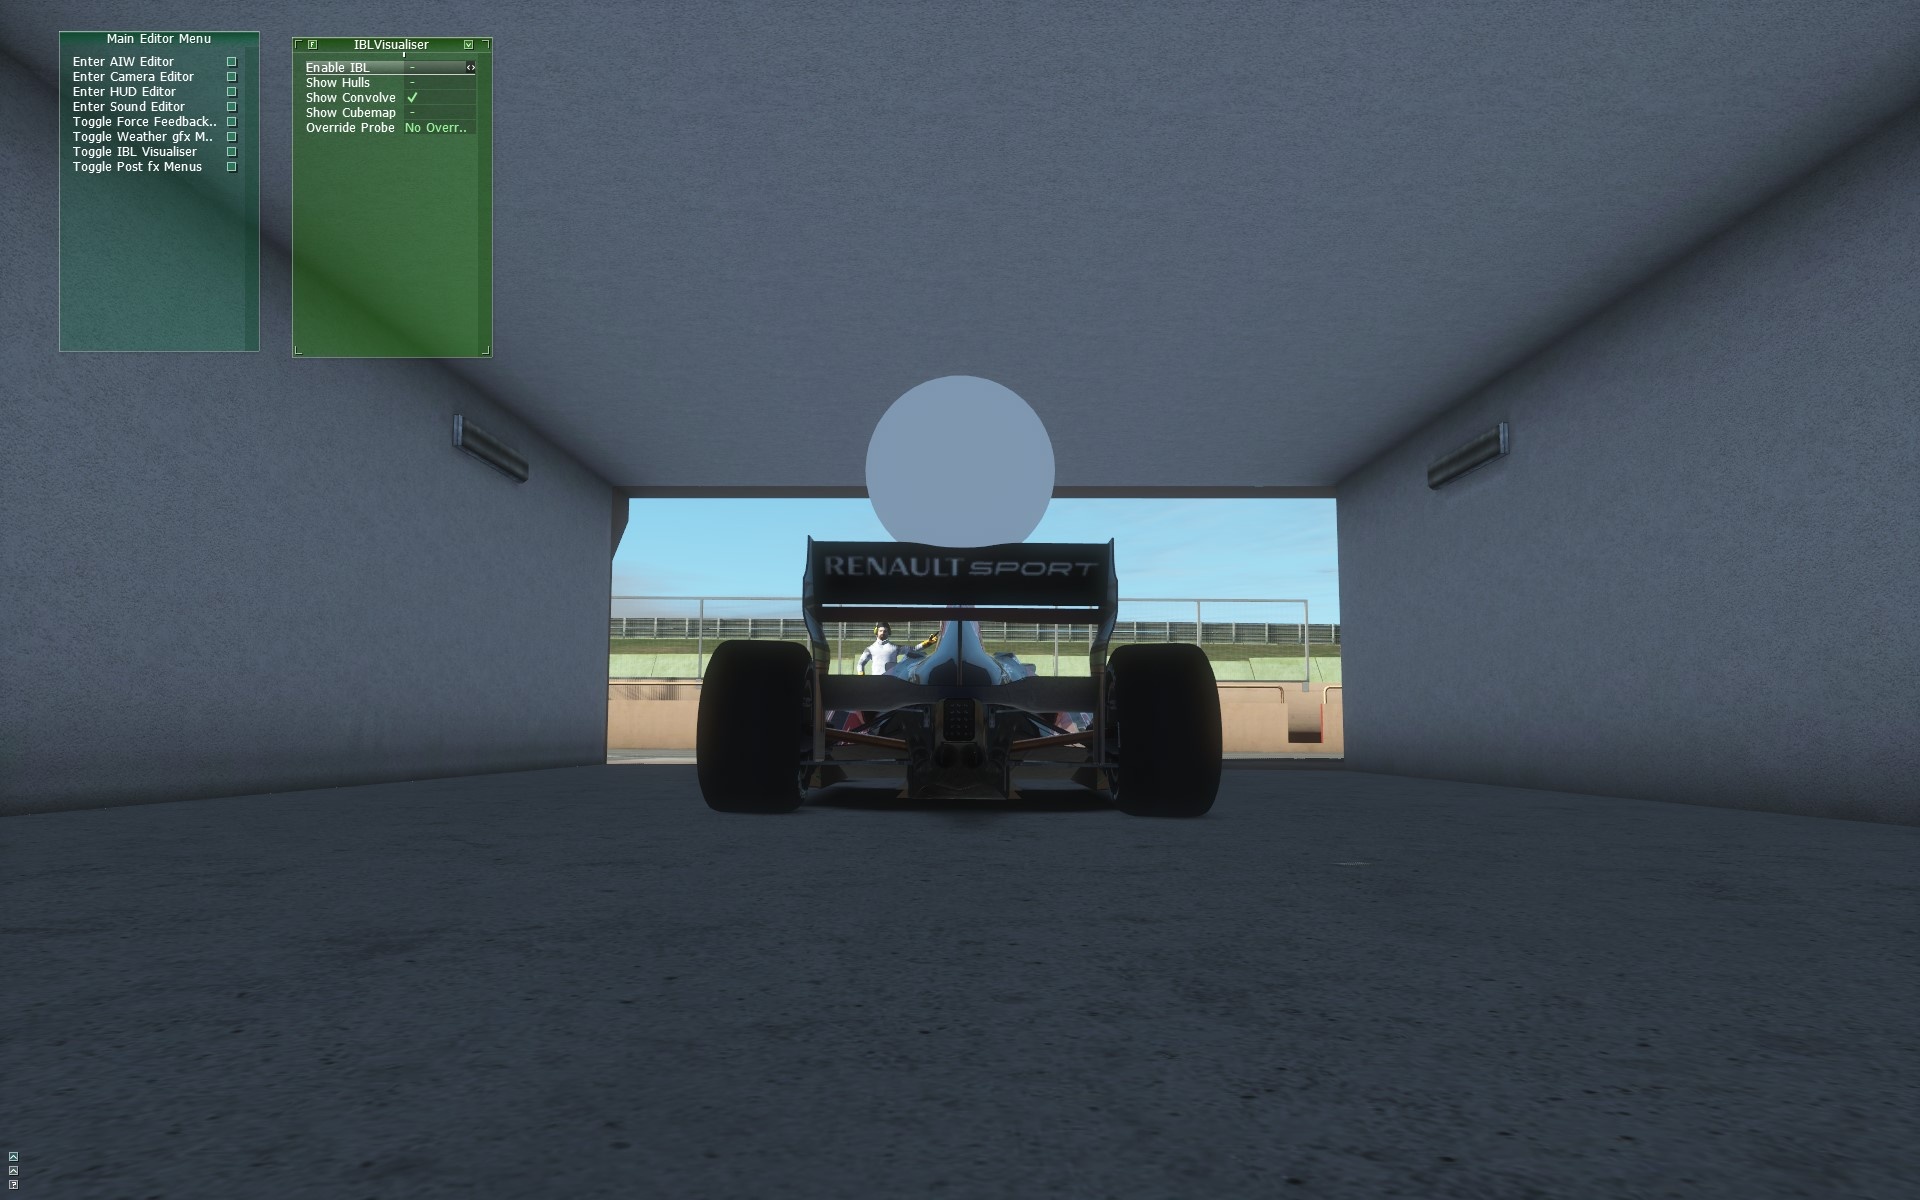
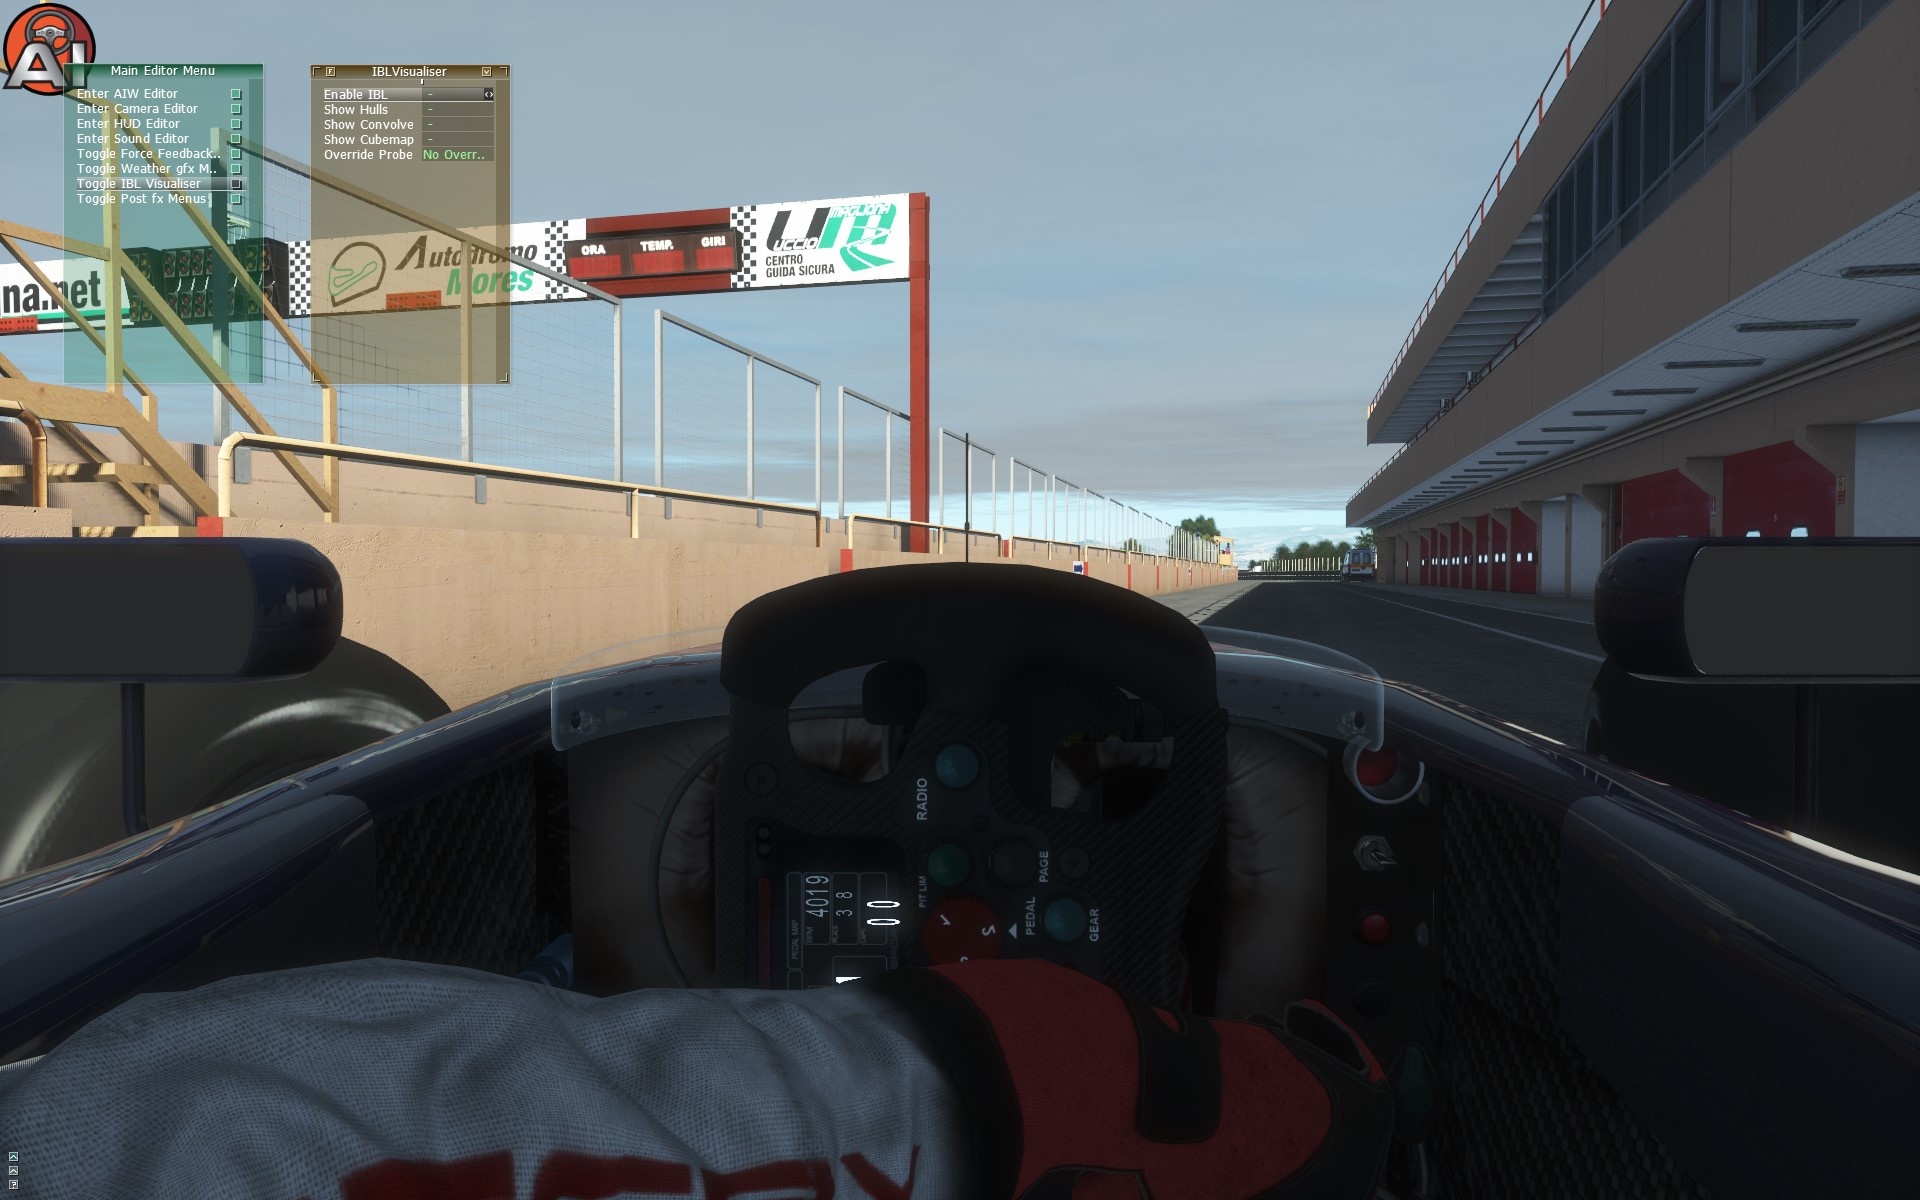
In Mod Dev we now have an extra editor, dedicated to the IBL. It is called IBL Visualizer and can be toggled on/off from the Main Editor Menu.
The IBLVisualizer has the following toggles;
- Enable IBL: this just toggle the IBL ambient On/Off. Useful to check how our setup is working, and if everything is working as expected.
- Show Hulls: this make invisible Hulls volumes, visible from the track. Since there is back culling as for any other mesh, you can see it only if your POV is outside the hull. Pretty much just a feature to quickly check if the Hull is there, where we want it.
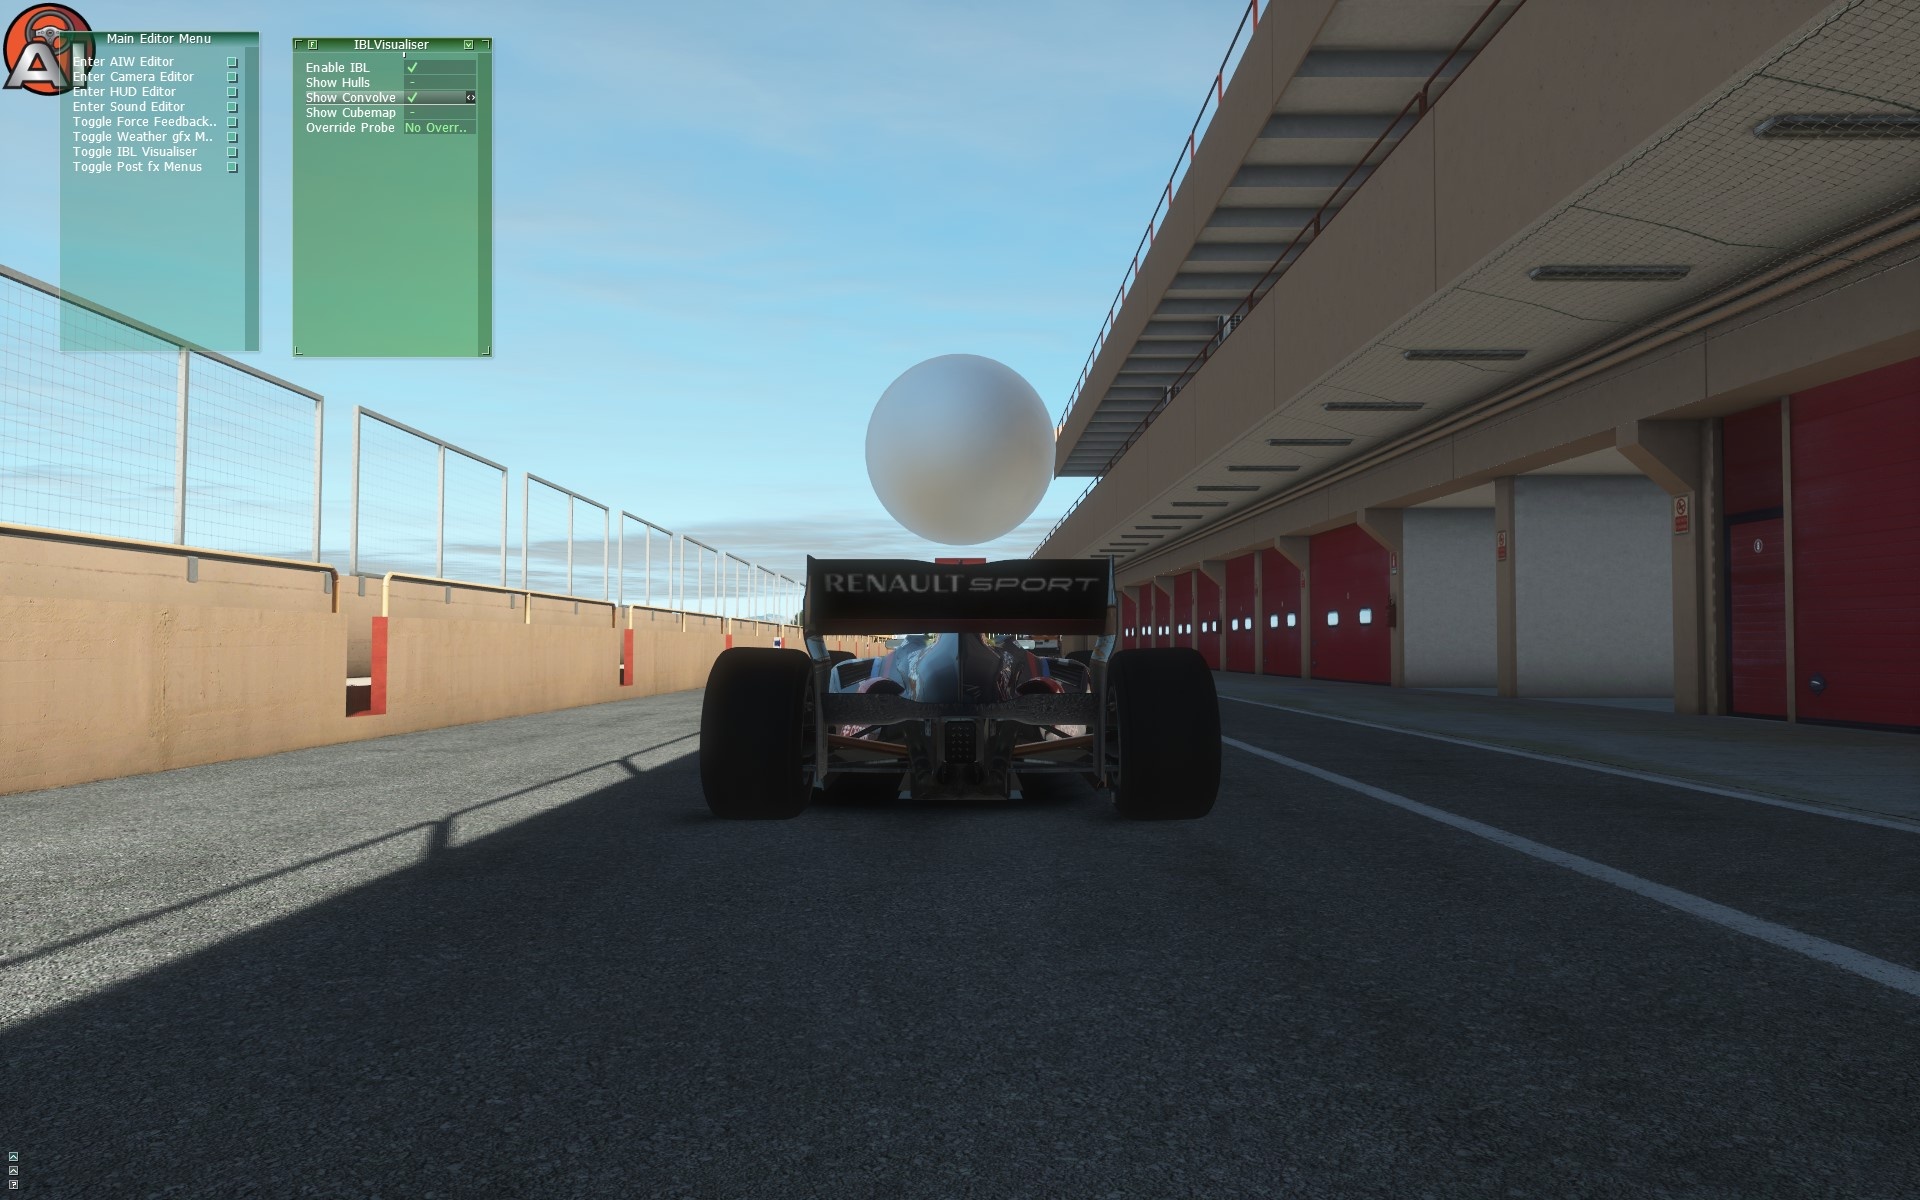
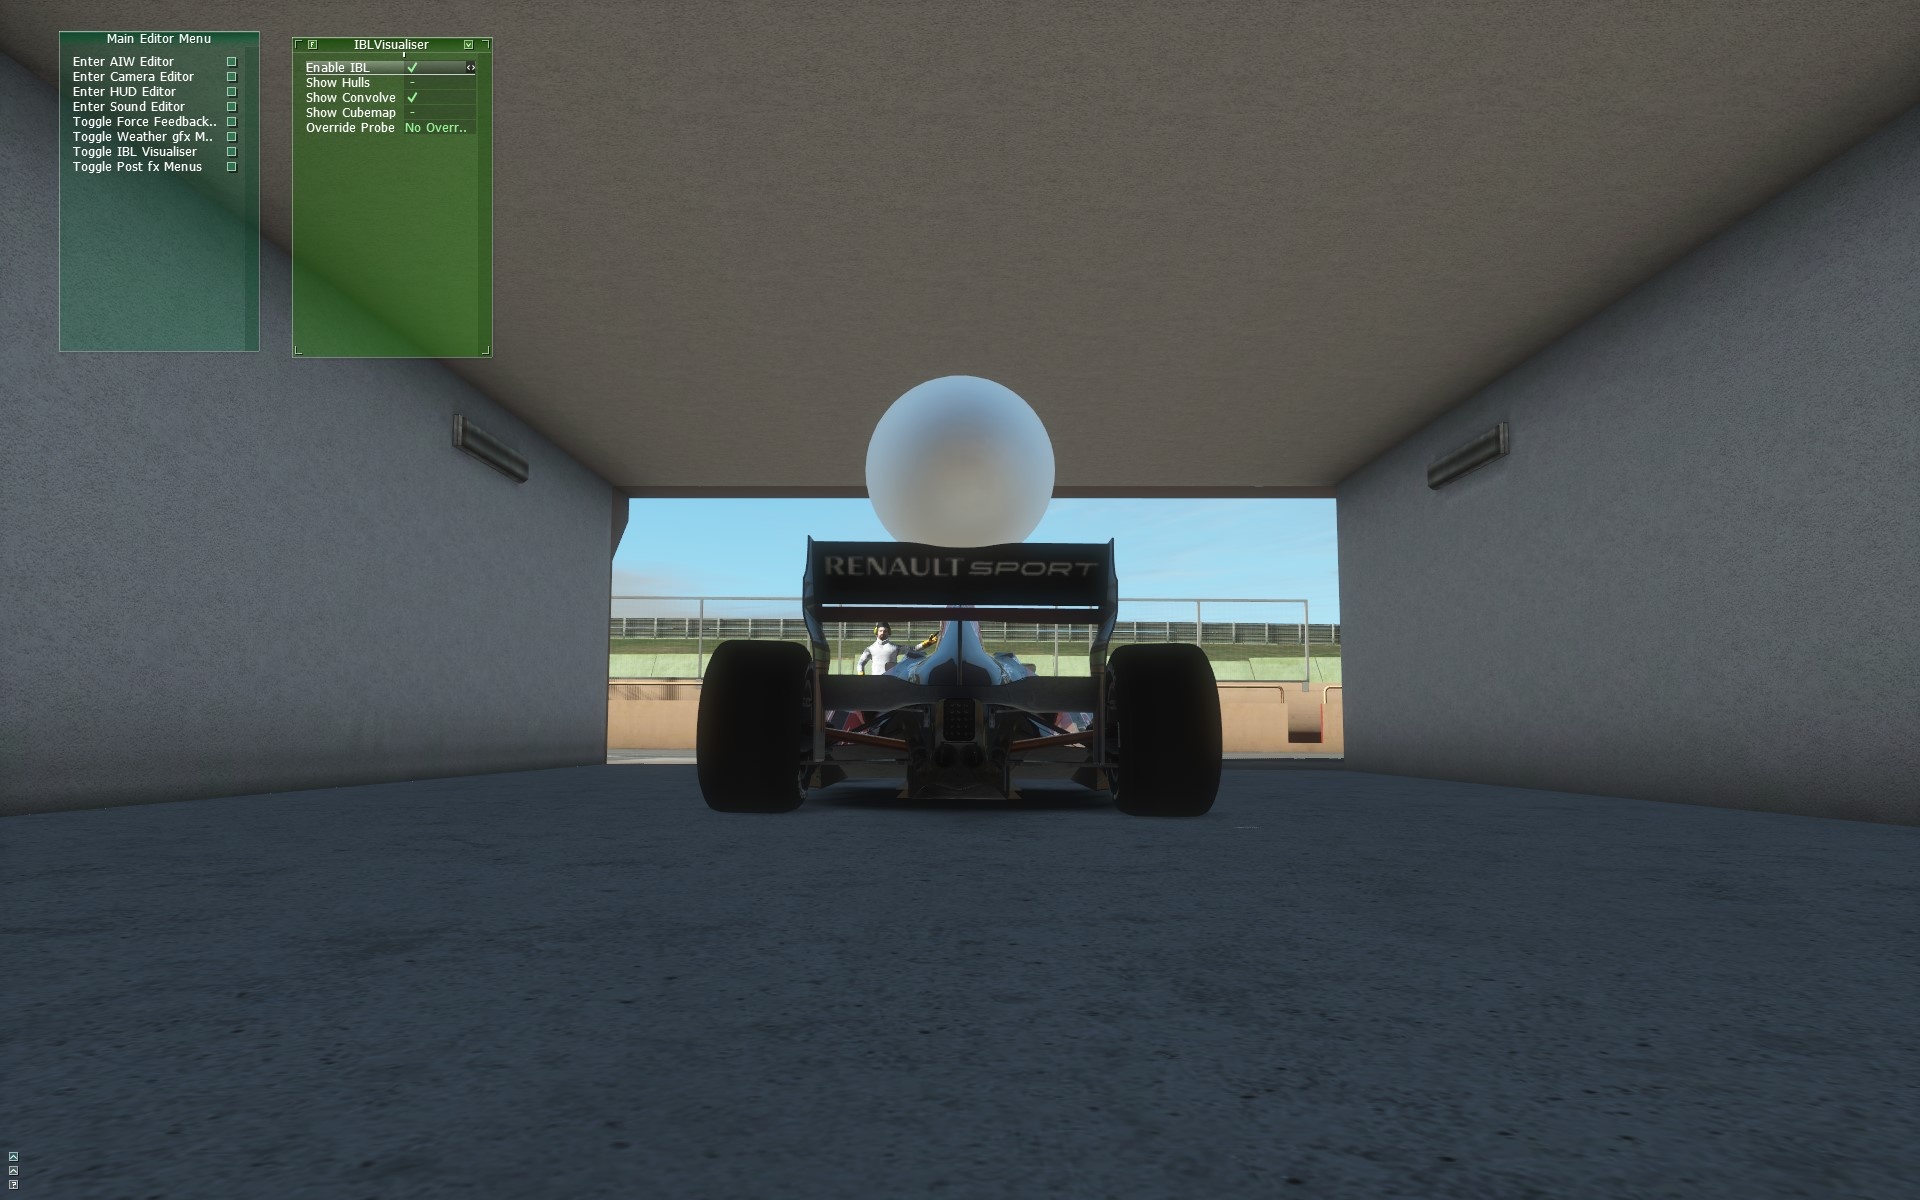
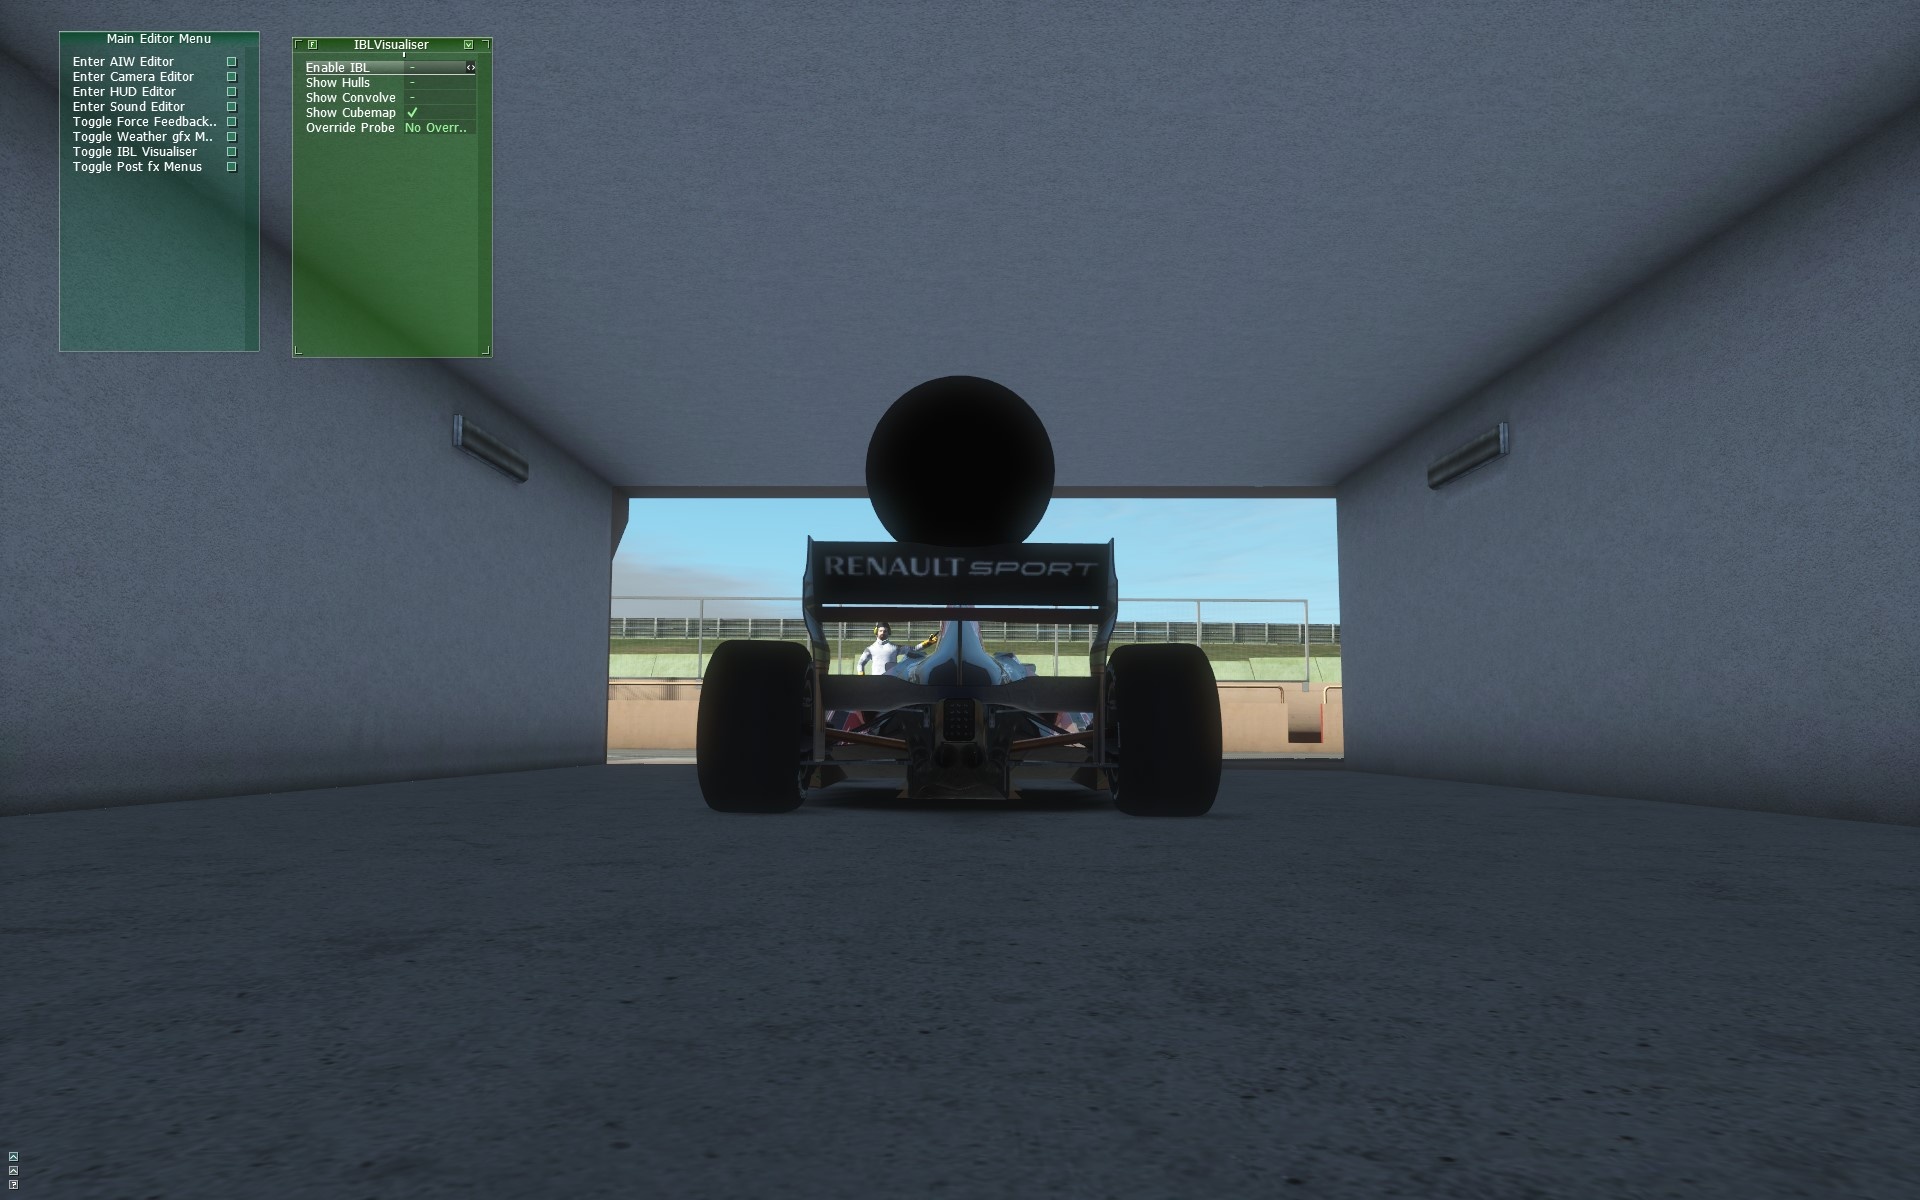
- Show Convolve: this will show a sphere on top of the car (so you need to use the swingman camera to see it), mapped with our light convolution map. Very useful to check the light map and how it does interpolate along the course, especially if Hulls are present.
- Show Cubemap: this will show the probing cubemap. Only working with IBL set to ON, since there is not probing with IBL off.
- Override Probe: this option allow the artist to isolate a specific Global Probe, or Hulls, to see its effect without interpolation between them.
IBL OFF

IBL ON

IBL OFF - CONVOLVE SHOWING FLAT AMBIENT COLOR
IBL ON - CONVOLVE SHOWING THE IBLA CONVOLUTION MAP
IBL OFF - NO PROBING
IBL ON - SHOWING CUBEMAP

IBL OFF - CONVOLVE SHOWING THE FLAT AMBIENT COLOR. Result is the shaded parts of the area are just flat bluish, without any surrounding irradiance coming from the scene
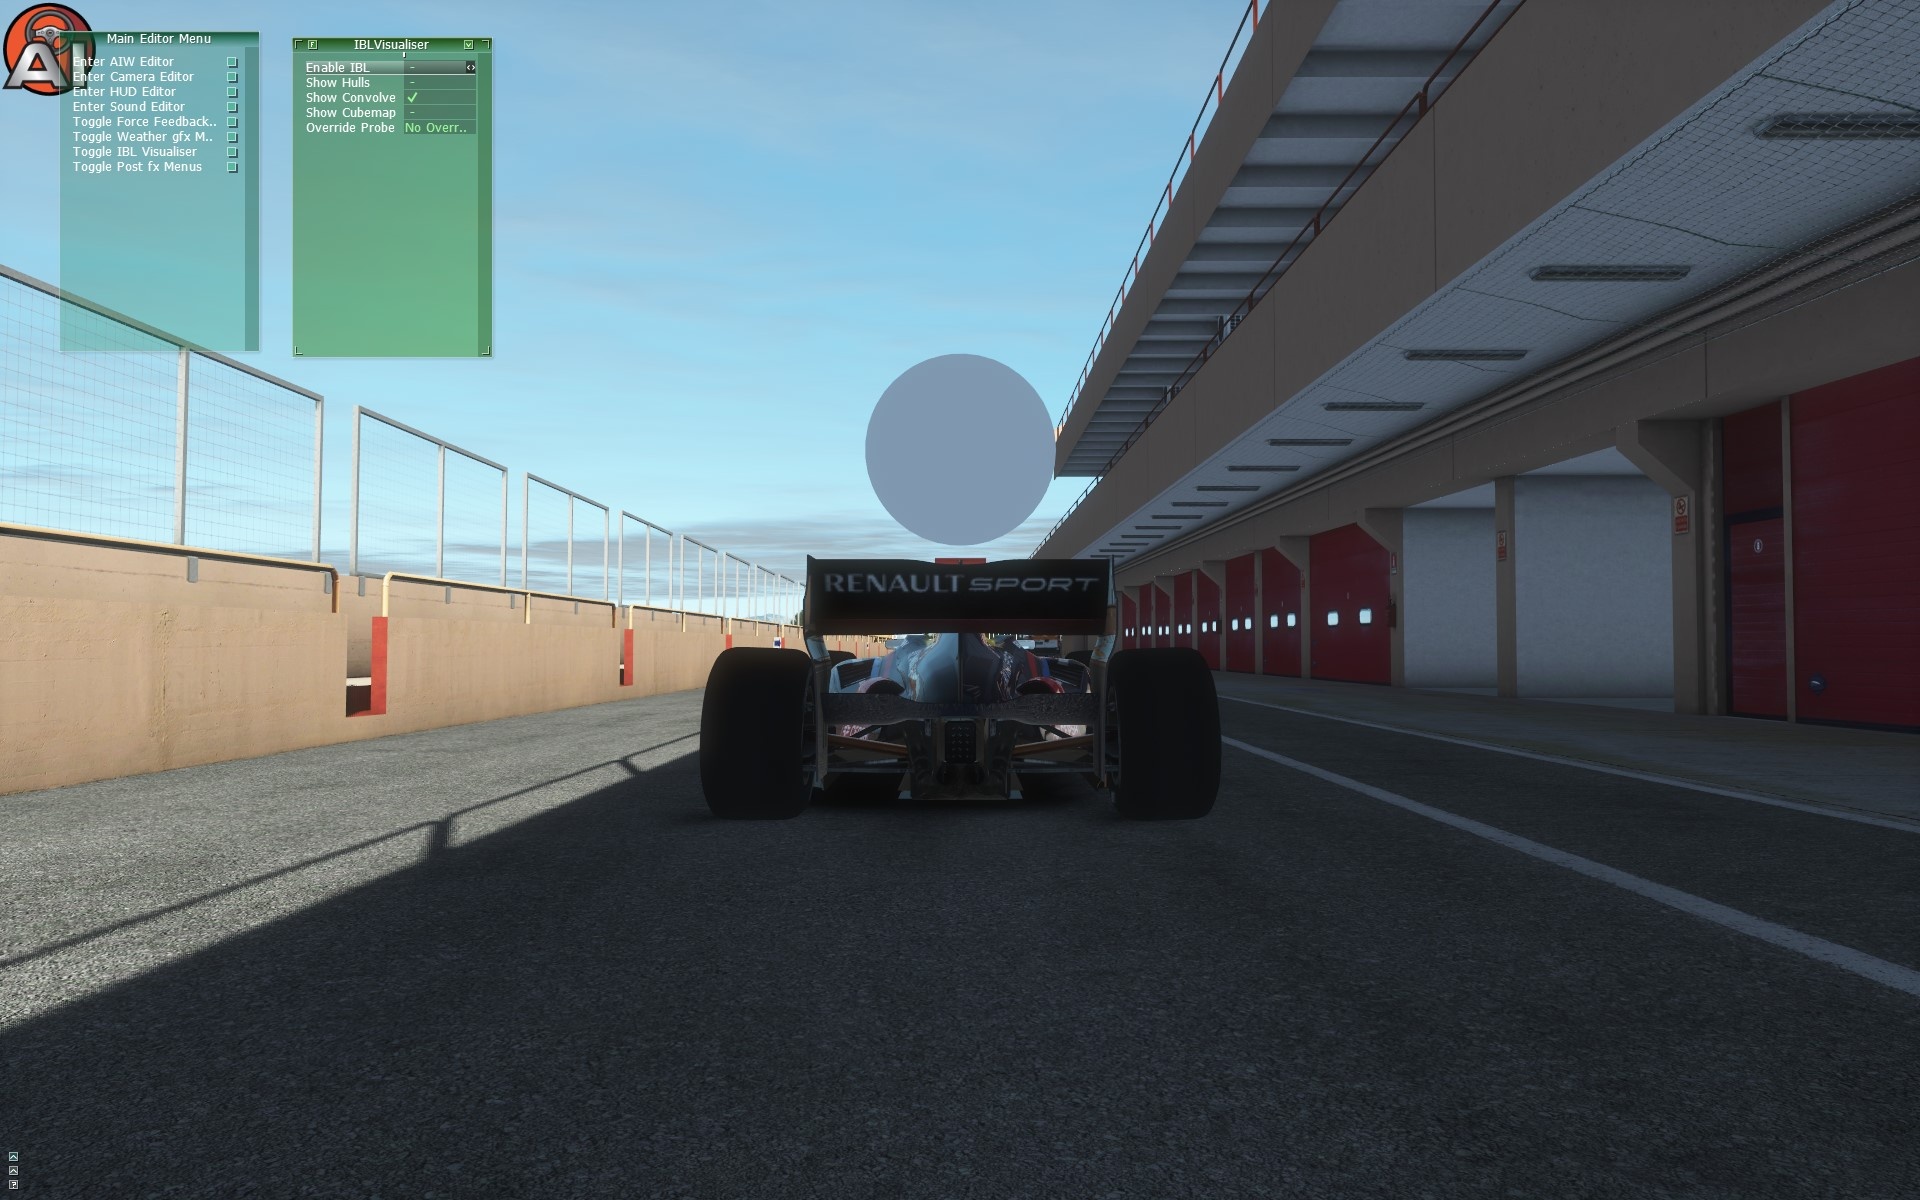
IBL ON - CONVOLVE SHOWING THE IBLA CONVOLUTION MAP. Result is the scene is receiving irradiance from the other major elements on the track, hence generating choerent and richier ambient colors.