Track Side Live TV Screens
A single track side TV screen contains two assets.
- The support for the screen which could be a scaffold, a vehicle or combination of these.
- The actual screen plane.
Asset 1
The supports for the screen should be modelled as normal TSO with LoD’s (if necessary), using a PBR shader (standard or blend as necessary) and baked AO.
The model should include the screen face surface, even though it will not be visible in game because the screen plane (asset 2) sits in front of it. This if for lighting and shading reasons.
Note that because the TSO’s screen face is not visible in game, it should just be mapped to some small part of albedo texture. Do not reserve a big area from albedo texture for this, but just give it reasonable mapping coords.
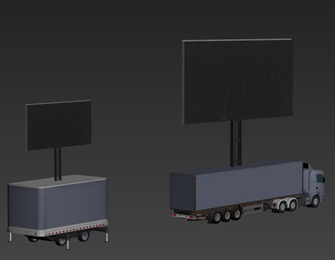
Asset 2
The second asset is the actual screen plane.
This is a flat, single polygon plane which has a "Track Side Live TV Monitor" shader is applied to it (described in the next section). The shader enables feed from the video frame buffer data which is then shown as a “live video feed” in game.
The plane should be placed 2 cm front of the TSO’s screen face to avoid z-fighting.

It is a good idea to group the screen TSO and screen face mesh together for easier distribution.
Setting up the Track Side Live TV Monitor shader in 3ds Max
Add new gMat material, give it some reasonable name and setup “Track Side Live TV Monitor” shader for it. Set emissive color to full white.
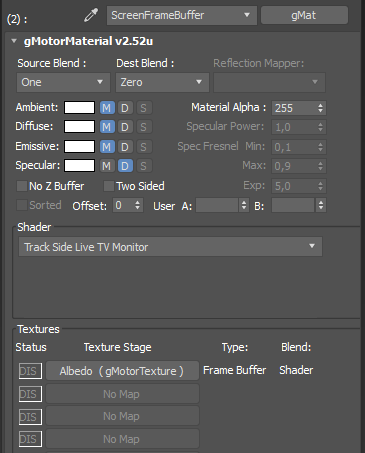
Add any existing small albedo texture (without alpha) to shader’s only texture slot. This texture won’t be rendered in game, but it is required to be there as render target.
Assign material with “Track Side Live TV Monitor” shader to the screen face mesh. We also need to give screen plane reasonable mapping coords, so we can export the plane as gmt.
Exporting
The screen TSO export settings should be setup like any other TSO. The screen face should share the same settings (like LoD in/out values and VisGroups), except shadow casting and reflections.
Shadow casting of the screen face should be turned off completely and there should be no reflection planes or other reflections settings for the screen face either.
Plant both assets somewhere on your track, export them and add scn entries for testing.
Material settings
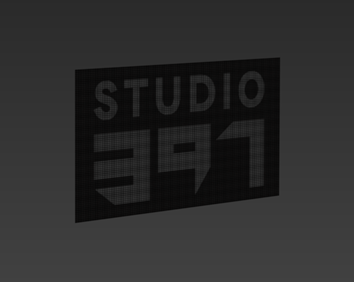
Load the track with your exported test screen in the SCN viewer and navigate to front of the screen.
You should see “live tv” feed on your screen face when moving around front of the screen.
Open material editor and find your screen face material.
Material settings are quite obvious, very similar like your own TV or monitor, with few extra adjustments. These adjustments manipulate frame buffer feed output on screen face.
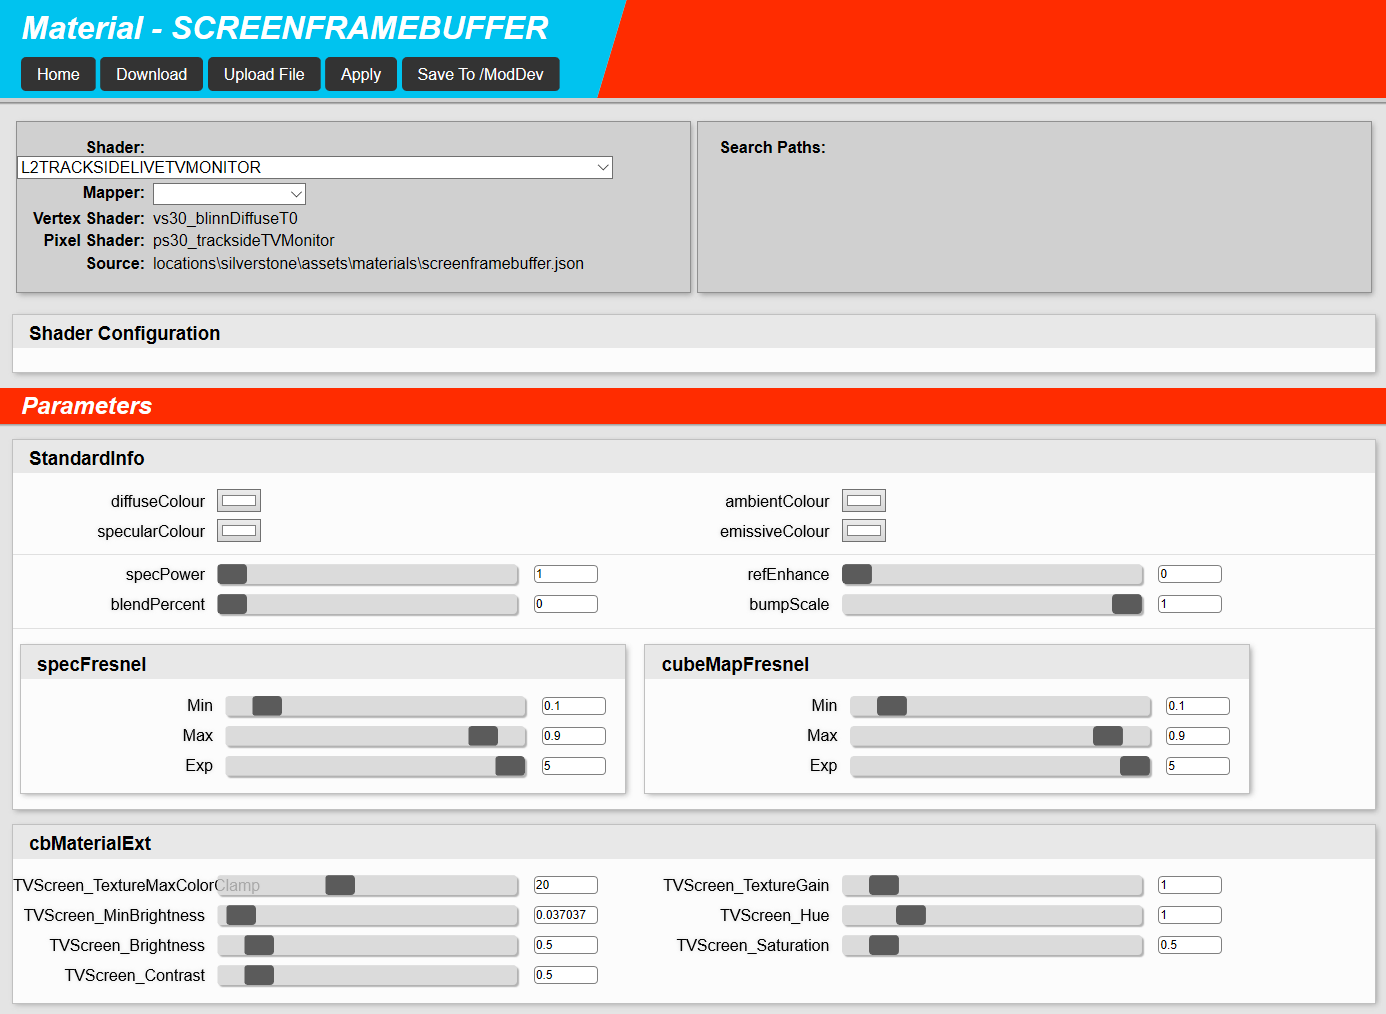
TextureMaxColorClamp - Works together with saturation adjustment, clamping the maximum saturation value. Default value 20 is good for most solutions.
MinBrightness - Works together with brightness adjustments, giving minimum level of brightness. Default value is 0.1
Brightness - Brightness adjustment. Default value is 0.5
Contrast - Contrast adjustment. Default value is 0.5
TextureGain - Simplifying explanation without complex scientific formulas, this adjustment affects to overall video signal level on the screen. Higher value gives “brighter” picture and lower value gives “darker” picture. This adjustment can be used for balancing screen output at night time, but be careful that you do not overdrive screen outlook at daytime (=washed out picture at daytime). Default value is 1.0
Hue - Adjusts base hue of the screen. With default value 1.0 frame buffer data is feed through as it is. Hue adjustment affects the hue of whole color spectrum of the screen. This is very sensitive adjustment, so adjust it carefully.
Saturation - Adjusts screen saturation, default value is 0.5
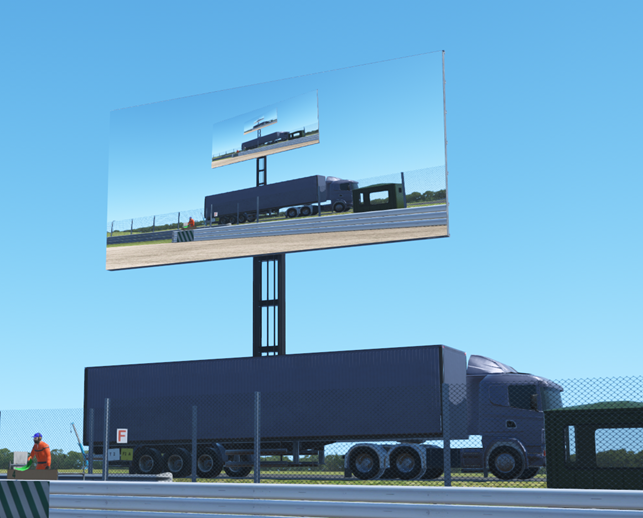
General information about jumbo tv screen panels and how they affect to our material settings
In real life these giant screens are made from standard size LED panels, which are “bolted” together for bigger screen sizes. Specific screen matrix hardware- and software solutions makes them work as a “single screen”.
Characteristic “features” of these panels are poor color gamut and color reproduction, poor contrast, brightness and saturation, compared to typical TV and monitor equipment.
Because of this we must take these LED panels “features” into account, when we fine tune our screen material settings.
Feeding frame buffer data through as it is does not give realistic output to our screens.
It is good practice to reduce saturation slightly and make the picture generally slightly darker. This should give us a more realistic look for our screens.