...
- Navigate to Installed\Vehicles\Bentley_Continental_GT3_2017:
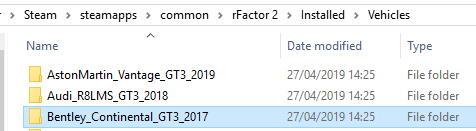
- Locate the correct subfolder for the original upgrade (the highest version of the two you will see, the other being the base) where you will find this mas file.


- Select and highlight one of the VEH files and right click:
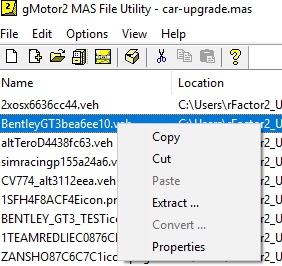
- Select 'extract' and save to 'Bentley League Updates' folder.
- Also extract the upgrade.ini, in this case for the Bentley: B_Cont-GT3_Upgrades.ini and save it in that same folder.
Step 5: Edit the extracted files, creating a template for your new ones.
...
Step 1: Populating the new MAS file.
Create a new folder inside 'Bentley League Updates' named "Bentley MAS files".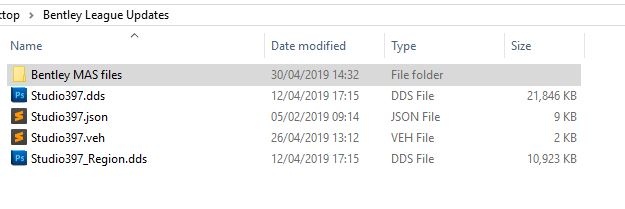
Open MAS2.exe again
...
, navigate to the folder 'Bentley League Updates'
...
, select all the contents of 'Bentley League Updates'
...
and drag the files into the main window of the MAS tool.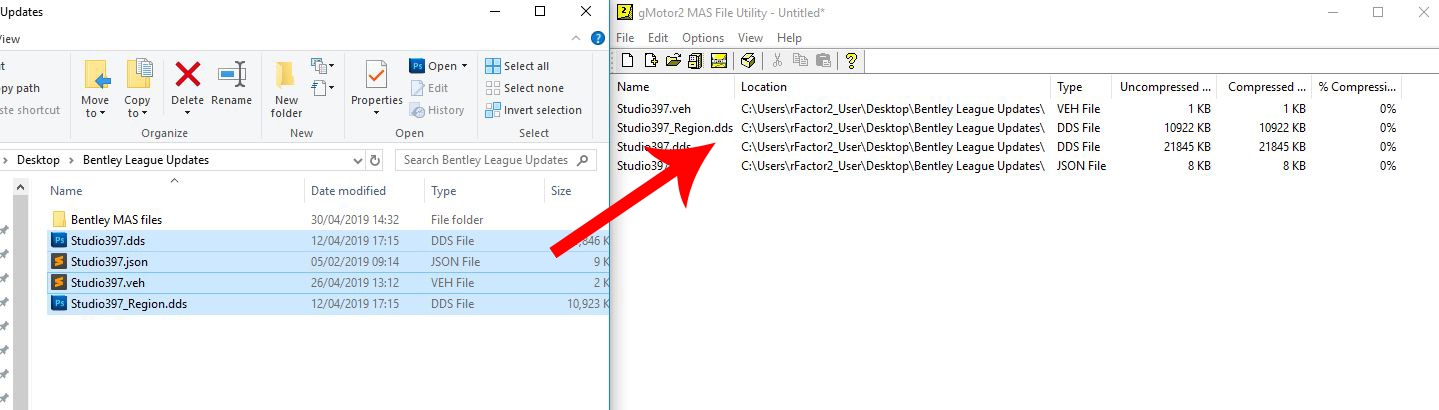
...
Step 2: Creating the new MAS file.
Select all contents in the MAS tool window and click on the 'create mas' icon in the top bar: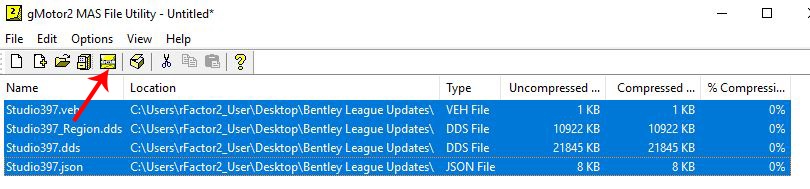
Save the MAS as Bentley_Myleague.mas in 'Bentley MAS files':
Part 3: Packing the 'update rfcmp'
Now that we've packed all our files in the mas above, it's time to create the new update component.
Step 1: Create a new update component.
Click on the filing cabinet icon and check where the working directory is set to. This will be where the rfcmp file will save to at the end of this guide.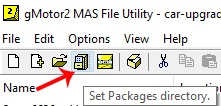
The default location
...
should be \Steam\steamapps\common\rFactor 2\Packages.
Step 2:
...
Create a new component.
Open the MAS2 tool again,
...
Step 3:
...
if it's not already open, and make sure you have an empty project selected (press the "new" icon if needed)
...
:![]()
Click on the box icon at the top 'Create the package file':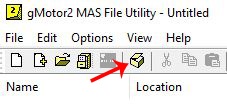
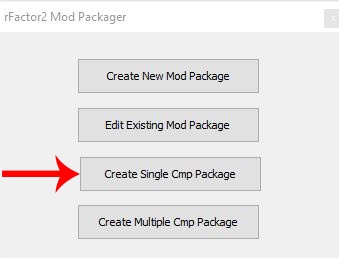
In the dialog click on 'Create Single
...
Cmp Package' button
...
:
Step
...
3: Enter the right component name.
In the first pop up window start with the top Selection 'Add New Component' by clicking on the paper icon: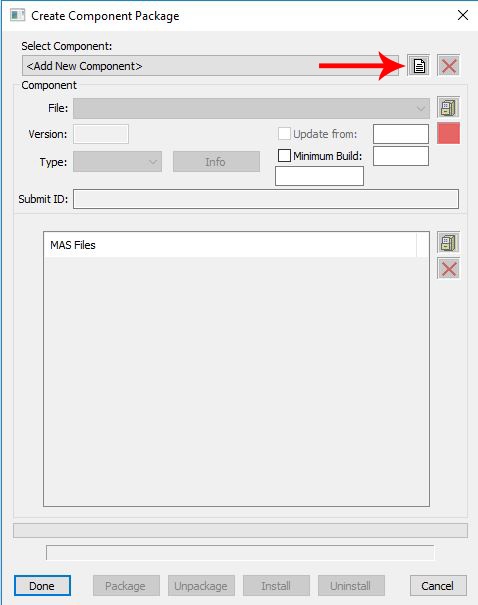
This next step is very important
...
, because you need to make sure that the component name that you use is identical to the base component that you are making an update for. These component names end up as folder names in the Installed\Vehicles folder, so you can copy the exact name from there: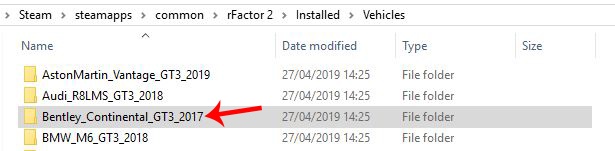
In this case 'Bentley_Continental_GT3_2017
...
'. Select and copy the folder name
...
, and paste 'Bentley_Continental_GT3_2017' into 'Edit New Component Name' and click
...
OK.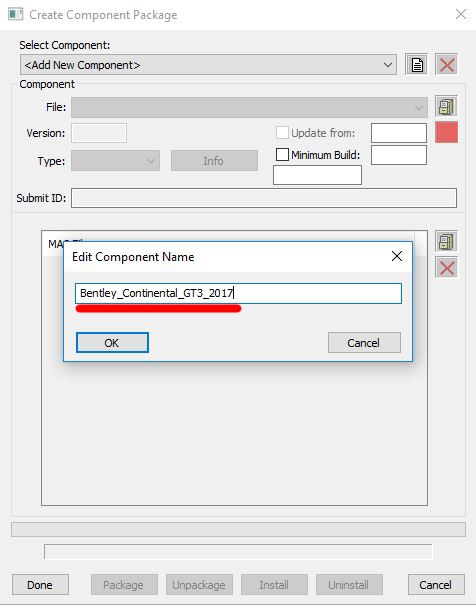
Step
...
4: Fill out the other information and generate the component.
Next to the File drop down click on the file cabinet icon: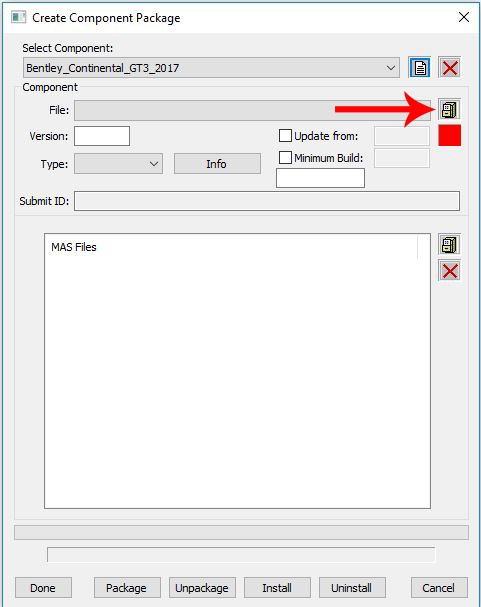
In the browse pop up navigate to
...
'Bentley MAS files' folder you created before and enter a new filename, for example: 'Bentley_Myleague_v2.47MLA.rfcmp' and click
...
Open.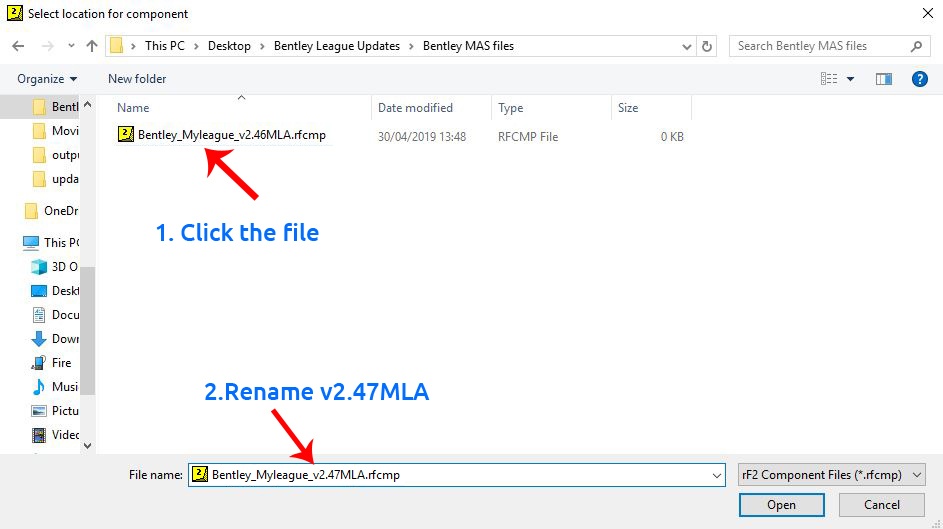
...
In the left field 'Version' put in
...
2.
...
47MLA and check the box 'Update
...
from' and enter 2.46 or whatever version number the base has that you're providing an update for: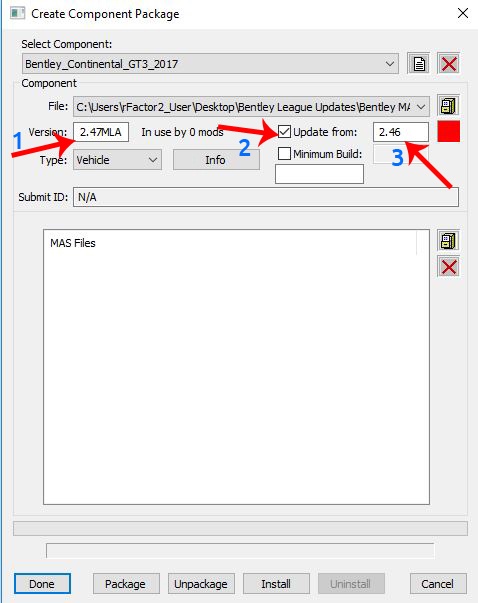
In the '
...
Type' dropdown select Vehicle: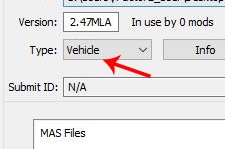
In the bottom window click on the box icon: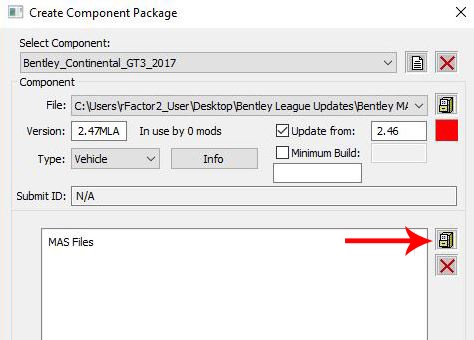
...
Browse to the 'Bentley MAS files
...
' folder and select Bentley_Myleague.mas: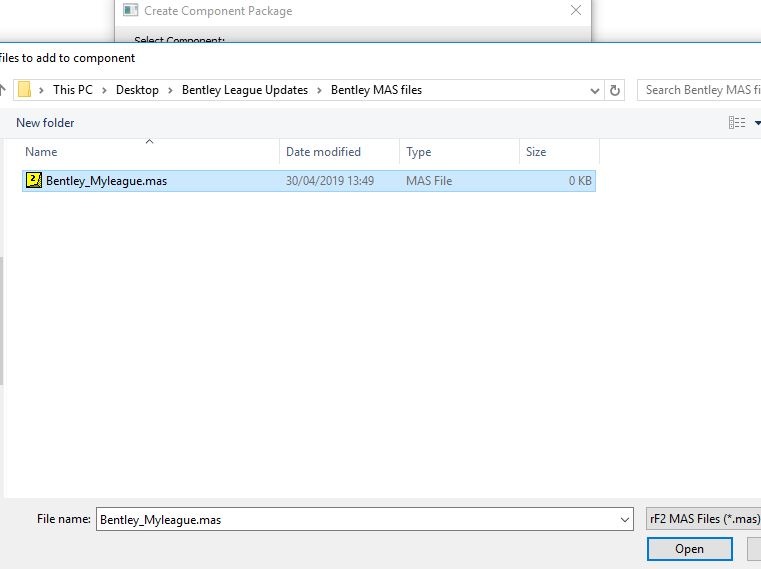
...
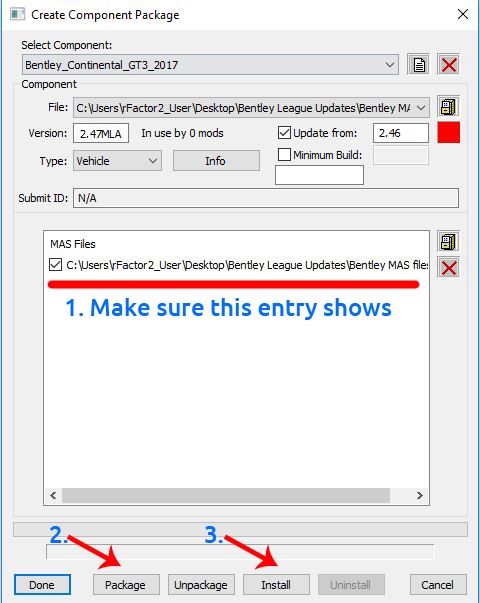
Make sure your mas file shows in the window
...
! As a last step click the 'Package' button at the bottom and then 'Install
...
'. Note you do not have to click 'Install', but we highly recommend you install the rfcmp to check it works in
...
single player before distributing to your league
...
:
The rfcmp
...
file 'Bentley_Myleague_v2.47MLA.rfcmp' will be saved
...
the Packages folder of your rFactor 2 install, from which you can distribute it. That's all!