...
- Ensure that you name textures appropriately, as the tool conforms to the Naming Conventions
- In the assets folder you can find the MapsConverter application: Maps Converter. Just run this to update any textures that need updating.
- In order to preview converted textures in Photoshop you might need updated plugins, see DDS Export File Formats. In other software you need to look for BC5 and BC7 format support.
Previously the workflow was to setup materials in 3ds Max and forget about them after export. That has now changed.
- For basic information on how to use the 3ds Max plugins see: gMotor 3ds Max Plugins
- We have provided a 3ds Max Material Library 3ds Max Material Library so you can copy in template materials.
- You can usually just edit in the albedo texture for your in map authoring. You can setup the rest in the Material Editor. Although any texture animation settings do need setting up in Max.
- By default the material library materials have UV1, 2, 3 and 4 configured to export. You do not need to modify this, you can choose any combination of the 4 in the Material Editor. However see 3ds Max GMT file UVW Export for a more in-depth look at how these get exported.
- Export your mesh into the GMT folder for the scene, and edit in the SCN entry for the file into the master file.
...
Further explanation reference:
Using Shaders
Introduction
...
When you change settings in this area, you must hit apply before you can edit the sections before.

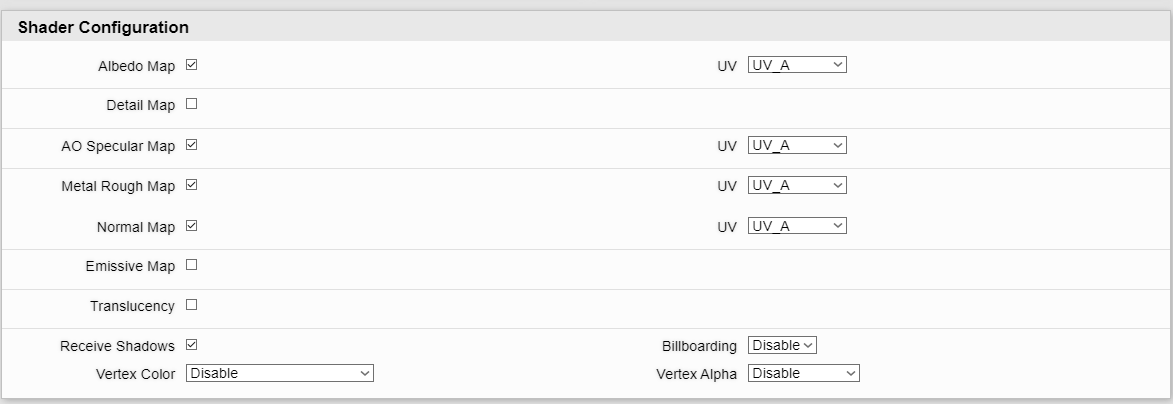
Parameter Configuration
...
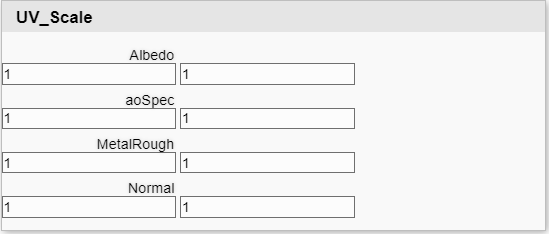
In addition to being able to select the actual UV data in the Shader Configuration, we can also scale that chosen UV data as we please. This effectively means even with the most complex of shader we should be able to give unique mapping to all maps if required. This can help greatly with the advanced blending options of the terrain shader to reduce noticeable tiling patterns.

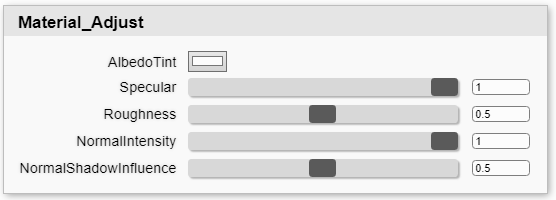
Material Adjust
...
- Albedo Tint: Adjusts the albedo with a multiply of this colour after all blending and before final lighting.
- Specular: This is an overall scalar on the specular output. This only effects the dielectric (non metallic) pipeline. This is set to 0.7 by default. For some natural materials such as grass you will need to reduce it to around 0.25.
- Metallic: This is an adjuster where 0.5 makes no change to the previous inputs. At 0, it forces to 0 and at 1, it forces to 1, with inbetween increasing or decreasing the value accordingly.
- Roughnness: This is an adjuster where 0.5 makes no change to the previous inputs. At 0, it forces to 0 and at 1, it forces to 1, with inbetween increasing or decreasing the value accordingly.
- NormalIntensity: This is an overall scalar for the strength of the normal maps in this material. This can be used to allow a subtler normal map with out banding caused by the low resolution of the texture.
- NormalShadowInfluence: This is how much the normal map perturbs the cast shadow. By default this is set at 0.5 to reduce the amount, but on something like an armco barrier that is abstracted to a plane and is faked by a strong normal map, you may wish to increase it.

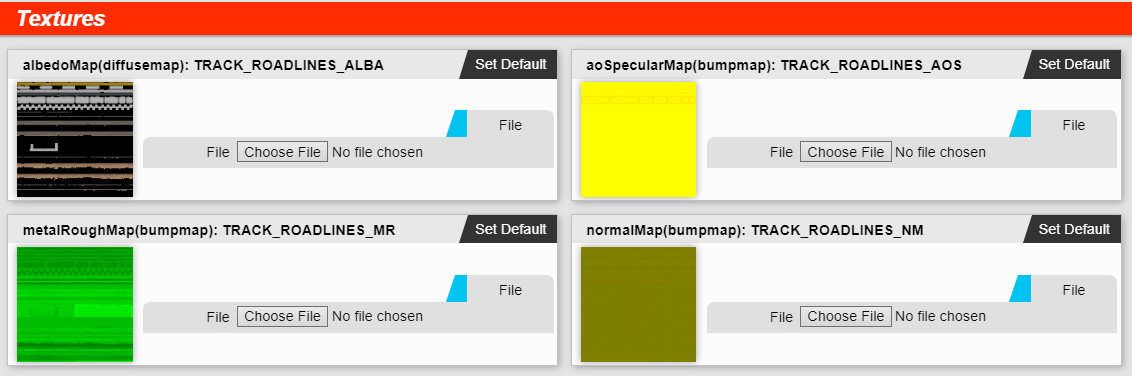
Textures
In the textures section, we :
- We can assign maps only at present.
...
- The Material Editor may show more maps than you can assign in 3ds Max, and it is required to assign them here in order for the shader to work correctly.
...
- Only maps enabled in the Shader Configuration are shown.

Shaders In Depth
...